Installation
Installation of the GSW Rocket Terminal Engine software is simple and quick. From Windows NT/XP/VISTA/2000/2003 perform the following:
1. Run the setup.exe program.
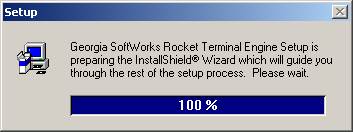
Figure 1: Initial Setup Screen
2. The Welcome screen of the setup program is displayed and you are reminded and urged to exit all windows programs before continuing. You are also reminded that you must have administrative privileges to install this program. Click Next.
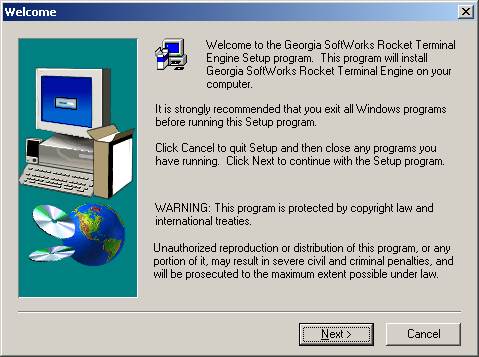
Figure 2: Installation Welcome Screen
3. A screen is displayed indicating the folder that the GSW Rocket Terminal Engine will be installed. The default is:
C:\Program Files\Georgia SoftWorks\Georgia SoftWorks Rocket Terminal Engine.
You may change the installation directory at this time. Note: Make sure that the users of the Rocket Terminal Engine have full access to the installation directory. Click Next.
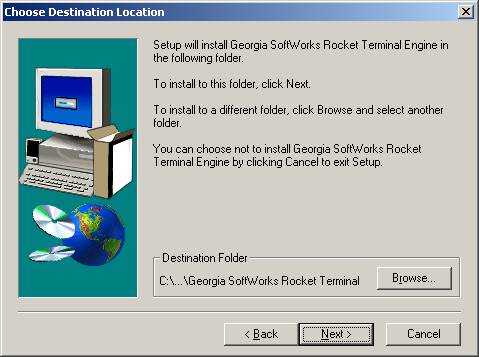
Figure 3: Installation - Choose Destination Folder
4. Select the Program Folder for the Rocket Terminal Engine. Click Next.
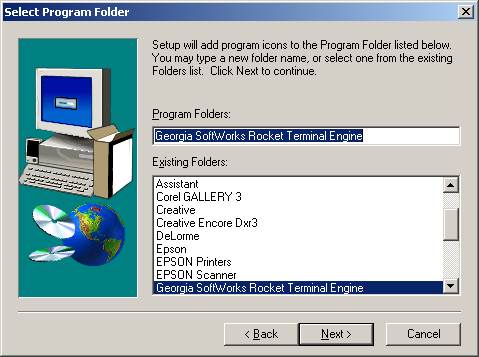
Figure 4: Installation - Select Program Folder
5. Now the Setup is complete! Now its time to register the Rocket Terminal Engine!
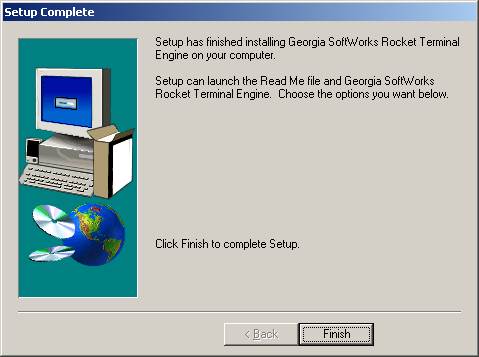
Figure 5: Installation - Setup Complete
Please view the readme.txt file as it may contain late breaking information about the Rocket Terminal Engine that has not yet made it into the user guide. Release notes are also contained in the readme.txt file.
NOTE: The Georgia SoftWorks Rocket Terminal Engine is an Add-On Component to SAPConsole. Successful installation will result in the Registration Program Item showing up under Georgia SoftWorks Rocket Terminal Engine and the GSWVTIO item in the SAP Administration Terminal Engine drop-down menu.
Registration
Two methods exist to obtain a valid Serial Number.
- Registration via Floating License (default method)
The Serial Number is pre-programmed into a specific hardware key that came with your purchase. The hardware key connects to a parallel port on the server. See page 8 for details on registration via the Floating License.
- Registration via Software Serial Number.
This method exists for environments that do not support Parallel ports. In brief this entails providing GSW with a machine specific Product ID. A Serial Number is generated based on the Product ID. This is usually performed via email, fax or telephone.
Floating License – Overview
The Georgia SoftWorks Floating License provides the flexibility to rapidly move the GSW Rocket Terminal Engine from one machine to another. If you are unable to use the Floating License - skip this section and go to the section on Registration via Software Serial Number on page 15.
NOTE: When a Rocket Terminal Pack is purchased (Rocket Terminal Engine and GSW Telnet Server), the same physical Floating License will contain a valid Serial Numbers for both products.
With the Floating License NO software registration is required for the Rocket Terminal Engine to operate.
Common scenarios where the Floating License is useful include:
· Laboratory usage in a development or test environment where the Rocket Terminal Engine is required for short periods of time on any particular machine and then moved to a new machine.
· Backup Servers in a production environment. Typically multiple Rocket Terminal Engines are purchased for backup systems, however with a Floating License the Hardware Key can be quickly moved from the primary machine to the backup without any other registration requirements.
· Environments where a failed server must be replaced or rebuilt and immediately restored to operation with full Rocket Terminal Engine capability.
The Georgia SoftWorks floating license is a hardware key that connects to a female parallel port connector or USB Port on the server. The parallel port floating license does not impact functionality of the port for other uses. The parallel hardware key acts as a pass though allowing normal connections to the other side of the key.
The Georgia SoftWorks floating license is a hardware key that can be ordered for a Parallel or USB Port.
|
Parallel Port Floating License |
USB Floating License |
|
Figure 6: Floating License – Parallel Port The Parallel Port Floating License is a Pass Through allowing normal function of the port. |
Figure 7: Floating License - USB Port Not attached to a Server |
|
The Parallel Port Floating License connects to a female parallel port on the server and does not impact functionality of the port for other uses. It acts as a pass though allowing normal connections to the other side of the key. |
USB LED Lights when Installed |
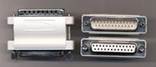
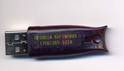

Figure 8: Floating License - Hardware Key
The Rocket Terminal Engine will recognize the presence of the key and activate the software with the proper date for which free version upgrades can be obtained. It does not matter which parallel or USB port on the server the Hardware Key is installed, as all ports will be scanned for the installation of the key.
The Floating License currently is installed using the manufacturer (Aladdin) of the hardware key’s setup program. It is described below. The name of the hardware key is HASPHL and you will see it displayed in the setup screens
Floating License – Hardware Key Installation Instructions
Note: If you are using a USB Floating License on a Windows NT system run the file aksnt4usb.exe prior to the following steps.
1. Copy the files from the Floating License folder (hardkey) on the provided CD to the hard drive on your sever.
2. Run the HASPUserSetup.exe program and follow the installation instructions. After installation of the hardware key install the GSW Rocket Terminal Engine as described on page 4 (if it is not already installed). You will first see the Aladdin Splash Screen. The Aladdin Splash Screen will display for about 5 seconds.

Figure 9: Floating License – HW Key Initial Splash Screen
3. The next screen displayed is the Aladdin Welcome Screen.
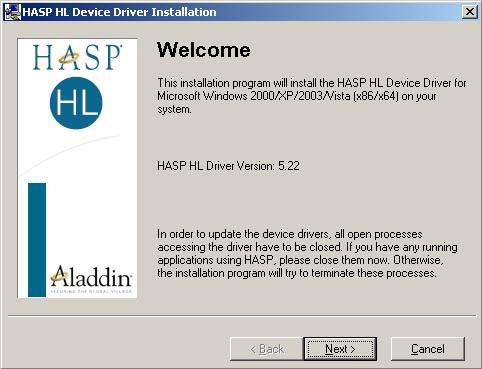
Figure 10: Floating License – Welcome Screen
As the dialog indicates, if you have any running application please close them now. Click Next.
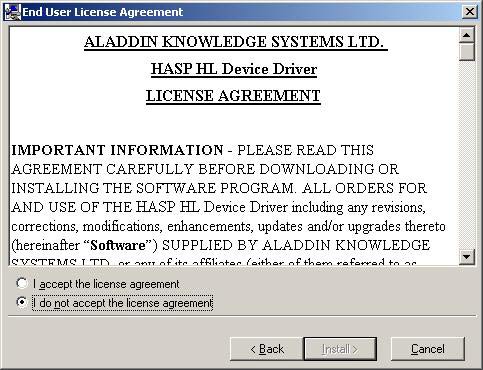
Figure 11: Floating License - License Agreement
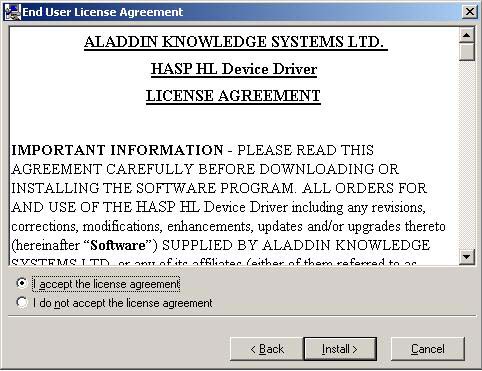
Figure 12: Floating License - Accept License Agreement
Read the license agreement and select “I accept the license agreement”, and then Click Install.
4. An installation status progress meter is quickly displayed and when the status gathered is completed the screen below is displayed.
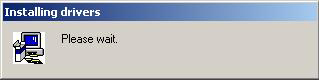
Figure 13: Floating License - HW Key - Installation Status
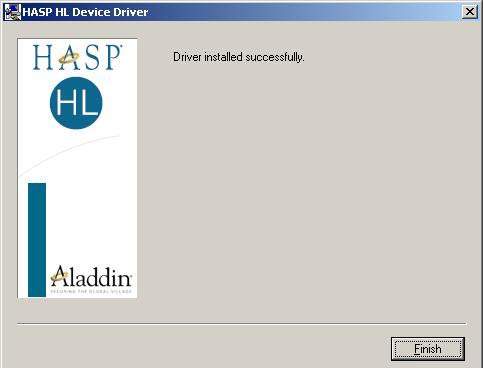
Figure 14: Floating License Drivers Successful Installation
5. When the installation of the Aladdin Hasp Device driver is complete the screen below is displayed. Click Finish.
6. Plug the hardware key onto the parallel or USB port on the server.
NOTE: On some systems you may
have to reboot the server after installation. If the Floating License is not
recognized (by the UTS server) after installing the driver, please reboot the
server.
Uninstall Floating License – (Hardware Key)
In the event that you need to uninstall the Floating License (Aladdin HaspHL) please use the Windows Control Panel Add/Remove Programs administrative utilities.
NOTE: Removing or uninstalling the Floating License will disable the GSW Rocket Terminal Engine Server.
Registration via Software Serial Number
To run the GSW Rocket Terminal Engine you must first register the software. (This registration is NOT required if you installed the Floating License. Page 8) Registration via Software Serial Number entails just a few steps that involve obtaining the Product ID and providing this Identification to Georgia SoftWorks so a Serial Number can be generated. - NOTE: Read System Signature chapter at the end of manual.
How to Register the Software
To run the registration software -
· Select the Start button on the task bar; select Programs, then Georgia SoftWorks Rocket Terminal Engine and then Registration.
Note: The Product Information Name and Version must contain valid data or it will not generate a correct Product ID.
The registration screen is displayed. The Registration software automatically fills in the Product Information fields as show in the figure below. Complete the Customer Information fields as shown in the figure below.
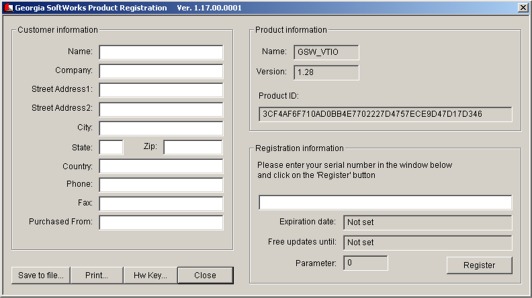
Figure 15: Registration with Serial Number - Initial Screen
1. Please complete the Customer Information and the Purchased From fields in the Registration Screen.
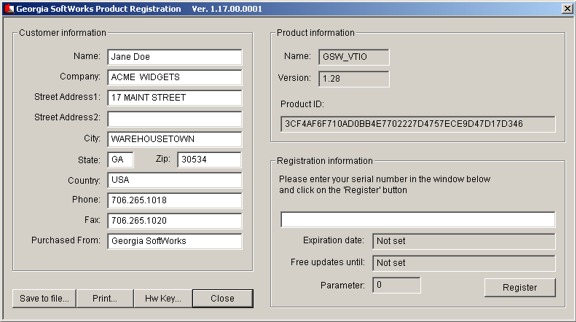
Figure 16: Registration - User Information
2. The registration information must be provided to Georgia SoftWorks to obtain the Serial Number. Several methods are available for your convenience.
a. Save the information to a file and email it to Georgia SoftWorks - Preferred method.
OR
b. Print the information and Fax it to Georgia SoftWorks
Please save (using the Save to file button on the registration screen) this information to a file and email to Georgia SoftWorks registration@georgiasoftworks.com
OR
Please print (using the Print button on the registration screen) this information and fax to Georgia SoftWorks - 706.265.1020
Once Georgia SoftWorks receives the information, we can generate a Serial Number on demand. We will reply back via Fax or email. You may close the registration program at this time.
3. When the Serial Number is provided Run the Registration Program again and enter the Serial Number. The easiest method to get the serial number is to highlight the returned Serial Number and copy (ctrl-c). Then position the mouse in the Serial Number field in the Registration Information box and paste (ctrl-v).
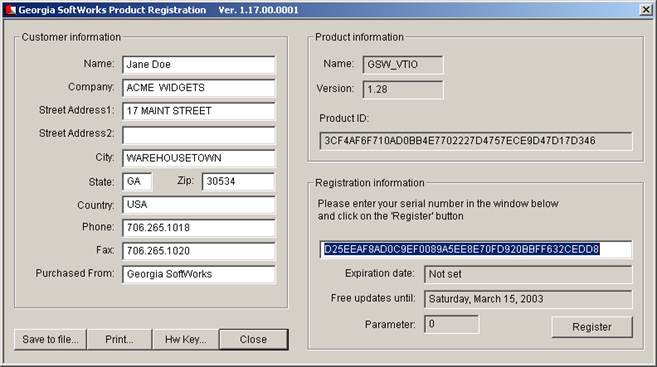
Figure 17: Registration - Serial Number Applied
4. Click Register.
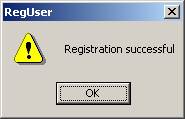
Figure 18: Registration Successful Screen
Now the software is registered. You may now run the Georgia SoftWorks Rocket Terminal Engine. Note that you will be able to obtain Free Updates until the date specified.
IMPORTANT: READ SYSTEM SIGNATURE CHAPTER AT END OF MANUAL (PAGE 40).
Configuration
Once the GSW Rocket Terminal Engine is installed and registered it only takes a moment to configure for it use.
In brief, the steps are
1. Select the GSW Rocket Terminal VTIO Engine
2. Select the number of columns and rows to match the device display
3. Customize the color attributes if required
4. Enable or Disable Beep handling as desired.
5. Configure Screen Field Adjustments if required
6. Configure the SAPConsole AutoLogon string if desired.
Open SapConsole Administrator
Open the SapConsole Administrator. Your screen will be similar to the figure below.
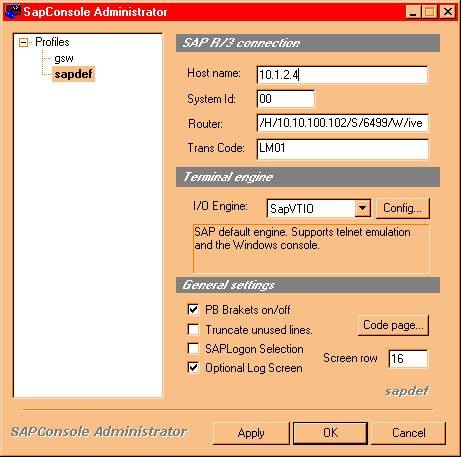
Figure 19: Configuration - SapConsole Administrator
SapConsole can now select the GSW Rocket Terminal Engine as the Terminal Engine for use. Note that the GSW Rocket Terminal Engine provides full support for SAP Profiles allowing different configurations for different profiles!
Select the GSW Rocket Terminal Engine
Notice that the Terminal Engine Drop Down now contains the GSWVTIO item. Simply select the GSWVTIO item to start using the Georgia SoftWorks Rocket Terminal Engine.
![]()

Figure 20: Configuration - Select Terminal Engine
GSW Rocket Terminal Engine Configuration Options
Additional configuration options for the GSW Rocket Terminal Engine are available. These options allow you to specify the number of Rows and Columns for the device; the color attributes and the beep handling.
![]() Click on the Config… button.
Click on the Config… button.
![]()

Figure 21: Configuration - GSWVTIO Terminal Engine Selected
Here you have the capability to configure:
· Rows and Columns
· Enable Beep
· Customize Colors
· Screen Adjustments
· Engine Count
The additional configuration options are available via the following form.
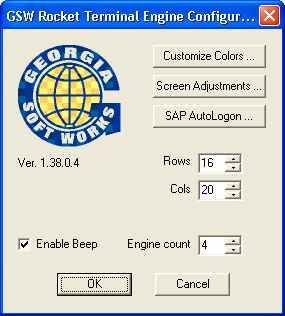
Figure 22: Rocket Terminal Engine Configuration Options
Rows and Columns
You should set the Rows and Cols to match the display of the device you are using. The Rows and Columns specify the number of rows and columns sent to the terminal device. This setting should match the number of Rows and Columns used in the ‘mode’ statement in GSW Telnet Server logon script. See page 31 for more details about the ’mode’ statement.
Enable Beep
Check to allow beeps to be sent to the device. Uncheck to prevent beeps from being sent to the device. See page 32 how to send the Bell Signal from you own SAPConsole’s screen.
NOTE: Support for the beep option was added in SAPGUI 4.6D patch level 327 (refer to OSS note 0391795). To use the beep functionality, please upgrade to at least this patch level, or install SAPConsole from SAPGUI 6.10.
Engine Count
The Engine Count parameter is available when operating with the GSW Telnet Server, which provides the capability to obtain VERY high numbers of sessions on high performance servers.
This parameter specifies the Rocket Terminal Engine performance level required (when operating with the GSW Telnet Server) for operation in your environment. The greater number of sessions required the higher you should set the engine count. The default engine count is four (4), which is should easily handle 200 sessions depending on other operating system settings. Optimal settings will have to be empirically determined for your specific environment. We caution against settings higher than 20 for the Engine Count.
You should reboot the system to ensure the new Engine Count takes effect.
Note 1: The Engine Count has no impact when the GSW Telnet Server is not in use.
Note 2: In order to be efficient with resources do not set the Engine Count excessively high.
Note 3: If the Engine Count is 0 or the control is disabled then you need the GSW Telnet Server version 6.24.0002 or higher to take advantage of this feature.
Customize Color Attributes
You will notice that all standard Color attributes are supported as well as additional attributes. The blink attribute is available as well as Reset Buttons for the Output Attributes and a Reset All Button.

Figure 23: Rocket Terminal Engine Attributes Configuration
The GSW Rocket Terminal Engine works with heterogeneous devices and thus encounters scenarios where the different devices may have different terminal attributes. Examples of these attributes include the underline, reverse video and blink. These attributes are used for many reasons such as to obtain the attention of the user or to identify data entry fields.
The Windows Console does not provide support for all the different terminal attributes, however colored output is available.
Note, that there are 4 SAPConsole attributes – Inverse, Bold, Underlined and Blink that can be applied to each character. From school, you will remember that this means that there are a total of 16 combinations of SAPConsole attributes that can be applied.
Each combination of attributes is translated to colors to be displayed on the Windows Console. Standard or default translations exist for each combination. You can view the defaults by placing combinations of checks in the SAPConsole attributes and observing the checks in the Corresponding Colors section of the screen.
You may re-define any or all of the SAPConsole’s attribute combinations to the color translations of your choice.
Select the SAPConsole attribute combination on the left. On the right you will notice the current color translation settings. The box on the lower left of the screen shows how the display will look on the Windows Console. Simply select by check the Corresponding Color translations check boxes desired for the SAPConsole attributes on the left.
Do this for the various combinations of SAPConsole attributes desired. When done, click on OK.
![]() If you want to restore the
default color translations for a particular SAPConsole attribute combination,
simply click on the reset button.
If you want to restore the
default color translations for a particular SAPConsole attribute combination,
simply click on the reset button.
![]()
![]()
![]()
Figure 24: Configuration - Reset Terminal Attribute
Note: This will ONLY reset (restore to the default) the Corresponding Color Translation for the particular combination of SAPConsole Attributes selected.
To Reset (restore to the default) the Corresponding Color for ALL combinations of SAPConsole Attributes you click on the Reset All button.
When used with the GSW Telnet Server, you have an incredible amount of control. If the device can display color, the GSW Telnet Server can provide a color display. You can even re-map the colors to be displayed on the Terminal to different colors with the GSW Telnet Server. (See the section on Color Mapping in the GSW Telnet Server User Manual). If the device display is monochrome, the colors can be remapped back to attributes such as the Inverse, Bold, Underlined and Blink.
Screen Adjustments
The GSW Rocket Terminal Engine Automatically Adjust Off-Screen fields back on screen. SAPConsole converts a Graphical User Interface to a character oriented user interface. Some of these conversions do not fit well on smaller RF displays and the result is fields that are not viewable but indeed exist off screen.
For example if an RF display is 16 x 20 characters. (16 rows by 20 columns). In some cases SAPConsole may place a field starting in column 25. From a coordinate viewpoint the field exists but is not viewable. This may occur due to the length of the descriptive labels preceding fields.
The GSW Rocket Terminal Engine recognized these Off-Screen fields and automatically adjusts the fields back On-Screen. Most often spaces are compressed (or removed) to make room to move the fields back on screen. Many times the descriptive label prior to the field is abbreviated to make room for the field to be moved back on screen. Adjustments are made on a row by row basis with no line wrapping.
Occasionally, System Administrators may want to disable the Automatic Adjustment of Off-Screen Fields back on screen. Configuration for this capability is accessed via the Screen Adjustments button on the configuration options screen. After clicking the Screen Adjustment button you will see the following screen.
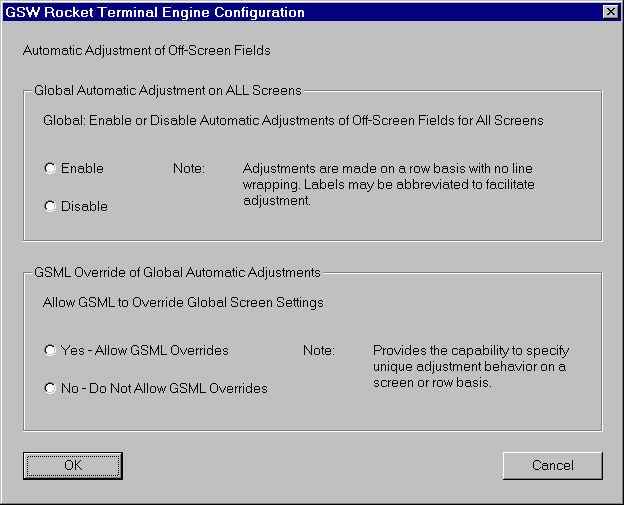
Figure 25: Screen Adjustment Configuration
Proper selection of varying combinations for the options discussed below will minimize the amount of GSML needed to obtain the desired results.
Automatic Adjustments on All Screens
The top half of the screen allows the configuration of the Global Automatic Adjustment on All Screens. You may either Enable or Disable the Automatic Adjustment on All Screens. The default setting is Enabled.
If you Disable Automatic Adjustments on All Screens then NO adjustments will occur on any screen. Off-Screen Fields will remain Off-Screen. NOTE: Exceptions to this are allowed only if GMSL Overrides of Automatic Adjustments are Enabled.
If you Enable Automatic Adjustments on All Screens then Adjustments will occur on EVERY screen. Off-Screen fields will be Automatically Adjusted back on Screen. NOTE: Exceptions to this are allowed only if GMSL Overrides of Automatic Adjustments are Enabled.
GSML Override of Automatic Adjustments
The bottom half of the screen allows the configuration of the GSML Override of Automatic Adjustments. There may be times when the System Administrator may want to Disable the Global Automatic Adjustment on All Screens using the feature described above; however there are a small number of screens where it would be convenient to have the Automatic Adjustments to occur. Using the GSML (Georgia SoftWorks Markup Language – page 35) you can specify adjustments on a screen basis or identify specific rows on a screen to enable Automatic Adjustments.
Alternatively, the System Administrator may want to Enable Automatic Adjustments on All Screens using the feature described above; however there are a small number of screens where it would be convenient to NOT perform the Automatic Adjustments. Using the GSML (Georgia SoftWorks Markup Language - page) you can specify to disable adjustments on a Screen basis or identify specific rows on a screen to disable Automatic Adjustments.
SAPConsole Autologon
The Georgia SoftWorks Rocket Terminal Engine provides a very useful feature allowing quick and seamless logon to SAPConsole.
A SAPConsole AutoLogon string can be defined that is sent to SAPConsole each time the SAPConsole is started.. In many cases the primary purpose of the SAPConsole AutoLogon string is to log the user into SAPConsole and thus will be defined to send the SAP User Name and the Password information. Since the User Name and Password is sensitive information, it is encrypted before it is stored and decrypted upon display in the SAP Administrator.
You may define the SAPConsole Autologon string to do more than just simply logon such as in addition to sending the user name and password that you also navigate to a particular screen, start a print job etc.
The SAPConsole AutoLogin string is a comma delimited list of keystrokes that you want to send when SAPConsole is executed. The string is sent each time SAPConsole is started, even if you start SAPConsole more than once in a telnet session.
The following control key designators are defined.
· shift-
· alt-
· ctrl-
The following special characters are defined.
· TAB
· ESC
· ENTER
· F1
· F2 and so on through F12
Also a special operator is defined.
· Sleepxx
This special operator will pause the output to SAPConsole for xx seconds. This gives the application time to process the input. By default a 1-second pause is injected between keystrokes, however some specific cases may require the use of the Sleepxx operator to introduce additional delay.
No extra white space is allowed. The string is not case sensitive. For example you must specify 'shift-c' to produce a capital 'C'
Configure the SAPConsole Autologon String
Access the SAPConsole AutoLogon feature by via the SAPConsole Administrator. When in the SAPConsole Administrator, select Config…, then SAP Autologon.
![]()
Figure 26: SAP AutoLogon
For example to AutoLogon user ‘bob’ with password ‘HardWorker5’ you would define the SAPConsole AutoLogon String as[1]: b,o,b,TAB,shift-h,a,r,d,shift-w,o,r,k,e,r,5,ENTER
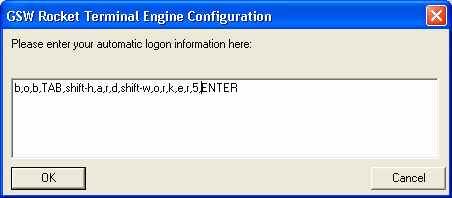
Figure 27: SAP AutoLogon String Configuration
This string is encrypted before it is stored. Note the Keywords TAB, shift-h and ENTER. The keyword TAB sends the TAB, the shift-h keyword sends a uppercase ‘H’ and the ENTER keyword sends the <ENTER> as if pressed at the keyboard.
Save the Configuration Profile
![]()
![]() After
Configuration of the Profile you may want to save the profile as the Default
Profile. To save as the default profile, select the profile, right click and
select “set as default”. The default profile is the one that is automatically
applied when the SAPConsole is launched without using the SAPConsole profile
name.
After
Configuration of the Profile you may want to save the profile as the Default
Profile. To save as the default profile, select the profile, right click and
select “set as default”. The default profile is the one that is automatically
applied when the SAPConsole is launched without using the SAPConsole profile
name.
![]() After choosing your configuration
be sure to apply the changes.
After choosing your configuration
be sure to apply the changes.
![]()
![]()
![]()
Figure 28: Configuration - Set as Default Profile and Apply
Using the GSW Rocket Terminal Engine Software
After Installation, Registration, and Configuration the GSW Rocket Terminal is ready to use. You can run SAPConsole locally by opening a Command Shell and executing SAPConsole. However in practice you will access SAPConsole via the GSW Telnet Server.
Rocket Pack (Rocket Terminal Engine and the GSW Telnet Server)
The Rocket Pack is when the GSW Rocket Terminal Engine and the GSW Telnet Server are packaged together rather than being sold individually. The GSW Rocket Terminal Engine and the GSW Telnet Server will be installed individually and each will have its own the User Guide and Software CD.
NOTE: The GSW Rocket Terminal Engine and the GSW Telnet Server will share the same physical Floating License device when purchased as a Rocket Pack.
Integration with the GSW Telnet Server
To realize the full benefit of the GSW Rocket Terminal Engine you should execute SAPConsole from the GSW Telnet Session. Typically you should add the required line to start SAPConsole in your Georgia SoftWorks Telnet Server logon script (c_start.bat or k_start.bat).
See GSW Telnet Server User Manual for information on logon scripts if needed.
Example:
Edit Logon Script for GSW Telnet Server and add the following lines.
c:
cd \Program Files\SAPpc\SAPGui\sapconsole
mode con: lines=16 cols=20
sapcnsl
Save the logon script.
1. The first line selects the destination drive where SAPConsole is located.
2. The next line changes the current directory to the directory where the SAPConsole executable resides
3. Specify the columns and rows for the display
4. invoke sapcnsl
If the desired profile is the not the default profile then be sure to specify the –p parameter when invoking SapConsole from the GSW Telnet Server Logon Script.
For example, if the SAPConsole profile that is configured to use the GSW Rocket Terminal Engine is named “gswrocket” then the following line would be used to invoke SAPConsole.
sapcnsl –p gswrocket
MODE CON
The console command
mode con: lines=xx cols=yy
where xx is the number of lines, and yy is the number of columns in the display.
is very important to include in your Logon Script for the GSW Telnet Server for maximum performance. This ensures that the GSW Telnet Server scans the exact number of rows and columns.
Send a Bell Signal to SAPConsole
Sending a bell signal to SAPConsole will cause an RF terminal to beep one or more times. This capability can be added to any screen and is controlled within the ABAP code.
Two steps are required to send a bell signal to a screen:
1) Add a special display-only field to the screen and
2) Populating the special field from the PBO of the screen. The example presented shows how to cause SAPConsole to beep 3 times when the screen is displayed.
In the following screen shot you will be able to see the last field in the screen, which has been defined with the name NOTIFY_BELL_SIGNAL. The field must have the following characteristics:
1. The length of the field will be one position.
2. The field will be in format NUMC.
3. The
field is Output only.

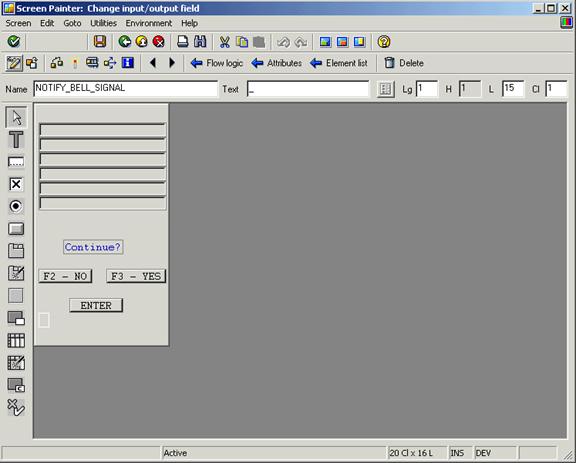
Figure 29: Notify Bell Signal Field
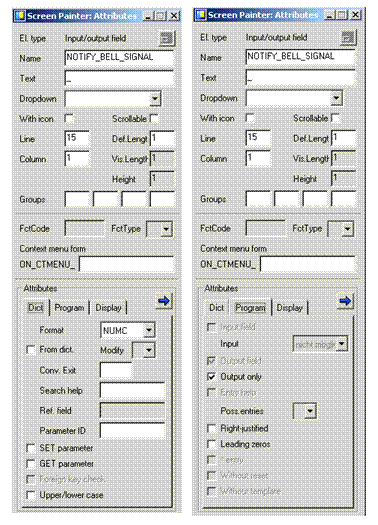
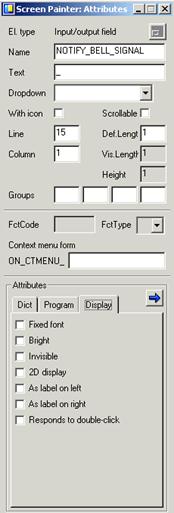
The properties for the field are show below.
 |
|
|||
ABAP Code to Generate Bell
This
section describes the ABAP code required to generate the bell signal when the
screen is displayed. Add a module for the “bell signal” module inside the PBO
associated with the screen. In this example, bell signal is our module.
PROCESS
BEFORE OUTPUT.
MODULE 9000_status.
*$$-- SET SCREEN ATTRIBUTES -----------------------------------------
MODULE 9000_attrib.
*$$-- SET SCREEN CURSOR ---------------------------------------------
MODULE 9000_cursor.
MODULE bell_signal.
*
PROCESS AFTER INPUT.
*$$-- SET SCREEN CURSOR ---------------------------------------------
MODULE 9000_user_command.
The module should include the following code:
*&---------------------------------------------------------------------*
*& Module Bell_Signal
*&---------------------------------------------------------------------*
MODULE bell_signal OUTPUT.
DATA: notify_bell_signal(1) TYPE n.
notify_bell_signal = '3'.
ENDMODULE. " bell_signal OUTPUT
The definition of the
variable notify_bell_signal is numeric with one position.
The programmer needs to enter values between 1-9, which determines how many “beeps” are by heard by the client device. This way you can send different numbers of “beeps” and differentiate in the code between success, warnings and errors.
NOTE: Support for the beep option was
added in SAPGUI 4.6D patch level 327 (refer to OSS note 0391795). To use the
beep functionality, please upgrade to at least this patch level, or install
SAPConsole from SAPGUI 6.10.
GSW SAPConsole Screen Markup Language.
Overview:
The Georgia SoftWorks SAPConsole Screen Markup Language (GSML) is useful when special processing is required for increased performance and added functionality when processing SAPConsole screens. The GSML allows special commands or functionality to be applied to screens and their components.
The GSML currently include the following commands.
- Automatic Tab
Once data is scanned (or entered) a TAB is automatically sent to the application moving the cursor to the next field in the tab order.
- Automatic Enter
Once data is scanned (or entered) a ENTER is automatically sent to the application initialing whatever action that is defined by an ENTER.
- Enable Automatic Adjustments of Off-Screen Fields
Perform Adjustments of Off-Screen Fields on a Screen or Row basis
- Disable Automatic Adjustments of Off-Screen Fields
Disable Adjustments of Off-Screen Fields on a Screen or Row basis
GSML Structure
Each Terminal has a defined screen display size as configured in the SAPConsole Administrator in the section where parameters for the GSW Rocket Terminal Engine are specified. The size is specified in terms of rows and columns.
Important Term: Rows and Columns can and do exist that are not displayed because they fall outside of the screen size. Rows and Columns that are outside of the defined screen size are termed “Off-Screen” and hence are not displayed. Rows and Columns that DO fit in defined screen area are termed “On-Screen” and are displayed.
We can take advantage of Off Screen areas (in particular the rows) to place the GSML.
The GSML begins in the First Off-Screen Row. This is the first row that is beyond the last displayed row. Multiple rows may be used for the GSML. The GSML commands are processed from the lowest numbered Off-Screen Row to the Highest and from left to right.
ABAP and SAP field definition database techniques are used to place the GSML in the Off-Screen rows.
Each GSML Command consists of a keyword and a parameter list. Multiple GSML Commands can be specified on a line when delimited with a pipe “|” symbol. The parameter list usually consists of the row and column identifiers of the On-Screen field that the Command is to apply.
The syntax for the each GSML Command is as follows:
Syntax: $keyword,parameter list
Where
keyword is valid GSML keyword and the
parameter list is one or more parameters that are specific to the GSML Command.
All keywords start with the dollar “$” symbol followed by the GSML Keyword. A comma “,” separates the GSML Keyword from the parameter list. Each parameter is separated by a comma “,”
Multiple GSML Commands are allowed and each is separated by the pipe “|” symbol.
Typically the GSML Keyword is followed by a Column Number and a Row Number which identifies the On-Screen Field for which the command will apply. Rows and columns are zero based with the top left corner at location (0, 0).
GSML Commands:
Following are each of the GSML Commands.
Automatic Tab
Description:
Once all data for a field is scanned or entered a TAB is automatically sent to the application moving the cursor to the next field in the tab order.
Syntax: $gsw-a-tab,column,row
Where
gsw-a-tab is the GSML keyword for Automatic Tab GSML Command
column specifies the column where the field begins.
row specifies the row when the field begins.
Example:
$gsw-a-tab,0,3
This specified that the GSML Automatic Tab command be applied to the field that starts in Column 0 on the 3rd Row.
Automatic Enter
Description:
Once all data is scanned or entered a ENTER is automatically sent to the application.
Syntax: $gsw-a-enter,column,row
Where
gsw-a-enter is the GSML keyword for Automatic Enter GSML Command
column specifies the column where the field begins.
row specifies the row when the field begins.
Example:
$gsw-a-enter,3,3
This specified that the GSML Automatic Enter Command be applied to the field that starts in Column 3 on the 3rd Row.
Enable Adjustments of Off-Screen Fields
Description:
If Global Automatic Adjustments of Off-Screen Fields is Disabled then AND GSML Overrides are Enabled then GSML can be used to adjust off screen fields back on screen on a per screen or row by row basis..
Syntax: $gsw-enable-llfix,row
Where
gsw-enable-llfix is the GSML keyword to Enable Adjustments GSML Command
row specifies the row to adjust. If the Row specified is -1 then the command applies to the entire screen.
Example:
$gsw-enable-llfix,6
This specified that the GSML Enable Adjustments command be applied to row 6 on the screen.
Example:
$gsw-enable-llfix,-1
This specified that the GSML Enable Adjustments command be applied to the entire screen.
Within the same page if the GSML specifies a command with row set to -1 and a command with a specific row then the command with a specific row takes precedence.
Example:
$gsw-disable-llfix,-1
$gsw-enable-llfix,6
This specifies that the GSML Disable Adjustments command be applied to the entire screen except for row 6.
Disable Adjustments of Off-Screen Fields
Description:
If Global Automatic Adjustments of Off-Screen Fields is Enabled then AND GSML Overrides are Enabled then GSML can be used to disabled the adjustment of off screen fields back on screen on a per screen or row by row basis..
Syntax: $gsw-disable-llfix,row
Where
gsw-disable-llfix is the GSML keyword to Disable Adjustments GSML Command
row specifies the row to NOT adjust. If the Row specified is -1 then the command applies to the entire screen.
Example:
$gsw-disable-llfix,6
This specified that the GSML Disable Adjustments command be applied to row 6 on the screen.
Example:
$gsw-disable-llfix,-1
This specified that the GSML Disable Adjustments command be applied to the entire screen.
Within the same page if the GSML specifies a command with row set to -1 and a command with a specific row then the command with a specific row takes precedence.
Example:
$gsw-disable-llfix,-1
$gsw-enable-llfix,6
This specifies that the GSML Disable Adjustments command be applied to the entire screen except for row 6.
GSW Rocket Terminal Subscription
The GSW Subscription plan provides access to the most current versions of the software as well as priority support.
In general, Georgia SoftWorks releases new version as soon as new features ready rather than waiting for quarterly or annual. Due to our development and release generation methods and JIT User Manual production we can release software on a much more frequent basis than other organizations. As soon as the features or defect resolutions are Alpha and Beta tested we can generate a release. This provides our customers with features much quicker than the “grouping” or “scheduling” method used by other companies.
The GSW Rocket Terminal (and Rocket Pack) subscription access to free version upgrades for the duration of the subscription. The duration is either 1, 2 or 3 years. This is good as you can obtain new versions of the software at your convenience obtaining all new features and defect resolutions.
NOTE: New versions can be downloaded from our web site at you convenience.
The GSW Subscription plan is an excellent value. Even if you upgrade the software once every few years you will save with the subscription.
Version Upgrade Pricing with Subscription Plan |
|
|
Time from date of purchase |
Price |
|
For the Duration of Plan (1, 2 and 3 year plans are available). |
Free |
Table 1: Version Upgrade Pricing with GSW Subscription Plan
The pricing for version upgrades without the Subscription is based on the time from the date of the original purchase or last version upgrade.
Version Upgrade Pricing without Subscription Plan |
|
|
Time from date of purchase |
Price |
|
Less than 90 days |
Free |
|
Greater than 90 days but less than 1 year |
50% of the current list |
|
Greater than 1 year |
90% of the current list |
Table 2: Version Upgrade Pricing Without Subscription Plan
HOW TO UPDATE THE SOFTWARE
1. Download the software or use the supplied CD
2. Make sure the Rocket Terminal Engine is not in use.
3. Run the Setup Program for the Update as done in the original installation.
4. You may specify the same or different installation folder.
HOW TO RENEW THE GSW SUBSCRIPTION
Please use the following procedure when renewing the GSW Rocket Terminal Engine or Rocket Pack Subscription.
|
Step |
Who |
Action |
|
|
1. |
GSW |
|
Send notice to customer giving indicating that the subscription is about to expire. The notice is sent approximately 4 to 8 weeks prior to the expiration of the plan. |
|
2. |
|
Customer |
Places order for new subscription |
|
3. |
GSW |
|
Confirms Order |
|
4. |
GSW |
|
Ships current software, documentation and new Floating License |
|
5. |
|
Customer |
Install new Floating License (and software if desired) |
|
6. |
|
Customer |
Ships OLD Floating License back to GSW |
Table 3: Steps to Renew the GSW Subscription Plan
System Signature - IMPORTANT PLEASE READ
NOTE: This section only applies to Software Registration
The registration software obtains a system signature that is unique to your system. This signature is an added security measure to inhibit unauthorized personnel to obtain working copies of the GSW Rocket Terminal Engine.
The signature is comprised of hardware and software identifiers that exist on your system that make the target system unique. These identifies are hashed into a Product ID and a Serial Number can be generated from this Product id.
If major hardware components of your system are removed, replaced or modified your Serial Number may discontinue to work and you may need a new Serial Number to obtain access to the Rocket Terminal Engine. Please contact Georgia SoftWorks Technical Support if needed.
Technical Support
In order to keep Technical Support Free please help keep our cost down.
· Gather all relevant system information.
· Write your question down. This not only helps us but also helps you in articulating the question.
If the question is not an emergency, please use e-mail at support@georgiasoftworks.com. We try to respond within 24 hours.
Or Call 706.265.1018 EST, M-F 9:00 a.m. to 5:00 p.m. and have your Product ID ready