GSW
ConnectBot Android Client for use with SSH/Telnet and now includes the GSW
Enterprise Browser
User’s Guide

GSW
ConnectBot Android Client for use with SSH/Telnet and now includes the GSW
Enterprise Browser
User’s Guide
THIS PAGE INTENTIONALLY LEFT BLANK
Georgia SoftWorks
Public Square
17 Hwy 9 South, PO Box
729
Dawsonville Georgia
30534
Telephone +1
706.265.1018 * Fax +1 706.265.1020
Visit Georgia SoftWorks web site
Copyright ©
Georgia SoftWorks, 2024 All Rights Reserved. Images and screenshots used in
this document may not represent the latest version of GSW ConnectBot, or the
version in use by the reader.
Google,
Android, Google Play, ConnectBot, are trademarks of their respective companies.
THIS PROGRAM IS PROVIDED "AS IS" WITHOUT
WARRANTY OF ANY KIND, EITHER EXPRESSED OR IMPLIED, INCLUDING, BUT NOT LIMITED
TO THE IMPLIED WARRANTIES OF MERCHANTABILITY AND FITNESS FOR A PARTICULAR
PURPOSE.
LICENSOR MAKES NO WARRANTIES OR REPRESENTATIONS,
EXPRESS OR IMPLIED, ORAL OR WRITTEN, REGARDING THE PROGRAM OR DOCUMENTATION AND
HEREBY EXPRESSLY DISCLAIMS ALL OTHER EXPRESS OR IMPLIED WARRANTIES, INCLUDING
MERCHANTABILITY AND FITNESS FOR A PARTICULAR PURPOSE. LICENSOR DOES NOT WARRANT
THE PROGRAM WILL MEET YOUR REQUIREMENTS OR THAT ITS OPERATION WILL BE
UNINTERRUPTED OR ERROR FREE.
IN NO EVENT WILL GEORGIA SOFTWORKS BE LIABLE TO YOU
FOR ANY DAMAGES, INCLUDING ANY LOST PROFITS, LOST SAVINGS OR OTHER INCIDENTAL
OR CONSEQUENTIAL DAMAGES ARISING OUT OF THE USE OR INABILITY TO USE SUCH
PROGRAMS.
LICENSE:
YOU ARE LICENSED FOR AN INSTANCE OF THE GSW CONNECTBOT
CLIENT SOFTWARE ON A SINGLE SPECIFIC DEVICE. ANY ATTEMPT TO DUPLICATE THE
LICENSE IS IN VIOLATION OF THIS AGREEMENT. THE GSW CONNECTBOT SOFTWARE
MAY BE INSTALLED ON A SINGLE ANDROID DEVICE.
Example 1.
Using a USB Connection
Generalized terse messages that require enabling from
unknown sources.
Copy and Install APK to Device - Sideloading
Registration of the GSW ConnectBot License
Registration by GSW Licensing and Deployment Server
(LADS)
Return
License to License and Deployment Server (LADS)
Update the GSW ConnectBot software
Updating Software by Licensing and Deployment Server
(LADS)
Updating Software by manually obtaining
gsw-connectbot.apk
GSW
ConnectBot Host Configuration and Connections
Create new
Host Connection Configuration
Collect Business Intelligence data
Upload screenshots to GWS LADS
Using Answerback with the GSW SSH/Telnet Server
Answerback Example Configuration
Configure a Host Connection Example 1
SSH with Password Authentication
Save host
connection configuration
Connect to
the new configured connection
Configure a Host Connection Example 2
SSH with Public/Private Key Authentication
Creating a
Public/Private key pair
Enter the
configurable parameters for the Public/Private Keys
Transfer the key to the SSH Server
Installing Private Key to GSW ConnectBot Android
Client
Configuring the Host (Public) key on a GSW UTS SSH
Server
Configure a
Telnet Host Connection
Managing Host Configuration with the GSW LADS
Uploading an Existing Configuration
Downloading an existing configuration
GSW ConnectBot Admin mode / Work mode version 2.9.194
and above
GSW ConnectBot Admin mode / Work mode version 2.9.186
and below
Lockdown (Pinning the app) on Android 7.0+
Enable “Ask for Pin
before Unpinning”
Device
Telemetry Data Variables
GSW Browser Telephone Keyboard
Barcode Scanner (Zxing plugin)
Georgia SoftWorks Scanner (cordova-plugin-gswscanner)
Cordova-plugin-cert-authentication.
GSW Variables (Telemetry Data)
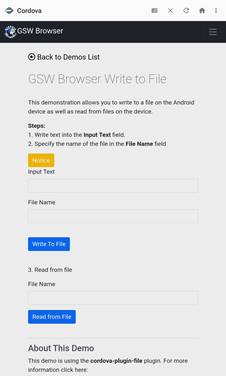
Write to File (File Storage plugin)
GSW Licensing
and Deployment Server (GSW LADS) for Windows
Installing the Georgia SoftWorks Licensing and
Deployment Server
Registering the Georgia SoftWorks Licensing and
Deployment Server
GSW ConnectBot LADS XML Configuration File
Automatic Provisioning (Auto Discovery)
Manage Software Updates to GSW ConnectBot
Upload / Download GSW ConnectBot Configuration
Rapid 2-Tap Screen Shot Upload to GSW LADS
Public/Private Key Import/Export
Understanding Business Intelligence (BI) Data
GSW Business Intelligence Data Collection – Overview
GSW ConnectBot Events Overview
Message ID
code: 1000 – Key code
Message ID code:
1001 – Key Output text
Message ID
code: 1100 – Keyboard Selected
ID code: 1201
Connected to a TE Host
ID code: 1202
Disconnected from a TE Host
ID code: 1301 Web Request Not Allowed
ID code: 1302 Top Level URL’s Not Allowed
ID code: 1400 Key Event from Telnet or SSH
Connections
ID code: 1401 Scan Events from Telnet and SSH
connections
ID code: 1402 Key Event from Web Connections
ID code: 1410
TE Scan Tracking
ID code: 1411
Web Scan Tracking
ID code: 5000 GSW Unified Scanner Interface Receives
Scanned Data from Web Host
GSW
ConnectBot Screen Recognition Events
Message ID
code: 1500 – Screen Recognition
ID code: 4000 Duplicate License Removed
Message ID
code: 3000 GSW ConnectBot application started
Message ID
code: 3002 GSW ConnectBot Activity Resumed
Message ID
code: 3003 GSW ConnecBot Activity Destroyed
ID code: 100000
Message License Count info
ID code: 100001
Message License Obtained
ID code: 100002
Message License Released
ID code: 100100
Message Device Telemetry Data variable change
ID code: 100101 GSW LADS Instance ID
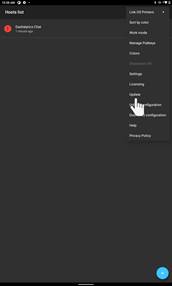
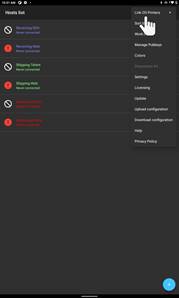
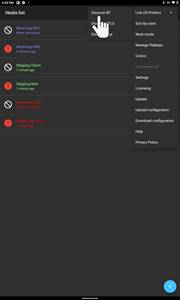
Discover Zebra Link-OS printer
Screen
Recognition / Custom Keyboard association
Understanding Screen Recognition
Table of Figures
Figure 1: Host Connections
/ Host Configurations
Figure 3: Where to obtain GSW ConnectBot
Figure 5: GSW Enterprise Browser - Quick Start
Figure 6: First time installation Android 8+
Figure 7: First time installation Android 7.x and
lower
Figure 8: GSW ConnectBot Google Play
Figure 9: Android device listed in Windows Explorer
Figure 10: Unknown Apps pop-up
Figure 11: App specific Allow from Source Setting
Figure 12: Enable App specific Allow from this source
Figure 13: Terse Alert Message Writing to SDCard
Figure 14: Locate GSW ConnectBot in the app Info.
Opens GSW ConnectBot app settings
Figure 16: Tap Install unknown apps
Figure 17: Tap Allow from this source
Figure 18: Allow from this source is enabled
Figure 19: Set Unknown Sources
Figure 22: Installation progress bar
Figure 23: Installation complete
Figure 24: Admin and Work Modes
Figure 25: Pre-configured Dashalytics Chat Host
Figure 26: When launching a host and unlicensed
software detected
Figure 27: Selected Demo - prompt to continue in Demo
Mode
Figure 28: Selected License Options - Description on
how to obtain license
Figure 29: Prompt after 30-minute demo has expired
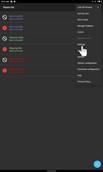
Figure 30: Hosts - More Options
Figure 33: Tap Continue to see License Info
Figure 34: Free Temporary Manual License Found
Figure 35: Temporary Manual License Expired
Figure 36:
Subscription Expired
Figure 37: Permanent License - Manual Registration
Figure 38: Permanent License Applied – GSW LADS
Figure 39: Register Using GSW LADS
Figure 40: Automatically Locate GSW LADS
Figure 41:Product License retrieved from GSW LADS
Figure 42: Get License for GSW LADS
Figure 43: Return GSW ConnectBot License from device
Figure 44: Notification that the License was
successfully released.
Figure 45: Permanent License – Serial Number
Figure 46: Permanent License - Continue
Figure 48: Allow access if needed
Figure 51: request.c2g placed in
root/android/data/com.gsw.connectbot/files
Figure 52: Request .c2g placed in root - v2.7.067 and
lower
Figure 53: Copy serial.g2c to root folder described
Figure 54: Apply Serial Number from file
Figure 55: Locate the serial.g2c file
Figure 56: Serial Number Applied Successfully
Figure 57: All Done, Tap Continue
Figure 58: Paste Serial Number
Figure 59: Tap APPLY after pasting serial number
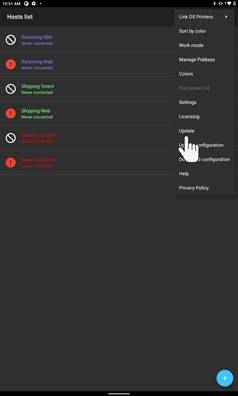
Figure 60: Admin Mode - Update software
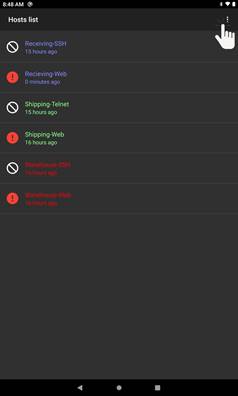
Figure 61: Work Mode - Update Software
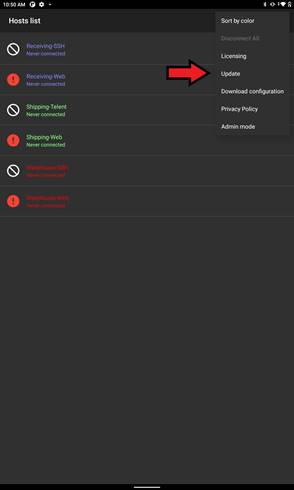
Figure 62: Hosts - More Options - Update
Figure 64: Update TAP GSW LADS
Figure 67: Use GSW LADS Update Screen
Figure 69: GSW LADS - Update Found
Figure 70: GSW LADS - running latest version
Figure 72: May be prompted to allow access to photos
Figure 73:
Update is downloading
Figure 76: Select version to install
Figure 78: Tap the overflow menu
Figure 82: Tap Check For Updates
Figure 83: Update Found - Tap OK
Figure 84: Install Update button highlighted
Figure 85: You may a security prompt - tap Allow
Figure 89: Configuring a Host connection
Figure 90: Host Connection Screen Display
Figure 92 - Admin Mode TE Over-Flow Menu
Figure 93 - Work Mode TE Over-Flow Menu
Figure 94: Cordova Examples Home Page
Figure 95: Industrial Browser Overflow Menu
Figure 96: Tap 1 - Tap overflow menu
Figure 97: Tap 2 - Tap Screenshot
Figure 98: Success. This prompt can be disabled in the
Global Settings.
Figure 99: Telnet/SSH Host List - Long Press Menu
Figure 100: Web Host List - Long Press Menu
Figure 101: Create Auto-Response field
Figure 102: Edit Auto Response Field
Figure 103: Auto Response Field completed
Figure 104:
Auto Response created.
Figure 106: Un-Secure Algorithms
Figure 107: Menu to access Global configuration
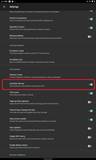
Figure 108: Accessing Settings
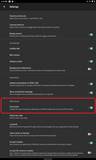
Figure 110: Global Settings Menu
Figure 111: Global Settings Menu Continued
Figure 112: Answerback Settings
Figure 114: Enter Host Information
Figure 115: Use pubkey authentication setting in Edit
Host
Figure 116: If multiple keys are needed
Figure 117: Select Use any unlocked key (Default) or
choose specific key
Figure 118: Saving the Connection Installing Private
Key to GSW ConnectBot Android Client
Figure 119: Tap the Overflow Menu
Figure 120: Tap Manage Pubkeys
Figure 122: Add Nickname (Password is optional) and
check Load key on start
Figure 124: Generate Randomness for Keys
Figure 125: Generate Randomness until 100%
Figure 127: Enter password if added
Figure 129: Tap Copy public key
Figure 131: Generate Randomness
Figure 133: GSW ConnectBot Admin Icon
Figure 135: Tap Manage Pubkeys
Figure 139: Enter Password if prompted
Figure 141: Certificate Mapping Tool
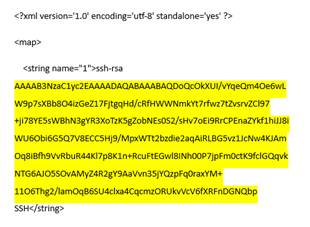
Figure 142: Example of pubkeys.xml uploaded to GSW
LADS from key generated on GSW ConnectBot
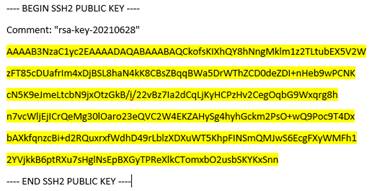
Figure 143: Example of public key generated by
puTTYgen
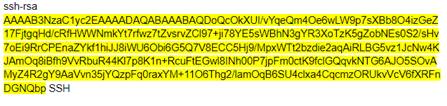
Figure 144: Example of public key generated on GSW
ConnectBot to clipboard
Figure 145: Installing Public Key
Figure 147: Restart SSH Service
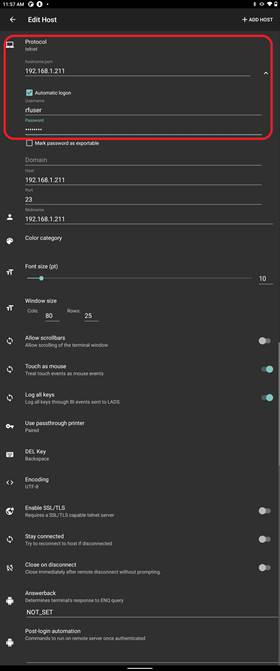
Figure 149: Defining a Telnet Host
Figure 150: Enter Telnet Configuration Information
Figure 151: Connection Settings
Figure 152: Saving the Connection
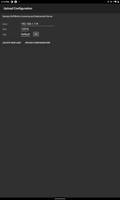
Figure 153: Tap Upload configuration from the overflow
menu
Figure 155: Upload Configuration
Figure 157: Copy upload configuration to download
folder
Figure 158: GSW LADS Config File shortcut
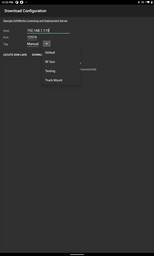
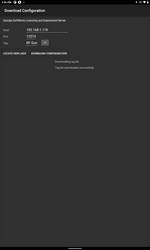
Figure 159: Tap Download Configuration
Figure 160: Select Configuration
Figure 161: Tap download configuration
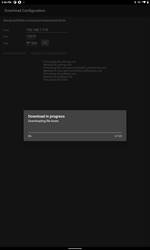
Figure 162: Configuration download in progress
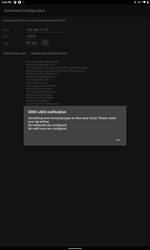
Figure 163: Configuration download successful
Figure 164 - 3-Dot Menu from Host List screen
Figure 165 - Work mode drop down menu
Figure 166 - Admin mode drop down menu
Figure 167 - Enter admin password (default
"admin)
Figure 168 - Global setting to change admin password
Figure 169 - Enter new password then confirm new
password
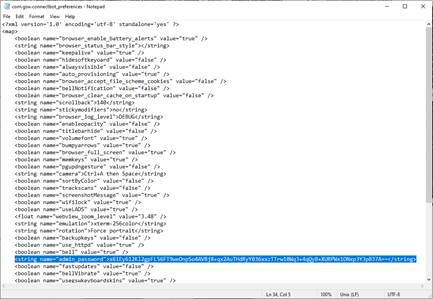
Figure 170 - com.gsw.connecbot_preferences text file
to change admin password
Figure 171: Two Modes of Connection
Figure 174: Tap Security Setting
Figure 175: Pin Windows Option
Figure 176: Ask for PIN before unpinning
Figure 177: Pinning the Window
Figure 178: GSW ConnectBot - Admin Mode
Figure 179: GSW ConnectBot Work Mode
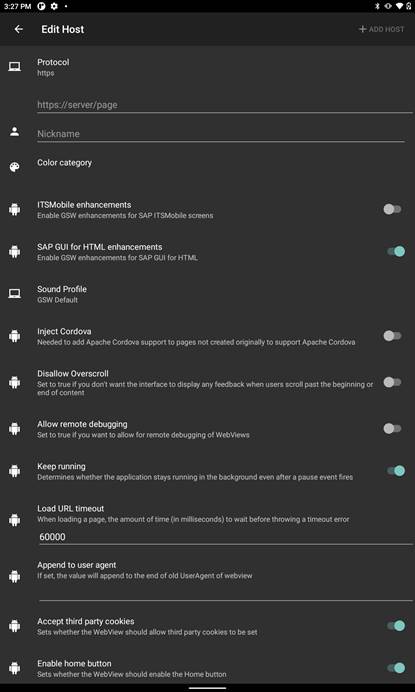
Figure 180: HTTPS Protocol Configuration Menu
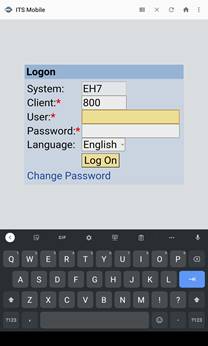
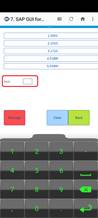
Figure 181: SAP ITS Mobile with GSW Enhancements
Disabled
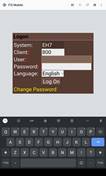
Figure 182: SAP ITS Mobile with GSW Enhancements
Enabled
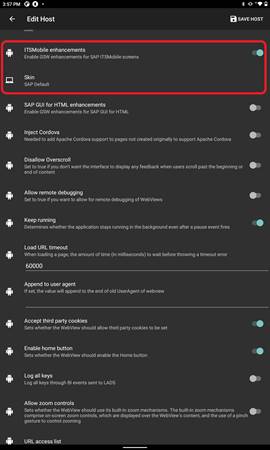
Figure 183: Enable ITSMobile Enhancements Shows Skin
Menu
Figure 185: ITSMobile Skin Options
Figure 186: Sound Profile option
Figure 187: Sound Profiles available
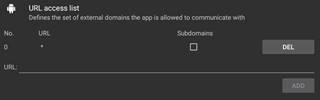
Figure 188: URL access list allowing all URLs
Figure 190: User Interface - Enable Autohide tool bar
Figure 191: Web Browser - Enable Full Screen
Figure 192: Swipe down to show tool bar
Figure 193: Swipe up to hide tool bar
Figure 194: GSW Browser Standard Telephone Keyboard
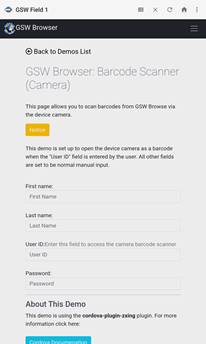
Figure 195: GSW Browser Barcode Scanner Plugin Example
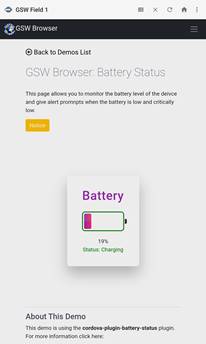
Figure 196: GSW Browser Battery Status Plugin Example
Figure 197: GSW Browser Camera Plugin Example
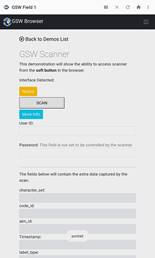
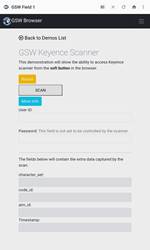
Figure 198: GSW Scanner Plugin Example
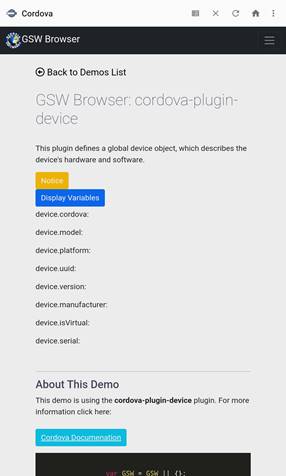
Figure 199: GSW Browser Device Variables Plugin
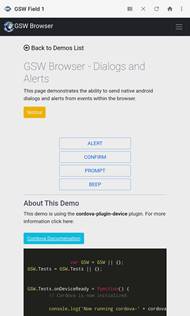
Figure 200: GSW Browser Dialogs and Alerts Plugin
Example
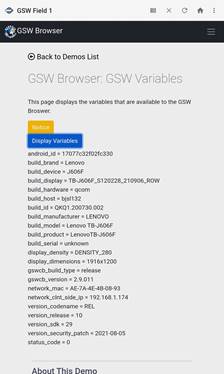
Figure 201: GSW Variables / Device Plugin
Figure 202: GSW Browser File Storage Plugin Example
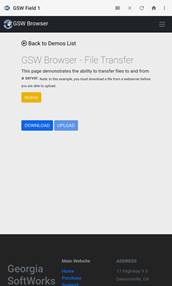
Figure 203: GSW Browser File Transfer Plugin Example
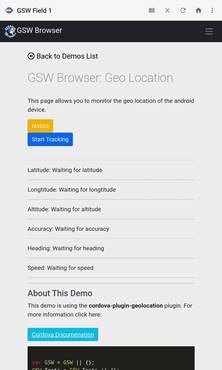
Figure 204: GSW Browser Geo Location Plugin Example
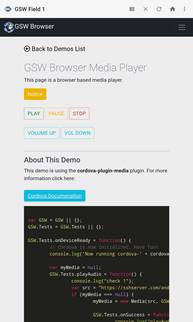
Figure 205: GSW Browser Media Player Plugin Example
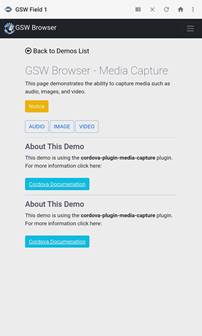
Figure 206: GSW Browser Media Capture Plugin Example
Figure 207: Network Plugin Example
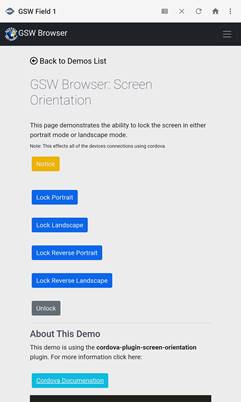
Figure 208: GSW Browser Screen Orientation Plugin
Example
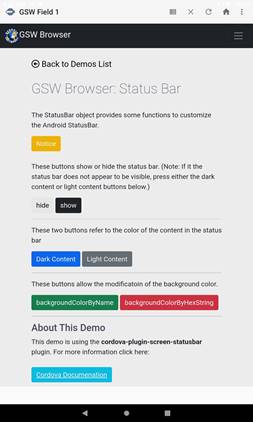
Figure 209: GSW Browser Status Bar Plugin Example
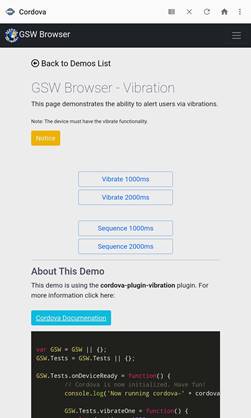
Figure 210: GSW Broswer Vibration Plugin Example
Figure 211: Zebra Bluetooth Printing Plugin Example
Figure 213: GSW LADS setup program
Figure 214: User Account Control Dialog
Figure 215: Setup progress bar
Figure 217: Installation Location
Figure 220: LADS Registration UAC dialog
Figure 221: GSW LADS registration tool opens
Figure 222: Registration Tool with completed
information
Figure 223: Registration Tool - Serial Number Entered
Figure 224: Registration Successful
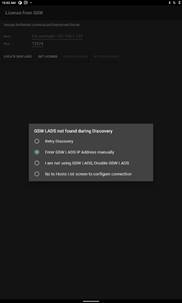
Figure 226: Searching network for GSW LADS
Figure 227: Enter GSW LADS IP Address manually
Figure 228: Enter IP where GSW LADS is located
Figure 229: I am not using GSW LADS, Disable GSW LADS
Figure 230: Automatic Provisioning disabled in Global
Settings
Figure 231: Go to Hosts List screen to configure
connection
Figure 232: Taken to Hosts List screen not changes
made
Figure 233: GSW License Manager tool
Figure 234: Release License - Notice Available License
Count
Figure 235: Enter Android ID, Click Release License
Figure 236: License Released Confirmation
Figure 237: Release License - Notice Available License
Count Incremented
Figure 238: LADSTble.exe folder
Figure 239: Output of LADSTbl.exe utility
Figure 240: GSW LADS - Software Updates
Figure 241: Apk and .json located in the GSW LADS
files folder
Figure 242: GSW LADS Config Upload/Download folders
Figure 243: Easy access to the Config Files via
Windows Start Menu
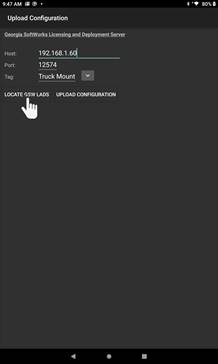
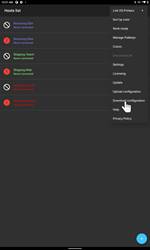
Figure 244: Hosts List - Select Upload Configuration
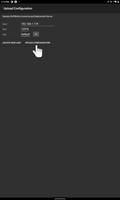
Figure 245: Set Tag field to "Default"
Figure 246: Tap Upload Configuration
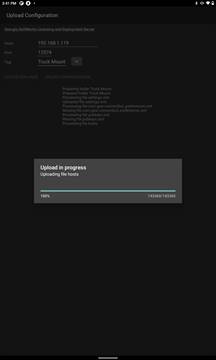
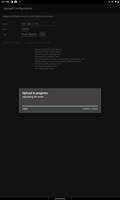
Figure 247: Upload Progress bar
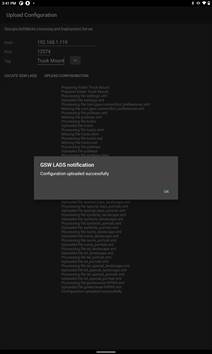
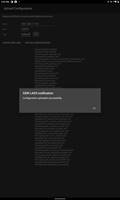
Figure 248: Uploaded Successfully
Figure 249: GSW LADS Screen Shot storage location
Android ID
Figure 250: GSW LADS Screen Shot storage location MAC
Address
Figure 251: Examples of stored Screen shots
Figure 252: pubkey.xml located on GSW LADS
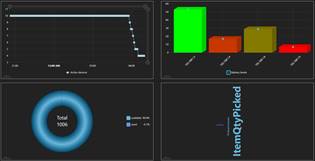
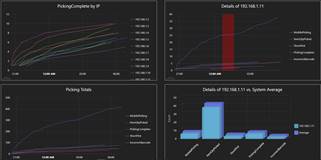
Figure 254: More BI example charts
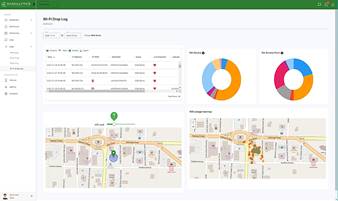
Figure 255: Dashalytics – Wi-Fi Drop Log
Figure 256: Dashalytics - Productivity Dashboard
Figure 257: Business Intelligence Data Flow
Figure 258: Android Lifecycle diagram
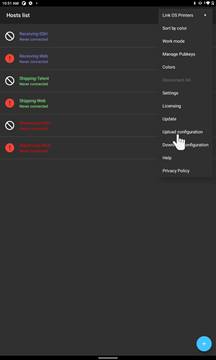
Figure 259: Select Link-OS Printers
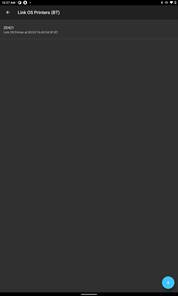
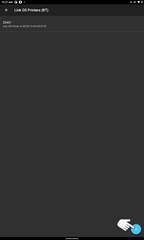
Figure 260: Select Printer Connection Technology.
Figure 261: Printer found. Select Printer
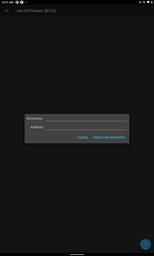
Figure 262: Add a Blue Tooth Link-OS printer
Figure 263: Add a Blue Tooth Low Energy (BTLE) Link-OS
printer
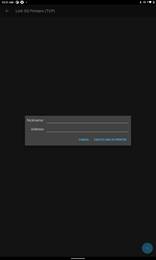
Figure 264: Add a TCP Link-OS Printer
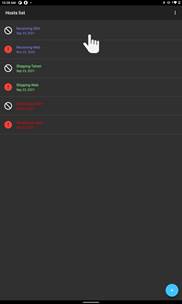
Figure 265: Long Press Host to get to Edit settings
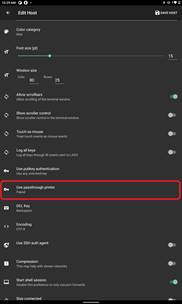
Figure 266: Scroll down to "Use passthrough
printer"
Figure 267: Select Link-OS printer
Figure 268: Screen Recognition/Custom Keyboards
Figure 269: Screen Recognition Fundamentals
Figure 270: Numeric Only Keys - Custom Keyboard
Figure 271: Five Key Only - Custom Keyboard
Figure 272: GSW Keyboard Special Key Definition
Figure 273: Opacity Control on default alpha keyboard
Figure 274: Swipe up to increase opacity/Swipe down to
decrease opacity
Figure 275: Transparency increased to see background
through keyboard
Figure 276: Qwerty keyboard – Black-Green skin
Figure 277: Special Keys keyboard – Stone Skin
Figure 278: Numeric keyboard - Stone skin
Figure 279: Telephone Keyboard – Black-Green (GSW
Browser Only)
Figure 280: Landscape Symbols/Numeric Keyboard
Anchored to Right Edge
Figure 281: Landscape – Alpha Numeric keyboard –
Yellow – Black skin
Figure 282: Landscape Special Keys keyboard - Stone Skin
Figure 283: Landscape Numeric - Stone Skin
Figure 284: QWERTY keyboard – Vista Sky Blue skin
Figure 285: QWERTY keyboard – Black Green Skin
Figure 286: QWERTY keyboard - Black White skin
Figure 287: QWERTY keyboard - Black Yellow skin
Figure 288: QWERTY keyboard – Vista Sangria skin
Figure 289: Numeric keyboard – Stone White skin
Figure 290: QWERTY keyboard – Vista Amber skin
Figure 291: QWERTY keyboard – Vista Green skin
Figure 292: Numeric keyboard – Stone skin
Figure 293: QWERTY keyboard – Android Green skin
Figure 294: QWERTY keyboard – Plum Crazy skin
Figure 295: Qwerty keyboard – White Stone skin
Table of Examples:
Example:
Inject mystyle.css in every page
Example: Inject liveoak.js in pages
Example: Inject greenstyle.css into the home page of
greenfieldsandvalleys.com
Example: Inject oyama.css into all pages
Example: When a host connection is configured for SSH
or Telnet and connected
Example: When a host connection is configured for SSH
or Telnet and it is disconnected
Example: When a host connection configured for http or
https has made connection
Example: When using GSW Unified scanner in web
session, scanned data will be reported
Example Screen Recgonition Event
Example: Duplicate License Removed
Example: Events.txt Activity Started
Example – Events.txt - Activity Resumed
Example – Events.txt - Activity Destroyed
Example: Device Telemetry Data variable change
|
GSW ConnectBot – Admin/Work Mode One Icon GSW ConnectBot Version 2.9.194+ |
|
|
GSW ConnectBot – Admin Mode launcher Icon GSW ConnectBot Version 2.9.186 and below |
|
|
GSW ConnectBot – Work Mode launcher Icon GSW ConnectBot Version 2.9.186 and below |
|
Hand Pointer Icon – used when requested to “tap” or select a location on the screen with your finger, stylus, mouse, etc.
![]()
Hosts - Host is used when identifying the SSH, Telnet, or Web Server to establish a connection
Host Connection and Host Configuration are used interchangeably when referring to the “Configuration that provides GSW ConnectBot with the information to establish a connection to a Host”. Typically used to refer to the list in the Hosts list Screen.
Figure 1: Host Connections / Host Configurations
Sideloading – Installing an application package in APK format on the Android device.
Vertical
Ellipses Icon
Figure 2: Overflow menu
On Window Operation System menu item navigation
Arrows or Pipes will be used
Start->Georgia SoftWorks Licensing and Deployment Server
Or
Start|Georgia SoftWorks Licensing and Deployment Server
Thank you
for purchasing the GSW ConnectBot.
GSW ConnectBot is a simple to use commercial grade Secure
Shell (SSH) and Telnet client for Android. Starting with version v2.8.085 GSW
ConnectBot also includes the GSW Enterprise Browser, built for web-based
applications with industrial grade features required to optimize productivity
and secure access to web pages. GSW ConnectBot is a feature rich client that
both system administrators and users will appreciate. It is well suited to the
demands of industrial environments.
When coupled with the GSW License and Deployment Server
(LADS), Licensing is automatic, Zero Touch configuration is available, and you
can spend more time working than administering. See page 145.
For the system administrator that has many devices to manage,
the GSW ConnectBot comes with GSW LADS that manages licensing, configuration
updates, software updates, and deployments. A light weight, easy-to-use tool
that is a major time saver for the administrator as well as all the people
working on the devices. GSW Business Intelligence gathers structured data that
can be used to assess strong and weak areas of operation allowing opportunities
to improve as needed.
Next to correct operation and usability, security is
paramount. GSW ConnectBot is the most
cryptographically secure, commercially supported SSH client for Android available.
GSW set out to make sure the default
security algorithms are current and considered safe via peer review. No
propriety algorithms, no – non-safe algorithms.
Don’t be the next headline about a security breach.
Dashalytics by
GSW is a data-driven, real time, SaaS application. It operates by taking
events created from GSW ConnectBot and GSW LADS and processing the data to
provide business and operational intelligence. The Dashalytics Icon ![]() will be used to distinguish features or
settings that require the usage of Dashalytics.
will be used to distinguish features or
settings that require the usage of Dashalytics.
Obtaining GSW ConnectBot
GSW ConnectBot can be obtained from the Google Play Store or the Georgia SoftWorks web site. For upgrades you can also obtain from your local GSW LADS (page 108).
Figure 3: Where to obtain GSW ConnectBot
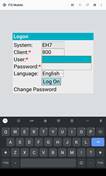
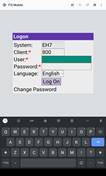
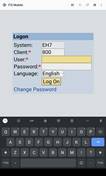
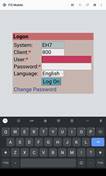
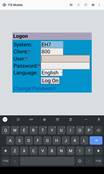
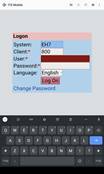
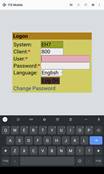
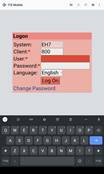
For those wanting to get started fast, here is a quick start step guide to get that first connection up.
Figure 4: SSH Quick Start
Note: Telnet is similar, just be sure to change the Protocol in the Host Configuration from SSH to Telnet.
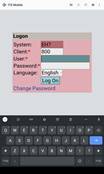
Quick Start GSW Enterprise Browser Configuration
The attached infographic (Fig. 5) provides step-by-step instructions for configuring a basic SSH connection in the app after initial installation.
Figure 5: GSW Enterprise Browser - Quick Start
Installation can be done directly from
Google Play Store or by downloading from Georgia SoftWorks website. The figure
below is an overview of the steps. We strongly recommend downloading from
the Georgia SoftWorks website. This ensures the latest and greatest
features.
Figure 6: First time installation Android 8+
Figure 7: First time installation Android 7.x and lower
To install from Google Play your
device must have internet access.
• On
your Android device, open Google Play Store.
• Search
for GSW ConnectBot.
• Select
GSW ConnectBot – TE & Browser.
Figure 8: GSW ConnectBot Google Play
• Select
Install.
The GSW ConnectBot is a standard
Android Package Kit (APK). Download
GSWConnectBot.apk from the GSW website. If your device has a browser and internet
access you can download and install on the device. Otherwise use another
computer to download the APK and then copy the APK to the device and execute.
Once installed, configure the
connections with the features desired. Please keep in mind that device
settings may vary between Manufacturers and Android versions. GSW ConnectBot
has been tested on multiple devices, and Android versions 9 through 13. GSW
cannot support versions of Android that are no longer supported by Google.
Following are instructions on how to install
GSW ConnectBot on your device. Installation is a simple process. To summarize:
·
Enable Allow Unknown Sources
·
Copy APK to Device
·
Run APK installation
To begin, connect the device to your
workstation via a USB cable. The device should appear in the Windows Explorer
navigation pane.
Figure 9: Android device
listed in Windows Explorer
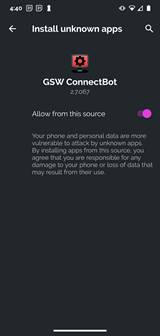
Android security requires that “Install Unknown Apps/Allow from
this source” be enabled in order to sideload updates or write to local storage
from some applications.
Android versions prior to version 8 used a global setting
to control sideloading, and must be enabled prior to the installation of the
application.
This became a per-application setting for Android versions
8 and higher, and the setting can only be changed after the application has
been installed.
Each manufacturer's devices setting location can differ, please
see devices manual for further instructions on sideloading. See generalized
examples below.
Android
Version 8 and higher
Permissions
on Android versions 8+ are set on a per-application basis. Regardless of
whether you install from the Google Play Store or sideload the APK from
www.georgiasoftworks.com, you must enable “Unknown Sources” for the GSW
ConnectBot application to be able to sideload GSW ConnectBot updates from GSW
LADS, and other instances where GSW ConnectBot needs to write to internal
storage of device. Not all manufacturer implementations are the
same. Some will offer a pop-up menu to dynamically set/allow unknown
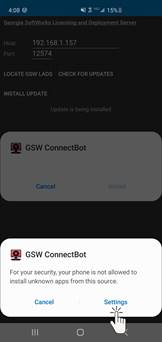
sources, and some will emit a terse error message about the inability to write
data. In most cases, this security setting can be found under the target
application (GSW ConnectBot) in the “Apps” settings menu.
Example: Generalized example of pop-ups to “allow from this
source”.
|
Figure 10: Unknown Apps pop-up |
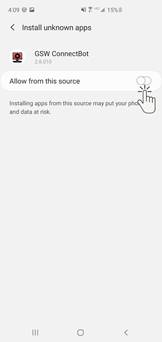
Figure 11: App specific Allow from Source Setting |
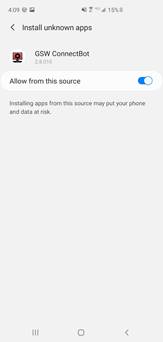
Figure 12: Enable App specific Allow from this
source |
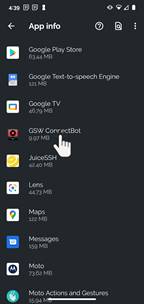
The example below with GSW ConnectBot shows permission error to write to the device. In the device settings, locate the App Info. Tap on the GSW ConnectBot and navigate to “Allow from this source” as shown in Figure 18.
|
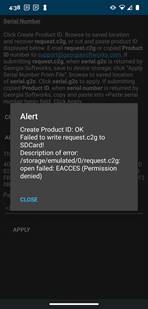
Figure 13: Terse Alert Message Writing to SDCard |
Figure 14: Locate GSW ConnectBot in the app Info. Opens GSW ConnectBot app settings |
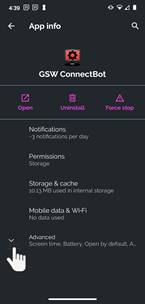
Figure 15: Tap Advanced |
|||
|
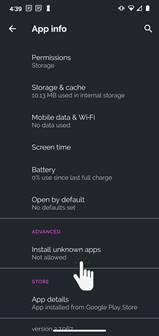
Figure 16: Tap Install unknown apps |
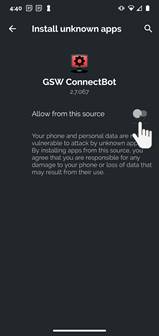
Figure 17: Tap Allow from this source |
Figure 18: Allow from this source is enabled |
|
||
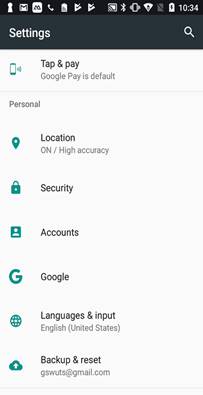
Android Versions Prior to 8
On the device, make sure that “Unknown Sources” is turned ON under “Security” menu in “Settings”.
This allows applications to be installed from outside the Google Play Store.
The name of the “Security” menu may vary from device to device.
|
Figure
19: Set Unknown Sources |
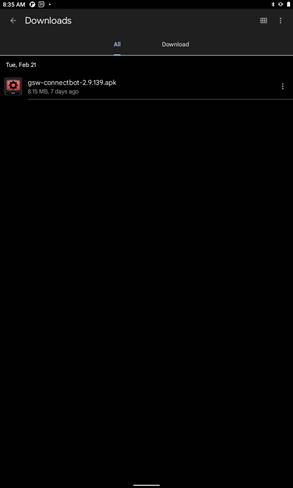
Copy the GSW ConnectBot APK to the device using Windows Explorer,
download or by whatever method you choose, preferably to the “Download” folder,
as some device File Managers limit access to files at the root of storage. The
name of the actual GSW ConnectBot APK is gsw-connectbot.apk or gsw-connectbot-version.apk, where version is the
version number of the release.
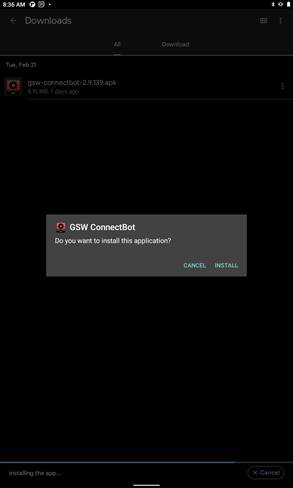
Next, Tap the GSW ConnectBot APK shown in Figure 20 and the
screen in Figure 21 is displayed.
|
Copy APK to the Device |
Installation Screen |
|
Figure 20: APK on device |
Figure 21: Install screen |
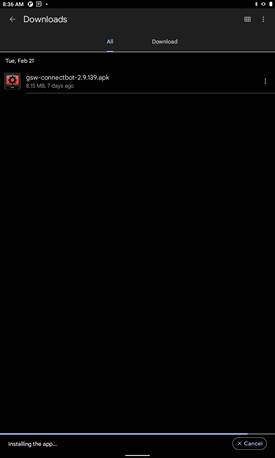
Next, tap the “INSTALL” button as shown below in Figure 21.
Installation continues and completes.
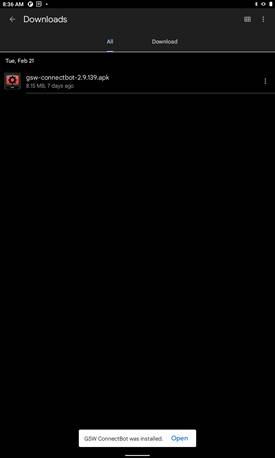
|
Figure 22: Installation progress bar |
Figure 23: Installation complete |
Tap “OPEN” to immediately begin configuration of GSW ConnectBot. The App will open into administrative mode by default, as described in the next section.
The GSW ConnectBot, built for
commercial environments has administrator mode and a user (work) mode. This provides a clean and distinct division of
roles where the worker can focus on their activities without concern for the
administration details, such as modifying settings or connection profiles. The
Administrative mode is a superset of Work mode, meaning the Administrator can
do everything the Worker can do plus more.
Administrative mode allows
configuration/management of:
·
Link OS Printers
·
Licensing
·
Global and Host Settings
·
Creation/Deletion and configuration and use of
connections
·
Manage Public/Private key pairs
·
Background/Foreground color translation
·
Enter Work mode
The Work mode is used for:
·
Launching preconfigured connections
·
Updating the software
·
Downloading configuration
·
Licensing
The administrator can preconfigure many
connections to multiple host computers. Multiple connections can be active
simultaneously, and the user can easily navigate between connections. The Work mode is a restricted, lockable
version for the end users that the administrator controls.
Work mode users can only launch
preconfigured connections created by the administrator. This allows workers to
only use these preconfigured connections without the risk of inadvertently
modifying settings, thus reducing errors and saving time. Additionally, the Work mode user can be
further limited to running only GSW ConnectBot, using a process called “App
Pinning”, which we will discuss later in this manual (page 100).
Starting with GSW ConnectBot version
2.9.194 and going forward you will only have one app icon displayed. Admin mode
will be accessed from the 3-dot menu on the host list screen. During first
launch you will automatically be in “Admin” mode, once you have configured
device select the 3-dot menu from the host list screen and select “Work mode”
from the menu, this will lock application down for production use. To return to admin mode select the 3-dot menu
and select “Admin mode” a password prompt will be shown enter password (default
password is “admin”)
|
|
GSW ConnectBot Admin/Work Launcher (One
Icon) GSW
ConnectBot Version 2.9.194 and above |
|
|
|
GSW ConnectBot versions 2.9.186 and
below the launcher icon with the gear is the Administrator.
The icon without the gear is for Work mode users which is a restricted,
lockable version for end users.
Note: When
switching between Admin and Work Mode apps (GSW ConnectBot versions 2.9.186 and
below) you must force stop the application, then launch the desired mode.
|
GSW ConnectBot – Admin Launcher Icon GSW ConnectBot Version 2.9.186 and below |
|
Figure 24: Admin and Work Modes |
|
GSW ConnectBot – Work Launcher Icon GSW ConnectBot Version 2.9.186 and below |
|
Table 1:
Admin and Work Launcher Icons
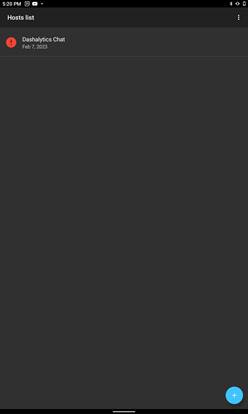
Once GSW ConnectBot is launched a
pre-configured HTTPS host will automatically be configured to chat with
Dashalytics by GSW. ![]()
|
Figure 25: Pre-configured Dashalytics Chat Host |
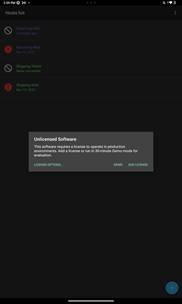
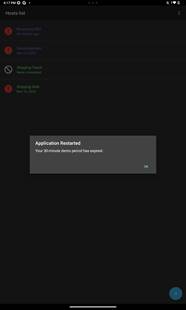
When first obtained and installed the GSW ConnectBot will operate in demo mode, that will allow a fully functional 30-minute connection to use for evaluation purposes.
To enable permanent operation, a software license needs to be applied. Registering the software is the process to obtain and apply a valid license for the GSW ConnectBot.
There are two options available to license the GSW ConnectBot
· Fast Registration - Use the Georgia SoftWorks Licensing and Deployment Server (LADS) See page 25
· Manual Registration - Send product identification code to GSW and a serial number is returned and applied. See page 28
Registration - This entails sending a product identification code to GSW and we will return a Serial Number. Apply the serial number and this activates the license for GSW ConnectBot.
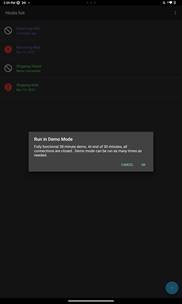
When launching a host, you will receive prompt shown in Figure 26, if unlicensed software is detected. To continue in Demo mode, select “demo”, a confirmation prompt will appear (Figure 27) select OK. The host will launch and allows connection to host for 30-minutes, when 30-minutes has ended the host will disconnect and the prompt shown in Figure 29 will be shown.
|
Figure 26: When launching a host and unlicensed software detected |
Figure 27: Selected Demo - prompt to continue in Demo Mode |
|
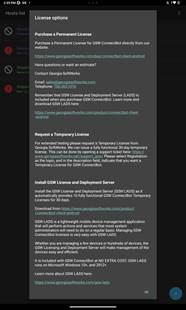
Figure 28: Selected License Options - Description on how to obtain license |
Figure 29: Prompt after 30-minute demo has expired |
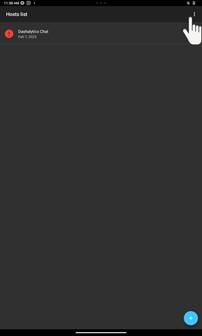
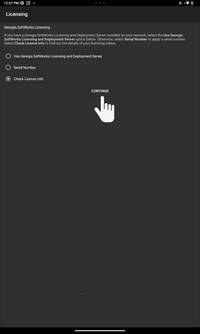
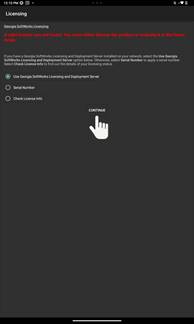
To determine the status of your GSW ConnectBot license, navigate to the GSW ConnectBot Licensing screen.
Tap on the Admin Launcher Icon.
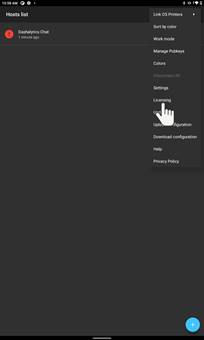
Tap on the overflow menu as shown in Figure 30.
The overflow menu opens. Now tap on Licensing as shown in Figure 31, and the licensing screen opens as shown in Figure 32
|
Figure 30: Hosts - More Options |
Figure 31: Hosts - Licensing |
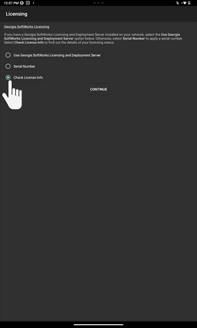
Tap on Check License Info, followed by CONTINUE
|
Figure 32: Check License Info |
Figure 33: Tap Continue to see License Info |
The type of license assigned to GSW ConnectBot is dependent on the installation and registration process. The software can have three types of licenses:
· Demo Mode - When installed via the Google Play store or an .apk from the GSW website, fully functional 30-minute demo for evaluation. (Unlicensed Software)
· Temporary – Manual temporary licenses are issued by GSW[1] through registration and allow for a fully functional license for a temporary period of time. GSW LADS initial download and install will automatically allow for temporary licenses for up to ten devices for a 30-day period (The license count and time period can be extended by a registration request to GSW)
·
Permanent –
Once GSW ConnectBot licenses have been purchased and
product has been registered manually or by GSW LADs, GSW ConnectBot will obtain
a permanent license. Permanent licenses will not expire.
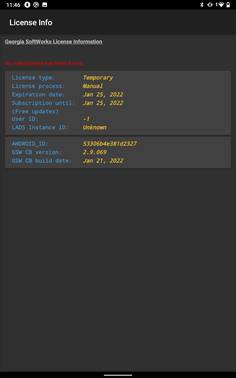
The GSW ConnectBot License information shows the license status, the registration process, the subscription expiration date and other relevant information to the license status.
Expiration date
Temporary License Type: Date that the software will stop operating
Permanent License Type: Not Set; the
software will not stop operating
Subscription until – The date that the subscription expires. The software will continue to operate with entitled versions. Versions released after the subscription date will not operate unless the subscription is renewed. In addition to access to free version upgrades, premium technical support is also included for the duration of the subscription.
User ID – Internally used and for diagnostic purposes
LADS Instance ID – GSW LADS Identifier can be found in GSW License Manager (see page157)
Lease expiration date – Date that GSW LADS will renew license
for more information (see page 157)
Android_ID – This is an
Android Identifier string
GSW CB Version – The GSW
ConnectBot Version installed
GSW CB build date – The GSW
ConnectBot build date
Examples of the GSW ConnectBot licensing information are shown on the following pages.
If the software is operating using the Temporary license the status will be similar as shown in Figure 34.
|
Temporary
Version |
Temporary
Version Expired – No License |
|
Figure 34: Free Temporary Manual License Found |
Figure 35: Temporary Manual License Expired |
Expired Temporary or Expired subscription license status is show in Figure 35 and Figure 36.
Subscription Expired – New software version not allowed with
expired subscription
Figure 36: Subscription Expired
When a permanent license is applied using a Manual registration,
it will be displayed similar as shown in 
Figure 37
If the software was licensed via GSW LADS (License and Deployment Server) the License information will look as described in Figure 38.
|
Permanent
License – Manual Registration |
Permanent
License – GSW LADS Registration |
|
Figure 37: Permanent License - Manual Registration The date that the subscription expires is shown as well. |
Figure 38: Permanent License Applied – GSW LADS Free version updates and support are available through the “Subscription Until” date. |
If you have the Georgia SoftWorks Licensing and Deployment Server (LADS) installed, obtaining a license for GSW ConnectBot is a breeze.
See your system administrator to determine if GSW LADS is installed or use the GSW ConnectBot Locate GSW LADS “button” to try and locate a GSW LADS.
To lease a license, GSW ConnectBot locates the GSW LADS and requests a license.
Navigate to the Georgia SoftWorks Licensing screen. Select “Use Georgia SoftWorks License Server” radio button and TAP “Continue” as shown in
Figure 39.
The screen in Figure 40 is opened.
|
Figure 39: Register Using GSW LADS |
Figure 40: Automatically Locate GSW LADS |
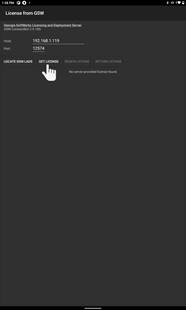
1. If the Host is not already populated then you must Locate GSW LADS. If it is populated then you can skip this step.
TAP “LOCATE GSW LADS” as shown in Figure 40 to locate the GSW License and Deployment Server. Notice that the Host does not need to be manually filled in unless GSW LADS cannot be located. Also, the default port 12574 should not be changed without a good reason.
When located, the screen is updated. The Host address of the GSW LADS server as shown in Figure 40 Note: Your host IP address will be different than the one displayed in the example.
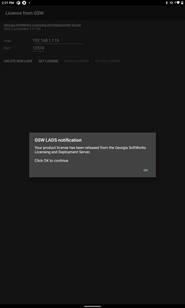
2. TAP “GET LICENSE” as show in Figure 41.
If a license is available for distribution, GSW ConnectBot will be licensed. This is confirmed by GSW LADS that the product license has been retrieved. TAP “Continue” to finish licensing.
|
Figure 41:Product License retrieved from GSW LADS |
Figure 42: Get License for GSW LADS |
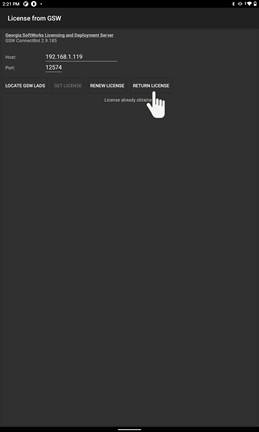
If a device is being de-commissioned; return the license to GSW LADS so the license can be reused with another device. Navigate to Georgia SoftWorks Licensing and Deployment Server as described starting in
Figure 39.
Locate GSW LADS as shown in Figure 40 and Figure 42.
TAP “Return License” (Figure 43)button to unregister the device and return the license to the pool to be distributed again.
|
Figure 43: Return GSW ConnectBot License from device |
Figure 44: Notification that the License was successfully released. |
Your license has been returned to GSW LADS. Please note that at this point GSW ConnectBot will no longer operate on this device.
Note 1: Only licenses obtained from GSW LADS may be returned to GSW LADS.
Note
2: Licenses are not portable between GSW LADS instances.
In brief, the Manual registration entails creating a Product ID, then sending it to GSW. GSW will use the Product Id to generate a device specific Serial number and send it to you. The Serial Number is used to apply a permanent license.
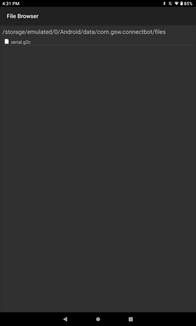
When GSW ConnectBot (version 2.8.010 and higher) generates the Product Id, it saves it in a file named “request.c2g”[2] and places it at the {root}/Android/data/com.gsw.connectbot/files.
Note: if using GSW ConnectBot version 2.7.067 or lower, the “request.c2g” file will store at the root of main storage.
That file is sent to GSW to generate and GSW sends a file back with the name “request.g2c”[3] that contains the serial number.
Step by step instructions follow.
Navigate to the Licensing screen to Manually register the software. This is de,5scribed as shown in the “check the license status” on page 19.
Tap on Serial Number radio button as show in Figure 45, then tap on continue.
|
Permanent
License – Manual Registration |
|
|
Figure 45: Permanent License – Serial Number |
Figure 46: Permanent License - Continue |
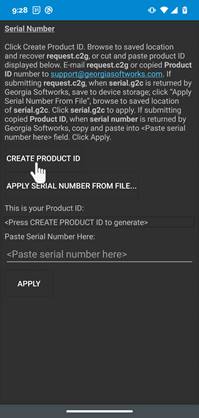
The screen to create the Product ID is opened as show in Figure 47.
Step 1. Tap “CREATE PRODUCT ID” to generate
a product id as shown Figure 47.
A pop-up indicating that the creation of the product id was successful
as shown
|
Create
Product ID |
|
|
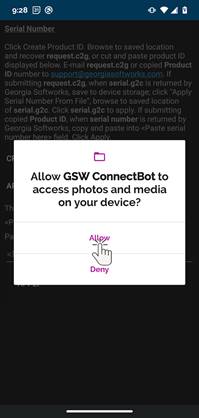
Figure 47: Create Product ID |
Figure 48: Allow access if needed |
Figure 49: Close Dialog
The Product ID
is displayed as shown in Figure
50.
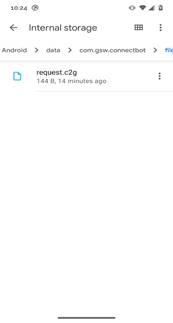
Additionally, a file “request.c2g” is
created and placed in {root}/Android/data/com.gsw.connectbot/files when using
GSW ConnectBot versions 2.8.010 and higher as shown in Figure
51.
|
Create Product ID |
|
|
Figure 50: Product ID created |
Figure 51: request.c2g placed in root/android/data/com.gsw.connectbot/files |
|
Figure 52: Request .c2g placed in root - v2.7.067 and lower |
|
Step 2. Copy the file “request.c2g” to a location either on the device or another computer where you can send it to GSW.
Step 3. Go to the GSW Support Page (preferred and fastest method) to initiate a registration ticket and attach the “request.c2g” file. You may need to move the file from the root of main storage to another folder (Download) to be able to copy it via USB or another method to make it available for sending to GSW.
A few alternate methods exist to send the Product ID to GSW to the 3 steps above.
·
Alternatively email the file to registration@georgiasoftworks.com
OR
· Copy and paste the Product ID from the Serial Number screen and send it to GSW as in Step 3 above. To copy the Product ID – Press and hold your finger on the Product ID, a Copy/Paste dialog will appear. Tap “Copy” to send the product ID to the Android clipboard, and paste it to a location where you can send it to GSW via the GSW Support Page or email as described above
Georgia SoftWorks will take the Product ID and generate a serial number that is device specific and send it back to you via the GSW Registration ticket system. Simply apply the Serial Number to activate the permanent license.
GSW will return a “serial.g2c” file that contains the Serial Number to activate the permanent license.
Step 1: (Starting with version v2.9.022+)
Copy this file to the root/android/data/com.gsw.connectbot/files folder on your device as shown using the Android file manager in Figure 53.
|
Figure 53: Copy serial.g2c to root folder described |
Figure 54: Apply Serial Number from file |
Step 2: Apply Serial Number from File
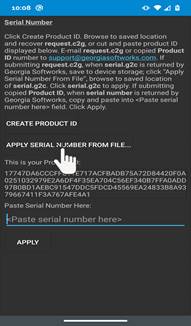
Navigate to Manual Serial Number screen (as shown in Figure 45 and Figure 46) and TAP on APPLY SERIAL NUMBER FROM FILE as shown in Figure 54.
The GSW ConnectBot file manager opens that allows you to navigate the folder locations on the device.
Go to the location you placed the serial.g2c file in step 1.
TAP on the file serial.g2c.
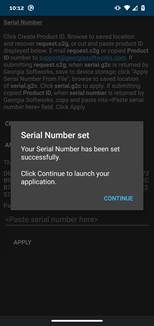
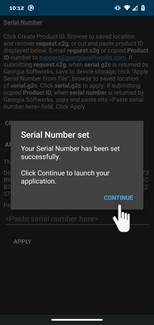
The screen that the Serial Number was successfully set is displayed as shown in Figure 56.
|
Figure
55: Locate the serial.g2c file |
Figure 56: Serial Number Applied Successfully |
Figure 57: All Done, Tap Continue |
You license is now permanent. TAP Continue to launch the GSW ConnectBot.
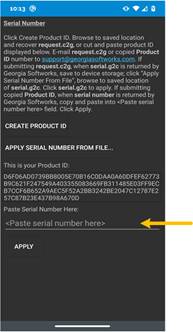
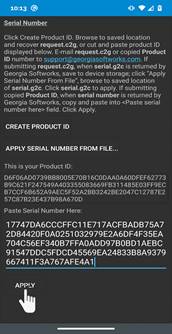
Note: As an alternative to selecting a serial.g2c file, you can paste the Serial Number in the field “Paste serial number here” as shown in Figure 58. Once you paste it then Tap APPLY as shown in Figure 59
|
Figure 58: Paste Serial Number |
Figure 59: Tap APPLY after pasting serial number |
The serial number is applied
and the license is permanent. Tap CONTINUE.
An important benefit of a GSW ConnectBot subscription is that it allows access to version upgrades at no additional cost. This is important to easily obtain new features that are introduced and problem resolutions that are rolled out.
Similar to licensing, updates can be obtained and installed either using the License and Deployment Server (LADS) or manually. GSW LADS make checking for updates and installation a breeze.
Administrator Mode or Work Mode can both perform software updates. Often it is easier for the user in Work mode perform the update rather than the system administrator touching all the devices.
|
Figure 60: Admin Mode - Update software |
Figure 61: Work Mode - Update Software |
Managing the GSW ConnectBot version can also be done from the server.
The administrator can place specific files on GSW LADS that allow
GSW ConnectBot to get software updates (see page 160).
Note: Android 11 implemented new security changes that require modification
of the GSW ConnectBot update procedure in certain situations. On Android 11, if upgrading GSW ConnectBot
version 2.7.067 or earlier, the .apk file must be manually placed on the
Android device (not in the GSW LADS folder).
GSW ConnectBot 2.8.010 and later is updated using the normal
process.
When the GSW ConnectBot client checks for an update, if a newer version has been placed in that location, it will confirm that an update is available and ask if you wish to perform the update.
Tap on the Admin or Work Launcher Icon (below is in Admin mode).
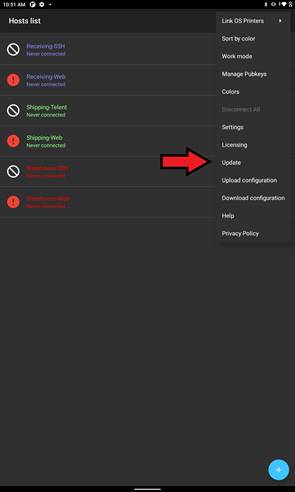
1. Tap on the “over flow” menu in the upper right-hand corner of the client.
2. Select “Update” from the menu.
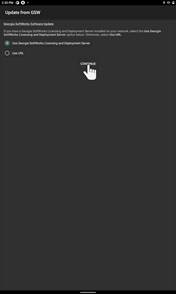
3. Tap “Use Georgia SoftWorks Licensing and Deployment Server”
4. Tap “CONTINUE”
5. Tap “CHECK FOR UPDATES”
|
Figure 62: Hosts - More Options - Update |
Figure 63: Tap Update |
Figure 64: Update TAP GSW LADS |
Figure 65: TAP Continue |
Figure
66: Check for Update |
|
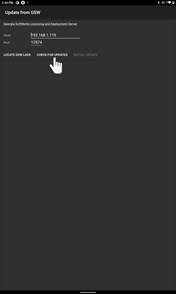
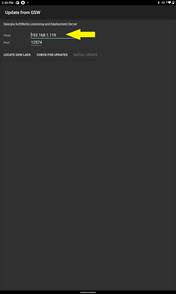
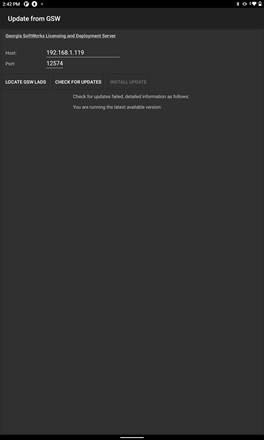
If the Host field (Figure 67) is not already populated then you must Locate the GSW LADS. If it is populated then you can skip this step.
Tap “LOCATE GSW LADS” as shown in Figure 68 to locate the GSW License and Deployment Server. Notice that the Host does not need to be manually filled in unless the GSW LADS cannot be located. Also, the default port 12574 should not be changed without a good reason.
Figure 67: Use GSW LADS Update Screen |
Figure 68: Locate GSW LADS |
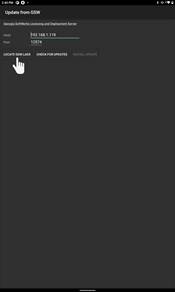
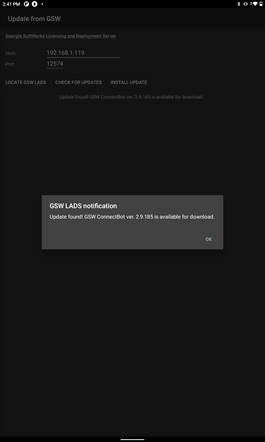
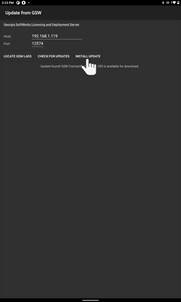
6. If a different version of the GSW ConnectBot client is available the “Update Found!” message will be displayed as in Figure 69. (Go to step 8)
7. If no update is available, you will receive a message that “You are running the latest available version:” as shown in Figure 70. No need to go further (swipe right/or back button to go to host screen)
|
Figure 69: GSW LADS - Update Found |
Figure 70: GSW LADS - running latest version |
8. Click “OK”.
9. Click “Install Update”
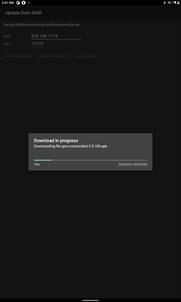
10. A progress bar will be displayed to provide the status of the download.
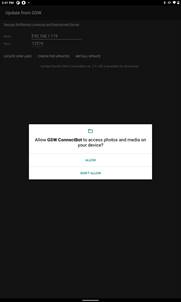
11. Once the download is complete, Android Security will ask for permission tap “Allow”
Figure 71: Install Update |
Figure 72: May be prompted to allow access to photos |
Figure 73:
Update is downloading |
|
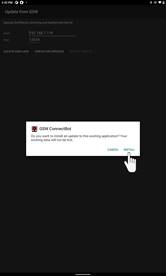
12. A confirmation message will pop-up asking if you wish to install the update.
13. Click “INSTALL” to proceed with the update.
14. When the download is complete, tap open to relaunch GSW ConnectBot and connect to a session.
|
Figure 74: Install Update |
Figure 75: Tap Open to launch |
Note: Sideloading example on page 13
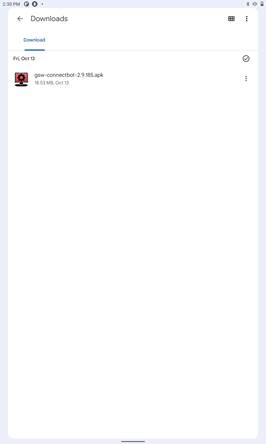
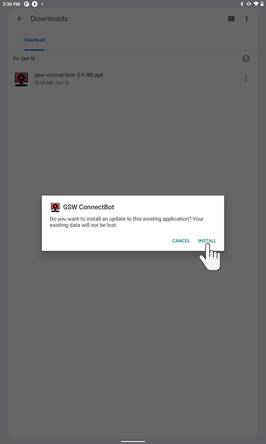
Copy the new version GSW ConnectBot APK to the device using Windows Explorer, download or by whatever method you choose, preferably to the “Download” folder, as some device File Managers limit access to files at the root of storage. The name of the actual GSW ConnectBot APK is gsw-connectbot.apk or gsw-connectbot-version.apk, where version is the version number of the release.
|
Figure 76: Select version to install |
Figure 77: Tap install |
The
hosts configuration and licensing are not affected when the updated version of
GSW ConnectBot has finished.
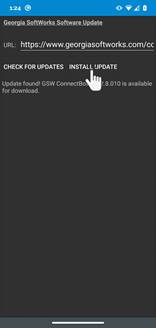
URL Update allows you to update GSW ConnectBot
directly from a web location. By default, the URL points to the GSW website[4]. You may also download the
.apk and .json file and place them on your own intranet website for download.
Select “Update” from the overflow
menu.
|
Figure 78: Tap the overflow menu |
Figure 79: Tap Update |
Figure 80: Select Use URL |
Select “Use URL” then select
“Continue”. The URL default is updating from the GSW Website. If using a website,
type the URL in “URL:” field. Tap “Check for Updates” button (Figure 82).
|
Figure 81: Tap Continue |
Figure 82: Tap Check For Updates |
Figure 83: Update Found - Tap OK |
Above images show tapping the “Check For Update” button. You will then see a message stating you are running the latest available version or “Update Found!” as shown in Figure 83. If update is found tap OK and you will then see the “Install Update” button highlighted (Figure 84).
|
Figure 84: Install Update button highlighted |
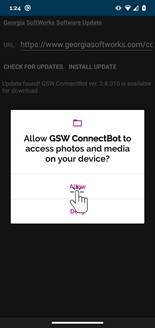
Figure 85: You may a security prompt - tap Allow |
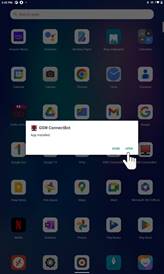
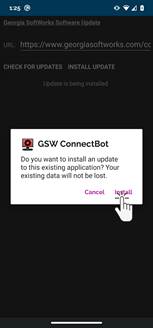
Figure 86: Tap Install |
|
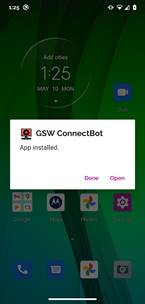
Figure 87: Installed |
|
|
Once the “Install Update” button has been tapped, you may or may not[5] receive an Android pop-up asking for access to photos and media on device (Figure 85). If you do, select “Allow”. Then you will have the option to finish installation just follow prompts. After the update has been installed you can launch the GSW ConnectBot app and all host configurations remain the same.
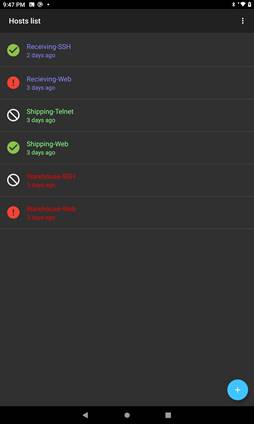
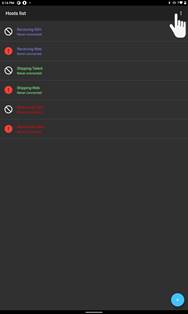
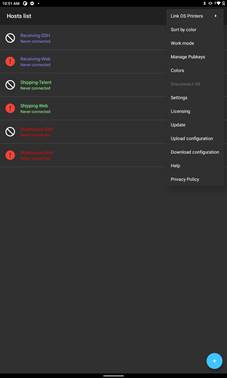
The “Hosts List” screen displays all the
configured connections and the connection status of each one. When using the System
Admin icon ![]() , you can
add, delete, and modify configurations as well as initiate connections. Unless
noted otherwise, configuration description is by the System Administrator.
, you can
add, delete, and modify configurations as well as initiate connections. Unless
noted otherwise, configuration description is by the System Administrator.
Starting with GSW ConnectBot version 2.9.194
and going forward you will only have one app icon displayed. Admin mode will be
accessed from the 3-dot menu on the host list screen. During first launch you
will automatically be in “Admin” mode, once you have configured device select
the 3-dot menu from the host list screen and select “Work mode” from the menu,
this will lock application down for production use. To return to admin mode select the 3-dot menu
and select “Admin mode” a password prompt will be shown enter password (default
password is “admin”)
Multiple connections can be defined, each with
a nickname and color-coded text for easy identification.
Additionally, you can have multiple
connections running simultaneously and navigate back and forth between them by
horizontal swiping and by the selection of tabs.
Open GSW ConnectBot App on your
Android device.
Figure 88: Creating a Host
Tap the plus sign button in the
lower right corner to start a new host configuration.
The following screen is displayed (Figure
89):
|
Figure 89: Configuring a Host connection |
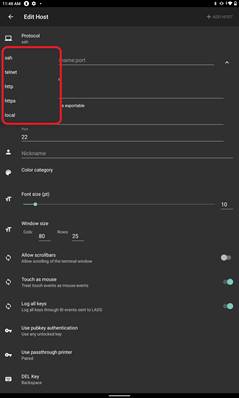
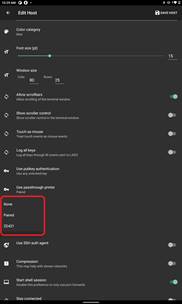
Configuration Parameter and
defaults are emboldened. SAVE – Tap the plus sign to save the configuration Protocol: Options are ssh, telnet, http, https,
and local. Local gives access
to the local Android shell. This is the username and hostname/IP
address of the ssh host. Entered
in the format <username>@<hostname> Automatic
Logon: Click the check box to access Username and Password fields for
Automatic Logon Mark
Password as exportable: Click the check box to include the
password in the exported configuration Nickname: Nickname: Easy name to associate with
the username/hostname on the ssh host configuration. This is displayed on the
Hosts screen (Figure 90) Color category: Color category: This is the color for
the text displayed in the Hosts screen. Font size (pt.): Font size: Can be adjusted when
“Allow scrollbars” is enabled. Otherwise GSW ConnectBot will calculate the
optimal font size to utilize all available space. Window
size: Adjust window size to match your server’s settings. Default 80 Cols 25 Rows. Allow
scrollbars: Options:
enabled /
disabled. Enables scrolling when the Window
size exceeds the display size. When enabled, Optional “Show Scroller Control”
is displayed. It provides a widget that can be used to scroll vertical and
horizontal. Touch
as mouse: Options: enabled / disabled. Enables
touch as mouse events, if supported by hardware. Translates Touch events to
Mouse Events for server. Log
all keys: Options: enabled / disabled. Enables log of all keys
through BI events and sent to LADS/Dashalytics Use
pubkey authentication: Options
are: “Use any unlocked key”, “Do not use keys” and select one of the
available public keys. Ignore this if using telnet as the protocol. Use
passthrough printer – Allows
host to print to printers attached to client. Provides printing to paired
printers DEL
Key: Options: Delete or Backspace Encoding: Options: UTF8 / multiple options available. Use
SSH auth agent: Options: enabled / disabled. Handles subsequent
SSH Auth. Compression: Options: enabled / disabled. May help with slower networks. Start
Shell Session: Options:
enabled / disabled. Disable to
only use port forwards. Stay
connected: Options: enabled / disabled. Try to
reconnect to the host if disconnected. Close
on disconnect: Options: enabled / disabled. Close immediately after a remote
disconnect without prompting. AnswerBack: Enter
an Answerback if needed by your application (see 66 for additional information when using GSW UTS). Post-login
automation: Commands to run on remote server once authenticated. |
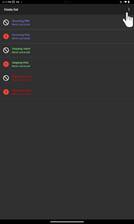
Configured Host Connections are displayed on the Hosts List screen.
Each connection has a status Icon, the Nickname and connection duration. By default, host connections are sorted alphanumerically.
Please notice the icons, the color of the text for each host connection and the nicknames. Each connection is customizable so that you can quickly recognize the connection by the nickname, the text color and the status.
|
Figure 90: Host Connection Screen Display |
The time the connection has been in that status is displayed under the nickname. |
From this screen, you can perform a variety of operations on the connections.
Tap a Host Configuration to initiate the connection
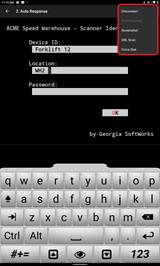
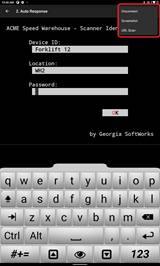
With an active connection, the overflow
menus have the following options for the session.
|
Figure 91 - Tool Bar Menu |
Figure 92 - Admin Mode TE Over-Flow Menu |
Figure 93 - Work Mode TE Over-Flow Menu |
When connected to SSH or Telnet session, the overflow menu provides the operations as shown in Figure 91, Figure 92 and Figure 93 and described below.

|
|
Allows pasting of clipboard data into a field |
|
|
Show GSW keyboard if keyboard is hidden. (Icon will not be shown if using 3rd party or Android keyboard) |
|
|
Hide GSW keyboard. (Icon will not be shown if using 3rd party or Android keyboard) |
|
|
·
Disconnect - Closes the connection ·
Port Forward- GSW ConnectBot provides basic port forward
capability. This menu allows the configuration of port
forwards. ·
Screen Shot- Takes a screen shot of the activity on the device.
Only 2-Taps. See Below. ·
URL Scan- Scans host session screen for URLs. Any found are
placed in a clickable list. Users can tap on the list to request the
operating system to open selected URL
on the device. ·
Force Size- NA, Do not use. |
Table 2: TE connection options
When connected to a Web session, the overflow menu provides the operations as show in and described below
|
Figure 94: Cordova Examples Home Page |
Figure 95: Industrial Browser Overflow Menu |

|
|
Returns
to “Hosts list” screen without closing session |
|
|
Closes
session, returns to “Host list” screen |
|
|
Refreshes
current webpage |
|
|
Returns
to homepage of current session |
|
|
Overflow
menu as shown in Figure 95 ·
Show Keyboard – available
if “Use GSW keyboards for web” is enabled in global settings ·
Hide Keyboard –
Available if “Use GSW
keyboards for web” is enabled
in global settings and the keyboard is shown on screen ·
Clear – Clear
cache, history, cookies, for data, certificates, passwords ·
Back in Browser
history – if history is available ·
Forward in
Browser history – if history is available ·
Screen shot –
Sends screenshot to LADS |
Table 3: Web connection options
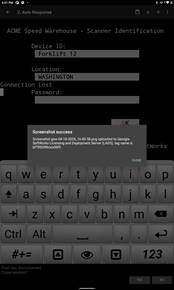
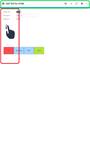
The GSW ConnectBot allows for screenshots to be quickly captured as needed. The need for screenshots has been around for years. If an anomaly or application error occurs the worker may need help with a screen, but not at that instant.
Other Android clients offer screenshots, but there is a difference. Often complicated navigation is required to get to the screenshot command. GSW ConnectBot purposely designed screen shots to be quick and easy as to minimize work interruption. This allows the worker to grab the screen shot and continue working.
|
Figure 96: Tap 1 - Tap overflow menu |
Figure 97: Tap 2 - Tap Screenshot |
Figure 98: Success. This prompt can be disabled in the Global Settings. |
Additionally, GSW ConnectBot can be configured to either store the images on the device or automatically send to GSW LADS where they can be viewed by the administrator at their convenience.
Administrators have easy access and are able to provide immediate support for devices in production from the comfort of their desk.
The worker simply taps the overflow menu and then taps “Screenshot” and boom - done! The image
is uploaded to LADS see 163.
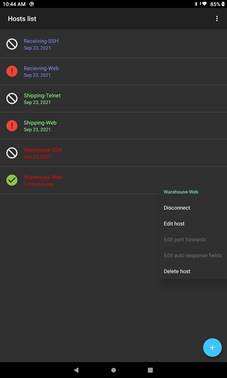
|
Figure 99: Telnet/SSH Host List - Long Press Menu |
Figure 100: Web Host List - Long Press Menu |
To access to the Host Connection menu, use a “Long Press” (Touch and Hold) on the specific Host connection. The result of the Long Press is a menu is displayed with the following options.
· Disconnect
· Edit Host
· Edit port forward, (Web Host Menu greyed out as option not available to edit)
· Edit auto response fields, (Web Host Menu greyed out as option not available to edit)
· Delete host
· Security Info (only displays when connected to host). (Not available for Web Host Connections)
Tap to Disconnect from the host
Tap to modify the Host Connection settings. You save the changes by Tapping Save Host, in the upper right hand of the screen.
This allows editing of the Host Connection Port Forward settings.
This allows editing of the auto responses fields. The administrator can preconfigure responses that GSW ConnectBot will insert when defined fields are recognized. For example, if the application prompts for the “Department Code”, the administration can preconfigure the “Department Code” so the user does not have to remember and enter the correct department code. The administrator defines the field to scan for, as well as the response when detected.
As many “Auto Response” fields can be configured as needed.
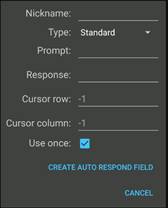
When Edit Auto Response Field is selected, a screen is displayed that shows all the auto responses configured (Figure 102). Tap plus to create the auto response field (Figure 102).
Nickname: This is an easy to remember nickname for this Auto Response.
Prompt: This is the text to scan for from the application.
Response: This is how you want the GSW ConnectBot to reply to the Prompt.
Use once checkbox: This determines if you only want the GSW ConnectBot to perform the auto response one time or if it should respond every time the Prompt appears.
Macros are a tremendous tool when coupled with Auto Response Fields. Please see page 106.
Macros can be used to provide unique device
information such as android id, mac address [6]etc.
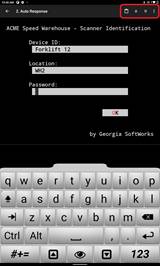
Example: Auto Response
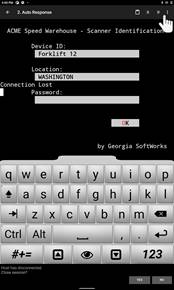
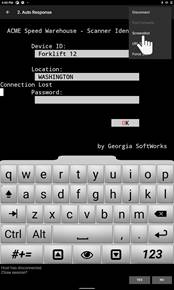
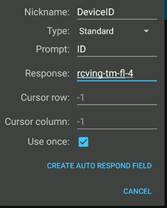
In the example below, each time a device is connected to the server, the application prompts for the assigned Device Identifier. Instead of the user having to remember the identifier for different devices, and entering it, the administrator can create an auto response and preconfigure each device with its identifier.
The nick name is DeviceID. The prompt from the application is ID. The response for this device is rcving-tm-fl-4
|
Figure 101: Create Auto-Response field |
Figure 102: Edit Auto Response Field |
Figure 103: Auto Response Field completed |
This saves the User time, reduces errors in entry providing an easier user experience and more productive work shift. Then tap on Create Auto Response Field.
As shown in Figure 104, you will see the auto response with the Nick Name, Prompt and Response. You can add as many auto response fields as needed.
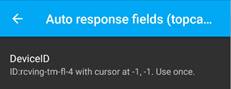
Figure 104: Auto Response created.
A long press on the Auto Response definition will allow you to edit or delete it.
If multiple prompts are required such as User Name/Password, you can use Escape sequences where appropriate in the response to move from field to field, etc.
|
Escape Sequence |
Description |
|
\a |
Form feed |
|
\b |
Backslash |
|
\e |
ESC |
|
\n |
Newline |
|
\r |
Carriage return |
|
\t |
tab |
|
\v |
Vertical tab |
Table 4: Escape sequences for Auto Response
Tap to delete the Host Connection.
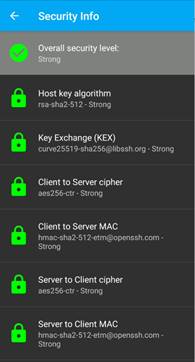
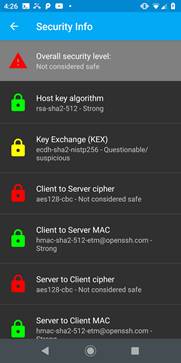
This displays the current status of the SSH Security Algorithms in use. This will let you know the security level of the negotiated algorithms between GSW ConnectBot and the SSH Server.
|
Figure 105: Secure Algorithms |
Figure 106: Un-Secure Algorithms |
If you do not have a Strong Security grade,
you will want to look at any of the main security algorithms that do not have
the Green Lock icon to determine what needs to be done (contact GSW Support).
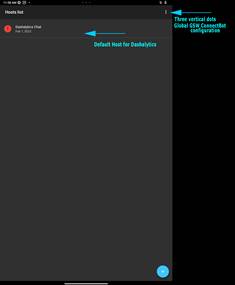
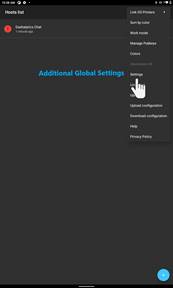
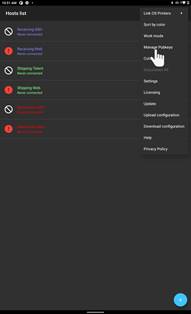
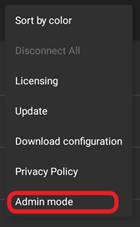
The “Hosts List” Overflow menu (3 vertical dots) allow access to the GLOBAL GSW Connect Bot configuration settings.
|
Figure 107: Menu to access
Global configuration |
Figure 108: Accessing Settings |
|
Figure 109: Select Settings |
|
Additional
settings are accessed by tapping the overflow menu (three vertical dots) in the
upper right-hand corner of the app and selecting “Settings”.
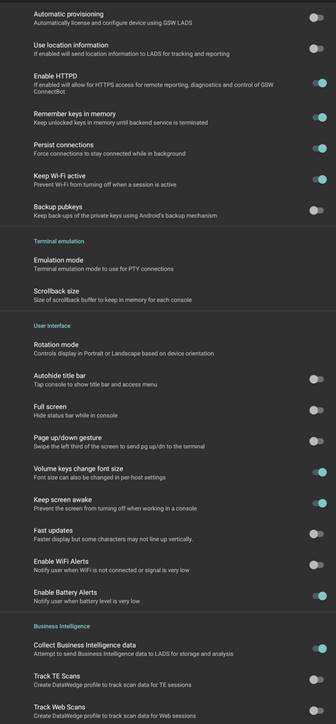
The
available settings are shown in the screen shot in Figure 110:
Global Settings Menu. The settings include:
· Automatic provisioning
· Use location information
· Enable HTTPD
· Remember keys in memory
· Persist connections
· Keep Wi-Fi active
· Backup pubkeys
· Emulation mode
· Scrollback size
· Rotation mode
· Auto hide title bar
· Full screen
· Page up/down gesture
· Volume keys change font size
· Keep screen awake
· Fast updates
· Enable Wi-Fi alerts
· Enable Battery alerts
· Collect Business Intelligence data
· Track TE Scans
· Track Web Scans
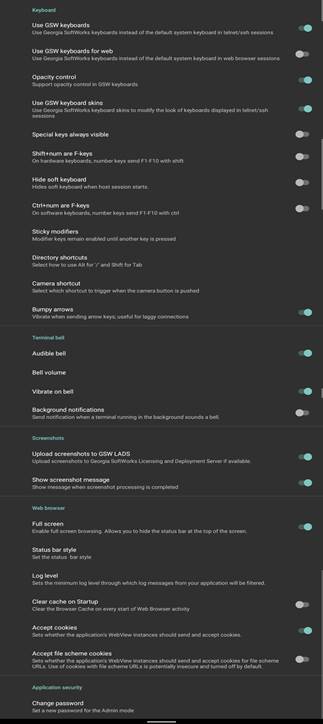
· Use GSW keyboards
· Use GSW keyboards for web
· Opacity Control
· Use GSW keyboard skins
· Special keys always visible
· Shift+num are F-keys
· Hide soft keyboard
· Ctrl+num are F-keys
· Sticky modifiers
· Directory shortcuts
· Camera shortcut
· Bumpy arrows
· Audible bell
· Bell volume
· Vibrate on bell
· Background notifications
· Upload screenshots to GSW LADS
· Show screenshot message
· Full screen
· Status bar style
· Log level
· Clear cache on Startup
· Accept cookies
· Accept file scheme cookies
· Change password
In the list below the default value for setting is “Bolded”
Disabling turns off auto discovering for GSW LADS. Disable when not using GSW LADS. This prevents GSW ConnectBot from searching the network for GSW LADS, allowing (enabled/disabled)
If enabled will send location information to LADS for tracking and reporting. (enabled/disabled)
If enabled will allow for HTTPS access for remote reporting, diagnostics and control of GSW ConnectBot. (enabled/disabled)
Keep unlocked keys in memory until backend service is terminated (enabled/disabled)
Force connections to stay connected while in background (enabled/disabled)
Prevent Wi-Fi from turning off while a session is still active (enabled/disabled)
Keep back-ups of the private keys using Android’s backup mechanism(enabled/disabled)
Terminal emulation mode to use for PTY connections (xterm-color, xterm-256color, xterm, vt100, ansi, screen)
The number of lines indicating the size of the scrollback buffer to keep in memory for each console. (Default 140)
Controls display in Portrait or Landscape based on device orientation. (Default[8], Force landscape, Force portrait, Force reverse landscape, Force reverse portrait, Automatic).
Tap console to show the title bar and access menu (enabled/disabled) The entire session display is the console unless Mouse to Touch is enabled.
Hide status bar while in console (enabled/disabled)
Swipe the left third of the screen to send page up/down to the terminal (enabled/disabled)
Font sizes can also be changed in per-host settings (enabled/disabled)
Prevent the screen from turning off when working in a console (enabled/disabled)
Faster display, but some characters may not line up vertically (enabled/disabled)
Notify user when WI-F is not connected or signal is very low. (enabled/disabled)
Notify user when battery level is very low. (enabled/disabled)
Send Business Intelligence data to GSW LADS for storage and analysis (enabled/disabled)
Create DataWedge profile to track scan data for TE sessions (enabled/disabled)
Create DataWedge profile to track scan data for Web sessions (enabled/disabled)
Use Georgia Softworks keyboards instead of the default system keyboard in telnet/ssh sessions (enabled/disabled)
Use Georgia Softworks keyboards instead of the default system keyboard for web. (enabled/disabled)
Support the ability to control the opacity of GSW keyboards. (enabled/disabled)
Use Georgia Softworks keyboard skins to modify the look of keyboards displayed in telnet/ssh sessions (enabled/disabled)
Special keys always visible (enabled/disabled)
On hardware with keyboards, simultaneous press of [Shift & number] keys send F1-F10 (enabled/disabled)
Hide soft keyboard when host session starts (enabled/disabled)
On software keyboards, number keys send F1-F10 with ctrl (enabled/disabled)
Modifier keys remain enabled until another key is pressed (No, Only alt, Yes)
Select how to use Alt for ‘/’ and Shift for Tab (Use right-side keys, Use left-side keys, Disable)
Select which shortcut to trigger when the camera button is pressed (Ctrl+A then Space, Ctrl+A, Esc, Esc+A, None)
Vibrate when sending arrow keys. Useful for laggy connections. (enabled/disabled)
Bell is audible (enabled/disabled)
Set bell volume (A slider to set the bell volume)
Vibrate on bell (enabled/disabled)
Send a notification when a terminal running in the background sounds a bell (enabled/disabled)
Upload screenshots to Georgia Softworks Licensing and Deployment Server, if available (enabled/disabled)
Show message when screenshot processing is completed (enabled/disabled)
Enable full screen browsing. Enables you to hide the status bar at the top of the screen. (enabled/disabled)
Choose between default, light and dark status bar style. (default, light, dark)
Sets the minimum log level through which log messages from your application will be filtered. (error/warn/info/debug/verbose)
Clear the Browser Cache on every start of the Web Browser activity. (enabled/disabled)
Sets whether the application’s WebView instances should send and accept cookies. (enabled/disabled)
Sets whether the application’s WebView instances should send and accept cookies for file scheme URLs. Use of cookies with file scheme URLs is potentially insecure and turned off by default. (enabled/disabled)
Set a new password for the Admin mode
|
Figure 110: Global Settings Menu |
Figure 111: Global Settings Menu Continued |
Georgia SoftWorks ConnectBot Global Configuration settings
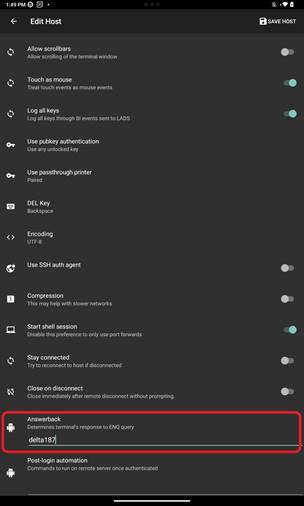
Answerback
allows the mobile client to pass a text string (up to 20 characters) to the
SSH/Telnet server when requested.
The
Answerback string is set in the GSW ConnectBot Host connection configuration.
This is
the only configuration required on the client for answerback.
|
Figure 112: Answerback Settings |
An enhanced method of obtaining the Answerback is available when
using the GSW SSH/Telnet Server (UTS).
The application running on the GSW UTS accesses the answerback value
using the server-side environment variable gwtn_answerback.
This does
not use any screen locations and the display is not impacted as with many
Answerback solutions. An environment variable is much easier to read than a
screen location.
Following
is an example of how to configure the GSW UTS to obtain the Answerback from the
GSW ConnectBot.
The Server-side
configuration consists of a lightweight utility (answerback utility) and logon
scripting (example below). When the GSW ConnectBot connects to the UTS, the
logon script is executed and the answerback utility obtains the Answerback
string from the GSW ConnectBot. It then inserts it in the environment variable
gwtn_answerback for the application to access.
From the GSW UTS SSH/Telnet Server. –
1. Download
and copy the gs_enq.exe, gs_enq64.exe files to a folder that the logon scripts
can access. To download these utilities Click
Here.
2. Set the
user’s home directory to point to a folder where they can write a temporary
file.
3. Edit the
users Logon Script (c_start.bat or k_start.bat) and add the lines to retrieve
the Answerback.
Modify the
Logon script of the User to the following, making sure to change any
environmental variables to match the User connection being queried. In this
example, we are querying for the Answerback of RFUser.
::==========
Start of Logon Script=========
@echo off
set
gwtn_color=1
set
gwtn_graphics=1
set
gwtn_term=1
set
gwtn_home_dir=C:\GS_UTS\scripts\LocalUsers\RFuser
@if
%gwtn_gsclnt%==1 goto :GSW
@set
GWTN_ANSWERBACK=%GWTN_CLIENT_IP%
@c:\gs_uts\gs_enq.exe
@if
errorlevel 1 goto :NOANSWERBACK
@set /P
GWTN_ANSWERBACK=<ab%gwtn_agntpid%.txt
@del
ab%gwtn_agntpid%.txt
@:NOANSWERBACK
@:GSW
<Launch your Application here, using GWTN_ANSWERBACK as a variable>
Example:
C:\hjs\adv\bin\telterm.exe 10.200.150.8 4700 %gwtn_answerback%
::
============ Answerback stored in GWTN_ANSWERBACK.=========
Connect the user to the server using GSW ConnectBot. The
Answerback in the GSW ConnectBot configuration should be returned within the
connection shell.
Note:
On x64 systems gs_enq64.exe must be used instead of gs_enq.exe.
After this block is executed the variable GWTN_ANSWERBACK is going to be set.
Of course, c:\GS_UTS\ must be substituted with your own path.
GSW ConnectBot is the most secure commercially
available SSH Client for Android.
The GSW
ConnectBot is using the current SSH algorithms recognized as secure to ensure
you have the best protection available. Algorithms that are not deemed safe are
not used.
Below we
are going to show you how to configure the GSW ConnectBot
client to make SSH connections using Password Authentication.
Open
GSW ConnectBot App on your Android device.
Tap
the blue plus sign button in the lower right corner to start a new host
configuration.
Figure 113: Creating a Host
|
Configure these options to get a working connection: 1.
Enter <user>@<IP address> and 2.
Check “Automatic Logon” 3.
Enter Username and Password 4.
(Host and Port Autofill). 5.
“Mark passwords as exportable” includes the
password when a configuration is uploaded to a LADS server. 6.
Choose a nickname (not required). ·
You
may also want to modify other items if necessary ·
Select
the Color of the text used on this Host Connection when displayed on the
Hosts list screen. ·
The
Font size does not need to be set unless the column and rows of the Window
Size are set to zero. ·
Adjust
Window size to match your server’s settings. ·
Confirm: o “Start shell
session” is on. o “Stay
connected” is on, to keep trying to reconnect
if disconnected. o Choose whether
to close the session on disconnect. |
Figure 114: Enter Host Information |
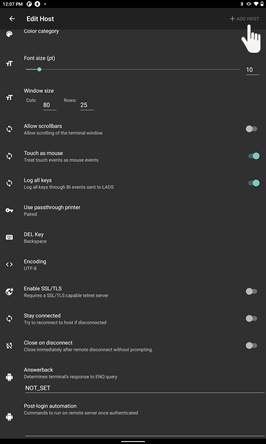
Tap “+ ADD HOST”
in the upper right to save the connection.
Tap on the
connection to connect to your Georgia Softworks Universal Terminal Server.
 Configure a Host Connection Example 2
Public/Private
key SSH connections are an extremely secure and convenient method of logging on
to an SSH host. This method of authentication is more secure than traditional
username and password. Using public/private key eliminates the need for user
name and password entry. Public keys are installed on the server and private
keys are installed on the client.
When using GSW
ConnectBot, GSW LADS, GSW UTS and Public/Private key authentication, users can
be assured that they are using the most cryptographically secure commercially
available SSH solution.
This
example is the same as Example 1, with some configurations difference.
Here are the modified items for
the SSH Public/Private Key Authentication.
You can
configure these options to get a working connection.
1.
Enter <user>@<IP address> and
2.
Choose a nickname (not required).
3.
Tap
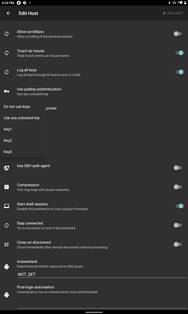
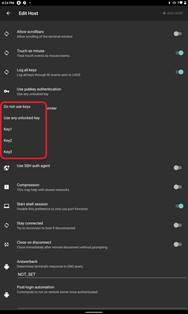
“Use pubkey authentication” as shown in Figure
115. Select hosts specific key
(recommend) or “Use any unlock key” (Default setting)
|
Figure 115: Use pubkey authentication setting in
Edit Host |
Figure 116: If multiple keys are needed |
Figure 117: Select Use any unlocked key (Default) or
choose specific key |
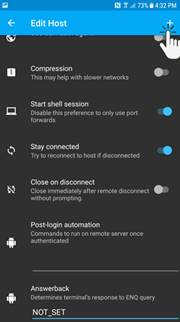
Figure 118: Saving the Connection Installing Private Key to GSW ConnectBot Android Client
Tap the “plus sign” in the upper right corner to save the configuration for the host connection.
Configuring a public/private key pair consist of the following steps.
· Enter the configurable parameters for the Public/Private Keys
· Unlock the Key
· Transfer the public key to the SSH server
· Install the public key on the SSH Server
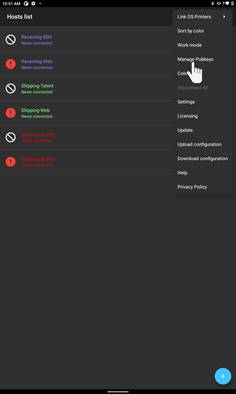
To create a Public/Private key pair on GSW ConnectBot, complete the following steps. From the “Hosts list” screen, tap the “Three Dot” menu in the upper right-hand corner and select “Manage Pubkeys” from the drop-down menu.
|
Figure 119: Tap the Overflow Menu |
Figure 120: Tap Manage Pubkeys |
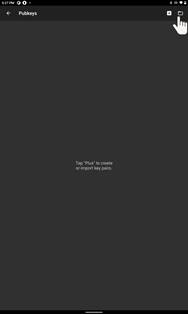
To create a key pair, tap the “+” in the top right corner of the “Pubkeys” screen as shown in Figure 121.
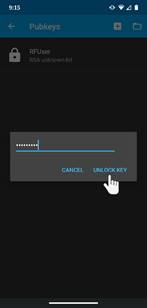
- Nickname: Enter a nickname for the key pair [Required field].
- Type: Select the type of key you would like to generate. [RSA is the default].
- Bits: Select the encryption strength by entering a value manually or by using the slide bar. Anything less than 2048 bits is not recommended.
- Password: Enter a password for your key pair [optional, but recommended].
- Password: (again) Confirm password in previous field
- Load key on start – “Checking” will automatically load key on start of host connection [optional, but recommended].
- Confirm before use – “Checking” will confirm before use will require you to confirm that you want to use the key when you attempt a Host connection [optional, but recommended].
- Tap “Generate”
|
Figure 121: Tap "+" |
Figure 122: Add Nickname (Password is optional) and check Load key on start |
Figure 123: Tap Generate |
The next step will be to generate randomness by moving your finger around the field, the percentage will increase as shown in Figure 125 . Once randomness reaches 100% the key pair is created.
|
Figure 124: Generate Randomness for Keys |
Figure 125: Generate Randomness until 100% |
The Pubkeys screen is opened as shown below in Figure 126 . Tap key to unlock, if password was added during setup a prompt
will pop-up requesting password as shown in Figure 127.
|
Figure 126: Locked Key |
Figure 127: Enter password if added |
Figure 128: Unlocked Key |
There are two options to transfer generated public key to server for mapping of the private key from the GSW ConnectBot to a Windows user account. The most convenient and easy way is to upload the public key with a host configuration (specifically “pubkeys.xml”) to the GSW LADS as explained on page 164. The second way is to long press on the key and tap “Copy public key” as shown in Figure 129, this copies the key to Android clipboard, then paste to a file and transfer to server using a preferred method (ex. Email, USB connection, etc.)
Figure 129: Tap Copy public key
Once the key has been copied to the GSW UTS SSH server see how to configure the Host (Public) key on a GSW UTS SSH Server with Certificate Mapping Tool on page 81.
1. Download PuTTY Terminal Emulator Package HERE.
2. Open PuTTYgen (included as part of the PuTTY
terminal emulator package).

Figure 130: Open PuTTYgen
3. Click the “Generate” button and move mouse over the blank area to generate randomness.
Figure 131: Generate Randomness
4. Key is created.
Figure 132: Enter Passphrase
5. From the top menu bar, select “Conversions”
then “Export OpenSSH Key”.
6. Name and save the key.
7. Click “Save Public Key” name, and save on
server.
8. Using a direct USB connection, copy the
private OpenSSH key, saved in step 6, to the Android device in the following
location:
(Device
Name)\Internal shared storage\Android\data\com.gsw.connectbot\files)
(This
location is also called the GSW ConnectBot external files folder)
1. GSW ConnectBot Version 2.9.194 and above - Enter Admin mode by clicking overflow menu and selecting “Admin mode” enter password (default password “admin”)
GSW ConnectBot Version 2.9.186 and below - Launch GSW ConnectBot – Admin Mode (Icon with gear).

Figure 133: GSW ConnectBot Admin Icon
2. Navigate to the Pubkeys screen by tapping the overflow menu then tapping Manage Pubkeys. Then tap the folder icon in the top right corner.
|
Figure 134: Tap overflow menu |
Figure 135: Tap Manage Pubkeys |
Figure 136: Tap folder icon |
3. Navigate to “Internal shared
storage\Android\data\com.gsw.connectbot\files” and Select key as shown in Figure 137 , this will
import key into GSW ConnectBot.
Figure 137: Select Public Key
4. Tap the key. If a password was entered when the key was generated, you will need to enter it, if not, the key will automatically unlock.
|
Figure 138: Tap key to unlock |
Figure 139: Enter Password if prompted |
Figure 140: Key is unlocked |
1. On the Georgia
Softworks UTS server, go to Start > All Programs > Georgia Softworks UTS
> Certificate Mapping Tool for GSW SSH Shield.
2. Expand Public Key
Mapping, and select 1-to-1. Next click
Add.
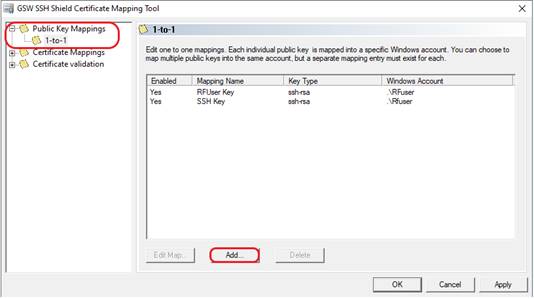
Figure 141: Certificate Mapping Tool
3.
Locate the public key file that
was created and saved in previous steps, either by GSW ConnectBot or PuTTYgen.
Right click on files and select edit. Copy the highlighted area as shown
in Figure
142, Figure
143, or Figure 144. Do not include the leading and trailing description tags.
|
Figure 142: Example of pubkeys.xml uploaded to GSW LADS from key
generated on GSW ConnectBot |
|
Figure 143: Example of public key generated by puTTYgen |
|
Figure 144: Example of public key generated on GSW ConnectBot to
clipboard |
4.
Click “Enable this
mapping”, paste the public key contents shown in previous step in the public
key area. Fill out the rest of the fields below. The User, Domain and Password fields must
correspond to an existing Windows user, that will be using the key pair.

Figure 145: Installing Public Key
5.
The mapping created should now be displayed,
click “Apply”
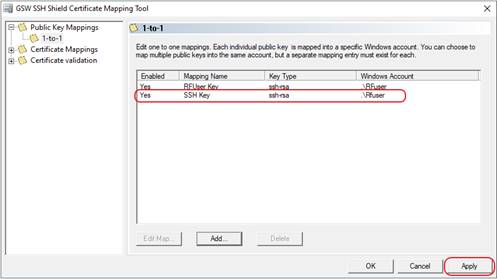
Figure 146: Key Installed
6.
After “Apply” has been clicked a pop-up
will appear as shown in Figure 147. The changes will not take effect until
the Georgia SoftWorks SSH Shield service is restarted. Click YES to restart SSH (all current
connections will be dropped) or NO if you intend to restart later.
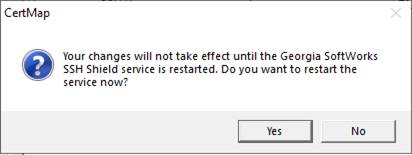
Figure 147: Restart SSH Service
Once the UTS
server has restarted, you may test the GSW ConnectBot SSH connection.
The
following guide will show how to configure the GSW ConnectBot client
to make Telnet connections using Password Authentication.
Open the
GSW ConnectBot App on the Android device.
Tap
the blue plus sign button in the lower right corner to start a new host
configuration.
Figure 148: Creating a Host
A new Host
Connection Configuration screen is displayed as shown in Figure 149.
SSH is the
default protocol, tap protocol and select Telnet.
|
Figure 149: Defining a Telnet Host |
|
|
Configure these options to get a working connection. 1. Tap the down arrow next to
the “hostname:port” field Enter <IP
address> If an alternate port is
used for Telnet, specify it here (ex: <IP address>:567) Otherwise leave it as
the default Telnet port, 23. 2.
Check “Automatic Logon” 3. Enter
Username and Password 4. “Mark
passwords as exportable” includes the password when a configuration is
uploaded to a LADS server. 5. (Host
and Port Autofill). 6. Choose a
nickname (not required). Other options may be modified if
necessary. Select the Color of the text
used on this Host Connection when displayed on the Hosts screen. The Font size does not need to
be set unless the column and rows of the Window Size are set to zero. Adjust Window size to match the
server’s settings. Telnet will not use public/private keys. The “Use pubkey
authentication” field may be ignored. Tap the DEL Key to specify the key use to send a “delete”
message. Choices are “Delete” and “Backspace”. |
Figure 150: Enter Telnet Configuration Information |
|
|
Continued on next page |
|
|
Choose the encoding, UTF-8 is the default.
Ignore “Use SSH auth agent”, as this is a Telnet connection.
Compression not used with Telnet.
Make sure “Start shell session” is on.
Make sure “Stay connected” is on, to keep trying to
reconnect, if disconnected.
Choose whether to close the session on disconnect.
Enter any Post-login commands as required, commands in user’s
logon script is a better option.
|
Figure 151: Connection Settings |
Figure 152: Saving the Connection |
Enter an Answerback if required by th application.
As
discussed in the “Host Connection Menu” section, additional settings (under
“Additional Settings”) can be found by tapping the three vertical dots in the
upper right-hand corner of the app and selecting “Settings”.
Once the host(s) have been configured on the Android device, the configuration may be uploaded to the GSW LADS. This will allow other devices to download a duplicate configuration.
For example, if there are three different types of devices or work areas (truck mount, shipping, etc.), and various quantities of each, configure each host and upload the configurations to the GSW LADS. The next time a similar unit is needed, simply connect that device to the GSW LADS and download the saved configuration. This is a huge time saver.
Once one instance of a device has been configured, simply “clone” the configuration to other devices, by doing the following.
1. Click on the “three dot” menu in the upper right-hand corner of the client.
2. Select “Upload configuration” from the menu.
3. Tap “LOCATE GSW LADS”
4. Name the Tag, for example: Truck Mount, Shipping, etc.
5. Tap “UPLOAD CONFIGURATION”. A folder will be created in the “Upload” folder with the name used when naming the Tag, in this case “Truck Mount”.
|
Figure 153: Tap Upload configuration from the overflow menu |
Figure 154: Locate GSW LADS |
6. Progress bar will appear
7. GSW LADS will confirm successful upload of configuration.
|
Figure 155: Upload Configuration |
Figure 156: Upload Complete |
8. On the server, navigate to C:\Program Files (x86)\Georgia SoftWorks\Georgia SoftWorks Licensing and Development Server\files\configs\upload
9. Copy your uploaded configuration[9] to C:\Program Files (x86)\Georgia SoftWorks\ Georgia SoftWorks\Georgia SoftWorks Licensing and Development Server\files\configs\download
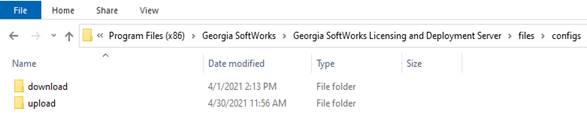
Figure 157: Copy upload configuration to download folder
Hint: Access the “Config Files” location using shortcut from the Windows Start Menu[10]

Figure 158: GSW LADS Config File shortcut
10. Now the uploaded configuration is accessible and can be downloaded to another device.
1. Click on the “overflow menu” in the upper right-hand corner of the client.
2. Tap “Download configuration” from the menu.
3. Tap “LOCATE GSW LADS”.
4. Select the uploaded configuration to install on the current device from the tag list.
5. Tap “DOWNLOAD CONFIGURATION”.
|
Figure 159: Tap Download Configuration |
Figure 160: Select Configuration |
6. Progress bar will appear.
7. GSW LADS will confirm successful download of configuration.
|
Figure 161: Tap download configuration |
Figure 162: Configuration download in progress |
Figure 163: Configuration download successful |
|
Client Lockdown limits a
user to the specific application. This prevents the Worker from modifying the
connection and other administration level settings or accessing other
applications. Georgia SoftWorks has provided a secure way to lock down the GSW
ConnectBot application by providing a distinct Admin mode and Work mode. Kiosk
and App pinning application and methods are available through 3rd
party providers.
- Locking down GSW
ConnectBot in “Work mode”
- GSW ConnectBot version 2.9.194 and above
- GSW ConnectBot version 2.9.186 and below
- Pinning work mode icon
with Android (GSW ConnectBot 2.9.186 and below)
- Admin mode vs Work mode
Starting with GSW ConnectBot Version 2.9.194 Admin and Work Mode will be combined to one app icon. You will access through the 3-dot menu from the host list screen, shown in Figure 164. If you are in work mode you will see Admin mode in the drop-down menu, shown in Figure 165, if you are in Admin mode you will see Work mode in the drop-down menu, shown in Figure 166. To enter admin mode, tap admin mode in the drop-down menu and you will be prompted to enter admin password (default admin password is “admin”). You may change the admin password from choosing Settings in the Admin mode drop down menu. Select “Change password” and enter new password and confirm password. This only changes the password for the current configuration. If configuration is uploaded to GSW LADS and download configuration to other devices this password will be carried to devices.
|
Figure 164 - 3-Dot Menu from Host List screen |
Figure 165 - Work mode drop down menu |
|
Figure 166 - Admin mode drop down menu |
Figure 167 - Enter admin password (default
"admin) |
|
Figure 168 - Global setting to change admin password |
Figure 169 - Enter new password then confirm new
password |
If admin password is forgotten you can follow the following steps to reset password. (You must be using GSW LADS to reset the password, GSW LADS is free and can be downloaded here)
The admin password is stored in the com.gsw.connectbot_preferences.xml file located in the config file, default location:
C:\Program Files (x86)\Georgia SoftWorks\Georgia SoftWorks
Licensing and Deployment Server\files\configs\download\ (Name of config file
that password needs to be changed)
|
Figure 170 - com.gsw.connecbot_preferences text file
to change admin password |
Open the xml file with a
text editor and locate the following line:
<string
name="admin_password">
<string name="admin_password">1ARVn2Auq2/WAqx2gNrL+q3RNjAzXpUfCXrzkA6d4Xa22yhRLy4AC50E+6UTPoscbo31nbOoq51gvkuXzJ6B2w==</string>
*Note this line will only
be in the file if password has been changed
To change the password
back to the default “admin” replace the highlighted field (above) with the
following data:
(This corresponds to the default
password of “admin”)
x61Ey612Kl2gpFL56FT9weDnpSo4AV8j8+qx2AuTHdRyY036xxzTTrw10Wq3+4qQyB+XURPWx1ONxp3Y3pB37A==
Another option to change
the default password is to use PowerShell by running the following command
powershell -Command "[Convert]::ToBase64String([System.Security.Cryptography.HashAlgorithm]::Create('SHA512').ComputeHash([System.Text.Encoding]::UTF8.GetBytes('PasswordHere')))"
Installation of GSW
ConnectBot version 2.9.186 and below results in creation of two user
icons. There is an Administrator launcher
and a Work launcher.
The Icon without
the gear is for companies using the client in restricted production and
or screen lockout mode.
Using the icon with
the gear enters administrative mode. The intent is that the
administrator will preconfigure hosts, public/private key etc.
The administrator will
then open the Work mode icon and pin the app.
|
Figure 171: Two Modes of Connection |
An administrator can limit a worker to the GSW ConnectBot by using Android screen pinning. The process varies slightly with different versions and devices.
To Pin (lockdown) GSW ConnectBot app, perform the following steps configuration:
Performed by administrator
· Create Hosts
· Enable “Pin Window”
· Enable “Ask for Pin before Unpinning”
· Pin the App
This
is described in the section Create new Host Connection
Configuration
|
Figure 172: Create Host(s) |
Enable Pin Window allows the
application to be “pinned” such that that it is the only application available
to the Worker.
To enable Pin Window, navigate to
Settings->Lock screen and security->other security settings.
From the Android home screen, tap “Settings”. On the example
device, the home screen and settings look as shown in Figure
173.
The settings screen opens
as shown on the right in Figure
174.
|
Figure 173: Settings Icon |
Figure 174: Tap Security Setting |
Tap on the “Security” setting. The name of this setting may vary
between Android devices.
The Other Security
Settings screen contains the “Pin Windows” configuration item.
In “Pin Windows” field,
tap the switch icon to turn this feature on.
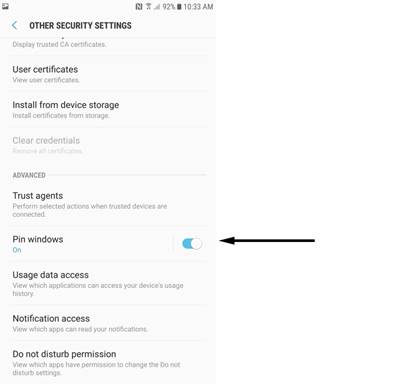
Figure 175: Pin Windows Option
The Pin windows option is
now enabled.
Enabling “Asking for the Pin” requires the PIN for the device be
entered to exit the application. If you don’t enable “Ask for Pin before
unpinning”, the worker can exit the application simply by pressing common key
sequences.
Tap on the Pin windows
field to display the “Ask for Pin before unpinning” option.
|
Figure 176: Ask for PIN before unpinning |
|
Now Exit Settings.
The last step is to Pin
the Window.
With GSW ConnectBot, Android Work App open, press the “Recent” button on the home screen.
Tap the “Pin” Icon in the bottom right corner of the GSW ConnectBot App Card.
Note: If the pin icon in the bottom right corner is not visible, move the window up to display the pin icon.
|
Figure 177: Pinning the Window |
To Unpin an App, press both the “Back” and “Recent” buttons simultaneously.
Enter PIN to complete unpinning.
To maintain security of the device, only the Administrator should have the PIN, otherwise the end user would have full access to the device and file system.
Figure 178 shows the GSW ConnectBot screen in Administrator Mode.
Notice the full menu options available.
|
Figure 178: GSW ConnectBot - Admin Mode |
Figure 179: GSW ConnectBot Work Mode |
Figure 179 shows the GSW ConnectBot screen in Work mode.
Notice the menu is restricted to “Sort by color”, “Disconnect All”, “Licensing”, “Update” and “Download configuration”.
No administrative functions are enabled in Work Mode.
NOTE: GSW ConnectBot must be Forced Closed to switch between Admin and Work modes with GSW ConnectBot version 2.9.186 and below.
When using the GSW ConnectBot with GSW UTS, useful device information is available for applications to provide a better experience for users.
These provide “smarter” applications the capability to make changes based on the device that they are connected. This includes knowing the display size, the IP Address of the device and much more.
The data is available on the device as Macros and on the UTS as environment variables.
This data is available to use in the Host Connection configuration in items such as AutoResponse Fields (see page 56) and Answerback (see page 66).
Macro Syntax: ${macroname}
Data Name Macro Syntax Evaluates to: (in our example)
build_device ${build_device} river
build_display ${build_display} PPOS29.114-134-10
build_hardware ${build_hardware} qcom
build_host ${build_host} ilclbld158
build_id ${build_id} PPOS29.114-134-10
build_manufacturer ${build_manufacturer} Motorola
build_model ${build_model} moto g(7)
build_product ${build_product} river
build_serial ${build_serial} UNKNOWN
display_density ${display_density} xxhdpi
display_dimensions ${display_dimensions} 2016x1080
gswcb_build_type ${gswcb_build_type} release
gswcb_version ${gswcb_version} 2.7.016
network_clnt_side_ip ${network_clnt_side_ip} 192.168.1.157
network_mac ${network_mac} 24-46-C8-0C-E8-61
status_code ${status_code} 0
version_codename ${version_codename} REL
version _release ${version_release} 9
version_sdk ${version_sdk} 28
version_security_patch ${version_security_patch} 2020-02-01
These variables are passed to the server so the application or the logon script running on the server can take advantage of this information.
For example: The application running on the server can look at the size of the screen and, based on the screen size, may launch a different application profile which was built for that particular screen size. For example, the application screen size might be 16x20 or 16x50. The application, invoked by the logon script, will be able to make an intelligent determination of the size of screen from environment variables and send the appropriate screen size to the device. The goal is to match the resolution. Avoid sending a very detailed screen when a particular android device has very limited resolution.
Example of Environment Variable[12]
gwtncl_answerback=1234
gwtncl_build_device=river
gwtncl_build_display=PPOS29.114-134-10
gwtncl_build_hardware=qcom
gwtncl_build_host=ilclbld158
gwtncl_build_id=PPOS29.114-134-10
gwtncl_build_manufacturer=Motorola
gwtncl_build_model=moto g(7)
gwtncl_build_product=river
gwtncl_build_Serial=UNKNOWN
gwtncl_ display_density=xxhdpi
gwtncl_ display_dimensions=2016x1080
gwtncl_gswcb_build_type=release
gwtncl_gswcb_version=2.7.016
gwtncl_network_clnt_side_ip=192.168.1.157
gwtncl_network_mac=24-46-C8-0C-E8-61
gwtncl_status_code=0
gwtncl_version_codename=REL
gwtncl_version_release=9
gwtncl_version_sdk=28
gwtncl_version_security_patch=2020-02-01
The Georgia SoftWorks ConnectBot contains GSW Browser, an Enterprise Browser suitable for industrial and commercial environments. Some notable features include:
No Address Bar
Prevents arbitrary URLs to be entered so no distractions from work.
Security
Provide detailed specification of URLs that may be accessed in different scenarios like page navigation, image source, media file source, email access, phone access, etc.
Injection
CCS and Javascript Injection. Allows modifications to the web page without having to modify the actual web page source.
SAP ITSMobile
Automatically enhance the SAP ITSMobile screens to improve readability, navigation and usability. No development required. Simply enable in the configuration and the enhancements work “out of the box”.
SAPGui for HTML
Excellent Enterprise Browser for SAPGui for HTML. On recommended list with SAP. Supports sound profiles, allowing the user to determine the sounds to use for Error, Information, Warning and Success scenarios.
Apache Cordova Support
Access a variety of Apache Cordova plugins to allow for rich interaction with the device and avoids limitations imposed by standard browsers. For example, work with files on the device, record video, take pictures, record audio, upload files to any destinations, use geolocation, 3 ways to control built-in scanner, or use device camera as a scanner. Also, battery, WiFi status, screen orientation and more.
GSW Keyboards
Dynamically transparent and moveable keyboards to maximize screen real-estate.
Configuration is easy and to get up and running fast, for most users simply enter the URL of the page to start. For the GSW Browser Quick Start chart please see Figure 5.
|
Figure 180: HTTPS Protocol Configuration Menu |
· http://server/page
· https://server/page
· Nickname
·
red
·
green
·
blue
·
gray
Enable GSW Enhancements for SAP ITSMobile screens. (enabled/disabled)
|
Figure 181: SAP ITS Mobile with GSW Enhancements Disabled |
Figure 182: SAP ITS Mobile with GSW Enhancements Enabled |
When the ITSMobile Enhancements setting is enabled the Skin option will appear as shown in Figure 183, allowing you to changes the color scheme of the ITS Mobile screen.
|
Figure 183: Enable ITSMobile Enhancements Shows Skin Menu |
Figure 184: Skin options menu |
Below is a variety of the GSW skins, so you can get an idea of flexibility of ITSMobile looks available. Color schemes are customizable.
|
Brown |
Cyan/Cyan |
Deep-Purple/Teal |
SAP Default |
GSW 1 |
|
GSW 2 |
GSW 3 |
GSW 4 |
GSW 5 |
GSW 6 |
|
Gray |
Indigo/Deep-Orange |
Light-Green/Cyan |
Purple/Purple |
Teal/Amber |
Figure 185: ITSMobile Skin Options
Enable GSW Sound Profiles for SAPGui for Html.
There are situations where the default Success, Warning, Information and Error sounds from the application are not suitable for the environment. You may want sounds that can pierce through noise, or more subtle sounds. GSW Enterprise Browser provides more than a dozen Sound Profiles for SAPGui for HTML.
When enabled the Sound Profile option is displayed. The currently selected Sound Profile is displayed under the Sound Profile option
Figure 186: Sound Profile option
Select the Sound Profile option to display the list of available Sound Profiles.
Figure 187: Sound Profiles available
Select the desired sound profile to start using it.
Custom Sound Profile
If you want to use your own custom sounds you can override any selected Sound Profile.
A Sound Profile consist of four files, one for each Sound Error, Information, Success, Warning.
Determine the sounds to override the configured Sound Profile. Rename the files as shown below:
They must have the specified names:
smsg.wav Success sound
wmsg.wav Warning sound
imsg.wav Informational sound
emsg.wav Error sound
The extensions can be .wav, .mp3, or .ogg.
Once the file(s) are renamed, please them in the webhostsdir folder on the GSW LADS server.
Example: %GSW_LADS_ROOT%\files\configs\download\default\webhostsdir
On GSW ConnectBot, download the configuration to the use the new Sound files.
Inject Javascript support code needed by Apache Cordova plugins. Please enable this option if you are using Apache Cordova plugins. (enabled/disabled)
Enable if you don't want the interface to display any feedback when users scroll past the beginning or end of content (enabled/disabled)
Enable if you want to allow for remote debugging of WebViews using Chrome browser developer tools on the server. (enabled/disabled)
Specify if the application stays running in the background even after a pause event fires. (enabled/disabled)
When loading a page, the amount of time (in milliseconds) to wait before throwing a timeout error. Set value. Default: 60000
If set, the value will append to the end of old UserAgent of webview. Set value on the line provided
The user agent tells the website information about the browser that is being used by the client. Advanced option.
Sets whether the WebView should allow third party cookies to be set (enabled/disabled)
Set whether the WebView should enable the Home button (enabled/disabled)
Log all keys through BI events sent to LADS
Sets whether the WebView should use its built-in zoom mechanisms. The Built-in zoom mechanisms comprise on-screen zoom controls, which are displayed over the WebView's content, and the use of a pinch gesture to control zooming. (enabled/disabled)
Information entered in the three sections
below follow the rules described in the Apache Cordova team documentation for
whitelisting. (URL Access List, Allow Navigation List, Allow Intent List)
https://cordova.apache.org/docs/en/9.x/reference/cordova-plugin-whitelist/
Defines the set of external domains the app is allowed to communicate with.
Enter list of URL’s.
May also enable Subdomains. Checkbox
The default list is * meaning all URLs, with Subdomains enabled (checked)
|
Figure 188: URL access list allowing all URLs |
Controls which URL's the WebView itself can be navigated to. Applies to top-level navigations only.
Enter list of URL’s.
The default list is *, meaning all URLs
|
|
Controls which URLs the app is allowed to ask the system to open.
|
Number |
Intents the system can open |
|
|
0 |
http://*/* |
|
|
1 |
https://*/* |
|
|
2 |
tel:* |
|
|
3 |
sms:* |
|
|
4 |
mailto:* |
|
|
5 |
geo:* |
|
|
6 |
market:* |
|
|
|
URL |
Add your own URLs if needed |
|
|
|
Add your own URLs if needed |
Table 5: Allow Intent List
To configure GSW Browser for full screen:
1. Tap the 3-dot menu from the host list screen and tap settings.
2. Enable Autohide title bar in user interface section of global settings.
3. Enable Full screen in Web Browser section of global settings.
4. Return to host list screen and launch web session.
5. Swipe down to access title bar
6. Swipe up to hide title bar
|
Figure 189:
Global Settings |
Figure 190: User Interface - Enable Autohide tool bar |
|
|
Figure 192: Swipe down to show tool bar |
Figure 193: Swipe up to hide tool bar |
|
GSW ConnectBot will recognize when the input field has the type "Telephone" to display the telephone only keyboard. In Figure 194 shows example where numeric characters are all that are needed and so it calls the telephone keyboard when field is selected.
|
Figure 194: GSW Browser Standard Telephone Keyboard |
GSW ConnectBot supports DOM Injection, which allows to insert CSS and JavaScript into a loaded web page. This permits to add features, capabilities and change the look and feel of a part or all of any website at runtime without changing the original source code on the web server. Additionally, many websites are not designed to accommodate mobile device screens and require injection of device-specific CSS and JavaScript to properly format user interface elements and their layout.
The DOM Injection feature can be used, for example, to inject style sheets (CSS) or business logic (JavaScript code) into an SAP ITSmobile or other website for which it is not feasible to modify the source. To make sure that page modifications are applied only after the DOM is ready for them GSW ConnectBot DOM injection occurs after the page is completely loaded. GSW DOM Injection supports both CSS and JavaScript injection. At the time of this writing there is no GUI to support DOM Injection and manual editing of the host specific XML configuration file is required. Host specific XML configuration files are located in the 'webhostsdir' folder in the LADS configs area, typically in this location:
C:\Program
Files (x86)\Georgia SoftWorks\Georgia SoftWorks Licensing and Deployment
Server\files\configs\upload\configuration_name\webhostsdir
CSS injection uses XML element named 'css-injection' and JavaScript injection uses 'js-injection'. The rest of the XML syntax is the same for both 'css-injection' and 'js-injection’.
1.1. file
File to be injected located in the respective webhostsdir
1.2. pages
You can restrict the urls where GSW ConnectBot performs injection based on the url value. This field allows you to specify a semicolon-separated list of url patterns where you want the injection to occur. If url being loaded matches any of the patterns then injection will be performed. The type of match being performed depends on the value of pages_uses_regex. If the latter is false then the pattern must be either the star character to match all pages or an exact url of a specific page. If pages_uses_regex is true then the GSW ConnectBot will perform a regular expression match.
1.3. pages_uses_regex
Specifies the type of match for the pages field as detailed in the section 1.2.
1.4. conditions
You can further restrict the urls where GSW ConnectBot performs injection based on the content of the page being loaded. This field allows you to specify list of url content patterns where you want the injection to occur. The list is separated by the value specified in the conditions_separator. If conditions is not empty then the url being loaded must match all of the conditions specified in this field. The type of match being performed depends on the value of conditions_uses_selector. If the latter is false then the specified pattern must match a piece of text somewhere on the page. If conditions_uses_selector is set to true then the match is performed using jsoup CSS selector syntax as specified in https://jsoup.org/apidocs/org/jsoup/select/Selector.html.
1.5.
conditions_uses_selector
Specifies the type of match for the conditions field as detailed in the section 1.4.
1.6.
conditions_separator
Specifies the separator for the conditions
field as detailed in the section 1.4.
Example: Inject mystyle.css in every page
<css-injection
conditions_uses_selector="true" conditions_separator="|"
conditions="" file="mystyle.css" pages="*"
pages_uses_regex="false"/>
Example: Inject liveoak.js in pages
http://www.gardenoaks.com/live.php and http://www.gardenoaks.com/live-oak-culture.php
<js-injection
conditions_uses_selector="false" conditions_separator="|"
conditions="" file="liveoak.js" pages="http://www.gardenoaks.com/live.php; http://www.gardenoaks.com/live-oak-culture.php" pages_uses_regex="false"/>
Example: Inject greenstyle.css into the home page of greenfieldsandvalleys.com
<css-injection
conditions_uses_selector="false" conditions_separator="|"
conditions="" file=" greenstyle.css" pages="
https?:\/\/(www\.)?greenfieldsandvalleys\.com\/?" pages_uses_regex="true"/>
Example: Inject oyama.css into all pages on amazon.com when the following two conditions are both true:
- Book’s contributor contains Oyama or book’s title includes the word Kyokushin starting with either lower or upper case
- Book’s title includes the word Karate starting with either lower or upper case
<css-injection
conditions_uses_selector="true" conditions_separator="|"
conditions="a[id=bylineContributor]:contains(Oyama),h1[id=title]:matches([kK]yokushin)|h1[id=title]:matches([kK]arate)"
file="oyama.css" pages="
https?:\/\/(www\.)?amazon\.com\/.*"
pages_uses_regex="true"/>
GSW ConnectBot Industrial Browser uses Apache Cordova, an open-sourced mobile development framework that uses standard web technologies – HTML5, CSS3 and Javascript. Not only does this framework enhance the gsw-connectbot.apk, it provides “you” the developer opportunities easily access device level API’s via plugins for use by your application.
The Apache Cordova Plugins and CSS can be used
· directly by your application
· injected to enhance existing applications
GSW Industrial Browser uses Cordova version 9.x
The Georgia SoftWorks Industrial
Browser provides over a dozen Apache Cordova plugins for the web application
developer that can greatly augment and simplify the programming involved.
Currently there are thousands of Android plugins and if the one you need is not
listed, please contact us and we will try to have it included in the GSW ConnectBot
in a future release.
We have included the ones that
application developers using GSW ConnectBot have shown interest.
For each plugin we include:
·
Description,
·
Plugin usage information,
·
Link to the Apache Cordova documentation
page for described plugin,
·
Location of a working example
Here is the link to the Cordova
Examples Home Page.
GSW Browser - Home
(georgiasoftworks.info)
*Please keep in mind that
these examples will ONLY work when using the Cordova Enabled GSW Industrial
Browser.
|
Ability
to scan barcodes using the cameraPlugin Highlights |
cordova-plugin-zxing |
||
|
|
|
|
|
|
Object |
zxingPlugin.scan |
(params,
onSuccess, onFailure) |
|
|
|
|
|
|
|
Parameters |
prompt_message |
orientation_locked |
camera_id |
|
|
beep_enabled |
scan_type |
barcode_formats |
|
|
extras |
|
|
|
Events |
onSuccess |
onFailure |
|
|
|
|
|
|
|
Return |
success(barcode_value) |
error('cancelled') |
error('misc error') |
|
|
|
|
|
|
Supported
Barcode Formats |
1D product |
1D industrial |
2D |
|
UPC_A |
CODE_39 |
QR_CODE |
|
|
UPC_E |
CODE_93 |
DATA_MATRIX |
|
|
|
EAN_8 |
CODE_128 |
PDF_417 |
|
|
EAN_13 |
ITF |
|
|
|
RSS_14 |
|
|
|
|
|
RSS_EXPANDED |
|
|
Cordova Documentation Link |
|||
|
Live Demo Page |
|||
Table 6: Zxing Plugin
|
Figure 195: GSW Browser Barcode Scanner Plugin Example |
This allows you to monitor the battery
level, whether it is charging and has events for Battery Low and Battery
Critically Low.
|
Plugin Highlights |
cordova-plugin-battery-status |
||
|
|
|
||
|
Object |
window |
|
|
|
|
|
||
|
Events |
batteryStatus |
batteryLow |
batteryCritical |
|
|
|
|
|
|
Properties |
level |
level |
level |
|
|
isPlugged |
isPlugged |
isPlugged |
|
|
|
|
|
|
Cordova Documentation Link |
|||
|
Live Demo Page |
|||
Table
7: Battery Status Plugin
info
|
Figure 196:
GSW Browser Battery Status Plugin Example |
This allows you to access the camera and take pictures or select a photo from the device image gallery.
|
Plugin Highlights |
cordova-plugin-camera |
|||
|
|
|
|||
|
Object |
navigator.camera |
|
||
|
|
|
|||
|
API Reference |
getPicture |
onError |
onSuccess |
CameraOptions |
|
|
|
|
|
|
|
Type |
function |
function |
function |
Object |
|
|
|
|
|
|
|
Parameters |
successCallback |
message |
imgData |
quality |
|
|
errorCallback |
|
|
destinationType |
|
|
options |
|
|
sourceType |
|
|
|
|
|
encodingType |
|
|
|
|
|
targetWidth |
|
|
|
|
|
targetHeight |
|
|
|
|
|
mediaType |
|
|
|
|
|
correctOrientation |
|
|
|
|
|
cameraDirection |
|
Cordova Documentation Link |
||||
|
Live Demo Page |
||||
Table 8: Camera Plugin
|
Figure 197: GSW Browser Camera Plugin Example |
Javascript API
Introduction
Georgia SoftWorks Scanner Plugin for GSW
ConnectBot provides unified interface to all supported scanners manufactured by
CipherLab, Honeywell, Keyence, and Zebra.
General rules
1.
All API functions and member variable are
available through navigator.gswscanner object, for example navigator.gswscanner.listen
2.
Method initialize must be called before any
other method with the exception of isAvailable.
3.
Successful call to claim disables Data Wedge
until release is called.
4.
Error callback receives an error message as
its argument
Member variables
1.
api
This member variable holds string representing
the name of interface being used as selected by the GSW ConnectBot
Methods
1.
Initialize(success_callback, error_callback)
This method needs to be called first to
activate the plugin. initialize calls claim automatically.
2.
claim(success_callback, error_callback)
This method is used to take control of the
scanner. Please notice that this method is called automatically by initialize.
This method must be called after release to regain control of the scanner.
3.
listen(success_callback, error_callback)
This method is used to start listening for
scanner data. Scanner data will be received in the callback to listen as an
object with the following properties:
- data (scanned characters)
- character_set
- code_id
- aim_id
- timestamp
- label_type
- code_type
4.
release()
This method is used to release control of the
scanner. It is necessary to call claim before being able to receive scanner
events again.
5.
softwareTriggerStart(success_callback,
error_callback)
This method is used to configure the scanner
to use software trigger instead of hardware trigger. Scanner data will be
received in the callback to softwareTriggerStart
as an object with the following properties:
- data (scanned characters)
- character_set
- code_id
- aim_id
- timestamp
- label_type
- code_type
It is necessary to call softwareTriggerStop to
switch off this mode of operation
6.
softwareTriggerStop(success_callback,
error_callback)
This method is used to switch off the software
trigger mode initiated by softwareTriggerStart
7.
enableTrigger(success_callback,
error_callback)
This method is used to re-enable the hardware
trigger after a successful call to disableTrigger
8.
disableTrigger(success_callback,
error_callback)
This method is used to disable the hardware
trigger after a successful call to enableTrigger. Call enableTrigger to
re-enable the hardware trigger after a successful call to this method.
9.
isAvailable()
This method returns true if our preliminary
check indicates that GSW scanner support is available on given device,
otherwise it returns false.
|
Plugin
Highlights |
cordova-plugin-gswscanner |
||
|
Objects |
navigator.gswscanner |
navigator.gswscanner.listen |
|
|
|
|
|
|
|
Methods |
initialize(success_callback,
error_callback) |
|
|
|
|
claim(success_callback,
error_callback) |
|
|
|
|
claim(success_callback,
error_callback) |
|
|
|
|
release() |
|
|
|
|
softwareTriggerStop(success_callback,
error_callback) |
|
|
|
|
enableTrigger(success_callback,
error_callback) |
|
|
|
|
disableTrigger(success_callback,
error_callback) |
|
|
|
|
isAvaliable() |
|
|
|
|
|
|
|
|
Method |
listen(success_callback,
error_callback) |
|
|
|
|
|
|
|
|
Properties |
data |
code_id |
aim_id |
|
|
timestamp |
label_type |
code_type |
|
Cordova
Documentation Link |
|||
|
Live
Demo Page |
GSW Browse - Scanner (georgiasoftworks.info) GSW Browse - CipherLab Scanner (georgiasoftworks.info) GSW Browse - Honeywell Scanner (georgiasoftworks.info) GSW Browse - Keyence Scanner (georgiasoftworks.info) |
||
Table 9: gswscanner plug-in
|
|
|
|
|
|
|
|
Figure 198: GSW Scanner Plugin Example
This plugin handles client certificate
request on Android. This plugin supports using client certificates from the key
chain, using shared preferences from the preference manager.
This plugin adds certificate-based
authentication (SSO) to your cordova application. There is no extra coding or
Android platform knowledge required when using this plugin on Android. It does
not contain any JavaScript since it just waits until the SSLSocket asks the
client for a certificate and then shows the default client-cert pop-up you
would also get when visiting your web page using the Android Chrome browser.
More information can be found here:
GitHub
- cordova-ccafix/cordova-plugin-client-certificate-support: Cordova Client
Certificate authentication support for both iOS and Android (limited testing of
updates on Android)
Device
Ability to access device specific
information
|
Plugin
Highlights |
cordova-plugin-device |
|||
|
|
|
|||
|
Object |
device |
|
||
|
|
|
|||
|
Properties |
.cordova |
.model |
.platform |
|
|
|
.uuid |
.version |
.manufacturer |
|
|
Parameters |
.isVirtual |
.serial |
|
|
|
Cordova Documentation Link |
||||
|
Example Demo File |
|
|||
|
Live Demo Page |
||||
Table 10: Device Plug-in
|
Figure 199: GSW Browser Device Variables Plugin |
Ability to give alerts, confirmation
messages, prompts, and beeps
|
Plugin Highlights |
cordova-plugin-dialogs |
|||||
|
|
|
|||||
|
Object |
navigator.notification |
|
||||
|
|
|
|||||
|
Methods |
alert |
confirm |
prompt |
beep |
dismissPrevious |
dismissAll |
|
|
|
confirm |
|
|
|
|
|
Parameters |
message |
message |
message |
times |
successCallback |
successCallback |
|
|
alertCallback |
confirmCallback |
confirmCallback |
|
errorCallback |
errorCallback |
|
|
title |
title |
title |
|
|
|
|
|
buttonName |
buttonLabels |
buttonLabels |
|
|
|
|
|
|
|
defaultText |
|
|
|
|
|
|
|
|
|
|
|
|
Cordova
Documentation Link |
||||||
|
Live
Demo Page |
||||||
Table 5: Dialogs Plugin
|
Figure 200: GSW Browser Dialogs and Alerts Plugin Example |
Cordova-promise-polyfill
Necessary for other plugins to work
properly
The web view components on Cordova
supported platforms lack support for ES6 Promise. A polyfill library bundled
with the plugin fixes the limitation. However, as more plugin use promises, the
application developer using these plugins will end up with multiple promise
polyfill libraries.
This plugin attempts to fix this
situation by providing a Promise polyfill so that other plugins can rely on
this functionality.
GSW Variables as described under Device
Telemetry Data Variables on page 106.
|
Plugin
Highlights |
|
|
||
|
|
|
|
|
|
|
Object |
gswconnectbot.clientStrings |
|
||
|
|
|
|
|
|
|
Properties |
android_id |
build_brand |
build_device |
build_display |
|
|
build_hardware |
build_host |
build_id |
build_manufacturer |
|
|
build_model |
build_product |
build_serial |
display_density |
|
|
display_dimensions |
gswcb_build_type |
gswcb_version |
network_mac |
|
|
network_clnt_side_ip |
version_codename |
version_release |
version_sdk |
|
|
version_security_patch |
status_code |
|
|
|
Cordova Documentation Link |
on page 106 |
|
||
|
Live Demo Page |
|
|||
Table 11: gswconnectbot –
Telemetry Data / GSW Variables
|
Figure 201: GSW
Variables / Device Plugin |
Write to File (File Storage plugin)
This plugin implements a File API
allowing read/write access to files residing on the device.
Link to documentation: File
- Apache Cordova
Link to Demo Page: GSW
Browser - File Storage (georgiasoftworks.info)
|
Figure 202: GSW Browser File Storage Plugin Example |
This allows you to download and upload
files to/from a server.
|
Plugin Highlights |
cordova-plugin-file-transfer |
||
|
|
|
||
|
Object |
File Transfer |
|
|
|
|
|
||
|
Methods |
upload |
download |
abort |
|
|
|
|
|
|
Pararameters |
fileURL |
source |
|
|
|
server |
target |
|
|
|
successCallback |
successCallback |
|
|
|
errorCallback |
errorCallback |
|
|
|
trustAllHosts |
trustAllHosts |
|
|
|
|
|
|
|
Results |
bytesSent |
|
|
|
|
responseCode |
|
|
|
|
response |
|
|
|
|
headers |
|
|
|
|
|
||
|
Errors |
FileTransferError |
|
|
|
|
|
||
|
Properties |
code |
target |
body |
|
|
source |
http_status |
exception |
|
Cordova Documentation Link |
|||
|
Live Demo Page |
|||
Table 12: File Transfer - Download and Upload files
|
Figure 203: GSW Browser File Transfer Plugin Example |
This plugin provides information about
the device’s location, such as latitude and longitude.
|
Plugin Highlights |
cordova-plugin-geolocation |
||
|
|
|
||
|
Object |
Navigator.geolocation |
|
|
|
|
|
||
|
Methods |
getCurrentPosition |
watchPosition |
clearWatch |
|
|
|
|
|
|
Pararameters |
geolocationSuccess |
geolocationSuccess |
|
|
|
geoolocationError |
geoolocationError |
|
|
|
geolocationOptions |
geolocationOptions |
|
|
Geolocation Options |
enableHighAccuracy |
|
|
|
|
timeout |
|
|
|
|
|
maximumAge |
|
|
Errors |
PositionError |
|
|
|
|
|
||
|
Properties |
Position |
Coordinates |
PositionError |
|
|
coords |
latitude |
code |
|
|
timestamp |
longitude |
message |
|
|
|
altitude |
|
|
|
|
accuracy |
|
|
|
|
altitudeAccuracy |
|
|
|
|
heading |
|
|
|
|
speed |
|
|
Cordova Documentation Link |
|||
|
Live Demo Page |
|||
Table 13: Geolocation Plugin
|
Figure 204: GSW Browser Geo Location Plugin Example |
Ability to play media files.
|
Plugin
Highlights |
cordova-plugin-media |
||||
|
|
|
||||
|
Object |
Media |
|
|||
|
|
|
||||
|
Parameters |
src |
mediaSuccess |
mediaError |
mediaStatus |
mediaStatus |
|
|
|
|
|
|
|
|
Constants |
MEDIA_NONE |
MEDIA_Starting |
MEDIA_RUNNING |
MEDIA_PAUSED |
MEDIA_STOPPED |
|
|
0 |
1 |
2 |
3 |
4 |
|
|
|
|
|
|
|
|
Methods |
getCurrentAmplitude |
getCurrentPosition |
getDuration |
play |
pause |
|
|
pauseRecord |
release |
resumeRecord |
seekTo |
setVolume |
|
|
startRecord |
stopRecord |
stop |
setRate |
|
|
|
|
|
|||
|
ReadOnly |
position |
duration |
|
|
|
|
|
|
|
|||
|
Parameters |
src |
mediaSuccess |
mediaStatus |
position |
duration |
|
|
|
|
|
|
|
|
Cordova Documentation Link |
|||||
|
Live Demo Page |
|||||
Table 14: Media Player Plugin
|
Figure 205: GSW Browser Media Player Plugin Example |
The Media Capture plugin allows you to take images, record video, and record audio.
|
Plugin
Highlights |
cordova-plugin-media-capture |
||
|
|
|
||
|
Objects |
Capture |
CaptureAutioOptions |
CaptureImage Options |
|
|
CaptureVideoOptions |
CaptureCallback |
CaptureErrorCB |
|
|
ConfigurationData |
MediaFile |
MediaFileData |
|
Methods |
capture.captureaAudio |
capture.captureImage |
|
|
|
capture.captureVideo |
MediaFile.getFormatData |
|
|
Properties |
supportedAudioModes |
supportedImageModes |
supportedVideoModes |
|
|
|
|
|
|
Cordova Documentation Link |
|||
|
Live Demo Page |
|||
Table 15: Media Capture Plugin
In the live demo, the captured media is
being sent to an external server to show how this functionality can be
accomplished.
|
Figure 206:
GSW Browser Media Capture Plugin Example |
Shows network information
|
Plugin
Highlights |
cordova-plugin-network-information |
||
|
|
|
||
|
Object |
connection |
(navigator.connection) |
|
|
|
|
|
|
|
Properties |
connection.type |
|
|
|
|
|
|
|
|
Constants |
.UNKNOWN |
.ETHERNET |
.WIFI |
|
|
.CELL_2G |
.CELL_3G |
.CELL_4G |
|
|
.CELL |
.NONE |
|
|
Cordova Documentation Link |
|||
|
Live Demo Page |
|||
Table
16: Network Information
Plugin
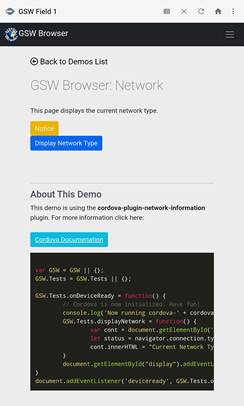
Figure 207: Network Plugin Example
Allows you to lock the orientation:
portrait, landscape, reverse portrait, reverse landscape.
|
Plugin
Highlights |
cordova-plugin-screen-orientation |
||
|
|
|
||
|
Object |
window.screen |
|
|
|
|
|
|
|
|
Supported
Orientations |
portrait-primary |
portrait-secondary |
portrait |
|
landscape-primary |
landscape-secondary |
landscape |
|
|
|
any |
|
|
|
Usage |
.orientation.lock('portrait') |
|
|
|
|
.orientation.unlock(); |
|
|
|
|
.orientation |
|
|
|
Event |
orientationChange |
|
|
|
Cordova Documentation Link |
|||
|
Live Demo Page |
|||
Table 17: Screen Orientation
|
Figure 208:
GSW Browser Screen Orientation Plugin Example |
The Statusbar plugin allows access to
the Android status bar.
|
Plugin
Highlights |
cordova-plugin-statusbar |
||
|
|
|
||
|
Object |
StatusBar |
|
|
|
|
|
|
|
|
Methods |
.overlaysWebView |
.styleDefault |
.styleLightContent |
|
|
.styleBlackTranslucent |
.styleBlackOpaque |
.backgroundColorByName |
|
|
.backgroundColorByHexString |
.hide |
.show |
|
Properties |
.isVisible |
|
|
|
|
|
|
|
|
Events |
statusTap |
|
|
|
Cordova Documentation Link |
|||
|
Live Demo Page |
|||
Table 18: Status bar
|
Figure 209: GSW Browser Status Bar Plugin Example |
Allows you to access the device
vibration.
|
Plugin
Highlights |
cordova-plugin-vibration |
|
|
|
|
|
|
Object |
navigator.vibrate |
|
|
|
|
|
|
Parameters |
time |
(in Milliseconds) |
|
Usage |
navigator.vibrate(time) |
navigator.vibrate([time]) |
|
navigator.vibrate([1000,
1000 , 3000 , 1000 , 5000]); |
||
|
This will: vibrate 1s, wait 1s, vibrate 3s, wait 1s, vibrate 5s) |
||
|
Cordova Documentation Link |
||
|
Live Demo Page |
||
Table 19: Screen Vibration
|
Figure 210: GSW Broswer Vibration Plugin Example |
Controls which URL the webview can be
navigated. Applies to top-level navigation.
This allows you to print via Bluetooth
on zebra printers.
Object: gswconnectbot.printString
Demo Page: GSW Browser - Zebra Printing (georgiasoftworks.info)
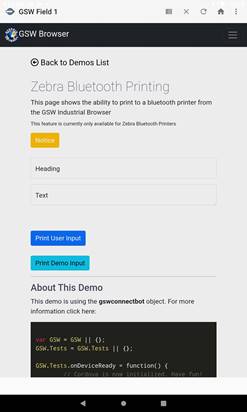
Figure 211: Zebra Bluetooth
Printing Plugin Example
GSW LADS is a lightweight intuitive mobile device management system that takes care of most mobile device administrative needs without the expense or complexity and large footprint so common with many mobile device management systems.
Figure 212: LADS components
GSW LADS provides several capabilities for GSW ConnectBot:
· Status and Management tools
· GSW LADS is the central repository for all of the GSW ConnectBot configurations, licensing data, software upgrades, Public/Private keys, custom keyboards, Business Intelligence, saved screen shots and more.
GSW LADS features are listed below:
· Manage Licensing
· Zero-Touch Configuration to Multiple Devices
· Upload/Download Device Configurations
· Manage Updates to Client Software
· Public/Private Key Import/Export
· Business Intelligence
· Custom Keyboards
· Rapid 2-Tap Screen Shot/Automatic Upload to GSW LADS
Installing the Georgia SoftWorks Licensing and Deployment Server
GSW LADS is
installed on a Windows Operating System computer that the devices running GSW
ConnectBot are able to access. Installation is simple and described below.
1. Download the Georgia SoftWorks LADS setup program here. GSW LADS can be installed on any modern Windows OS and must reside on the same LAN as the GSW ConnectBot devices that are being licensed. Once licensed, the device is portable to other networks.
![]()
Figure 213: GSW LADS setup program
2. User Account Control Dialog.
Often you will get a UAC prompt. Select Yes
Figure 214: User Account Control Dialog
3. Double click the executable. You will see the initial setup dialog. Let it run until finished.
Figure 215: Setup progress bar
4. Select “Next” on the following dialog, to move to location dialog.
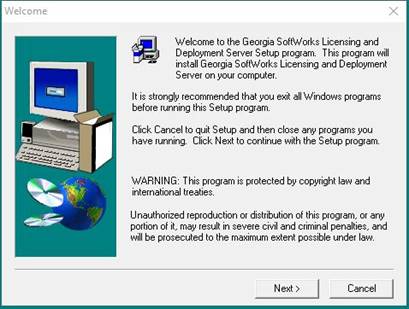
Figure 216: Welcome
5. Select “Next” on the following dialog, to move to folder dialog
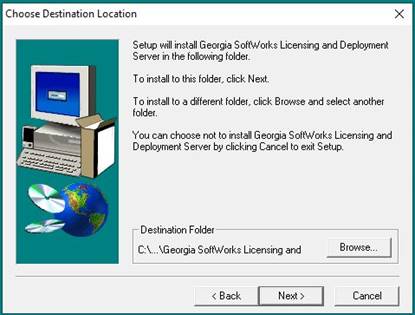
Figure 217: Installation Location
6. Select “Next” on the following dialogs to move to Setup Complete Dialog.
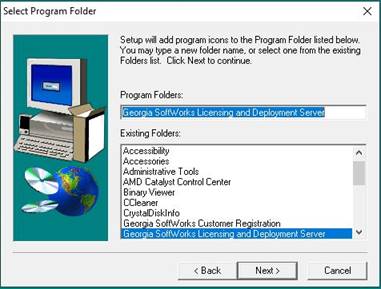
Figure 218: Install folder
7. Select Finish to complete GSW LADS installation.
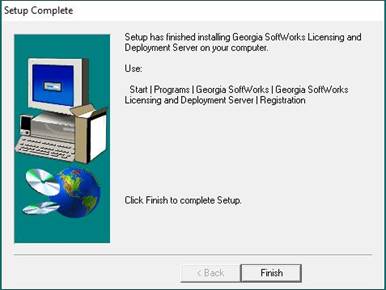
Figure 219: Setup Complete
Setup is now complete. GSW LADS when first installed
comes with 10 GSW ConnectBot temporary licenses for 30 days for testing
purposes. Once evaluated, please license GSW LADS with Georgia SoftWorks, using
the registration process to activate the software.
Overview:
GSW LADS when first installed is licensed with 10 temporary GSW ConnectBot licenses for 30 days. Once 30 days has expired, you must register the software. This entails just a few steps that involve obtaining the Product ID and other registration information and providing this information to Georgia SoftWorks so a Serial Number can be generated. The Serial Number is sent back to you and when applied it activates the GSW LADS software.
These are the steps to register and activate the GSW LADS.
1. From the Start Menu, select
Georgia SoftWorks Licensing and Deployment Server -> Registration.
You may get a UAC prompt. Select Yes.

Figure 220: LADS Registration UAC dialog
2. The registration tool dialog for GSW LADS appears.
The registration software automatically fills in the Product Information fields as shown below.
Figure 221: GSW LADS registration tool opens
Please complete the “Customer Information”, the “Purchased From”, “Application software” in the form as shown. Also enter the number of GSW ConnectBot licenses requested as shown in Figure 222.
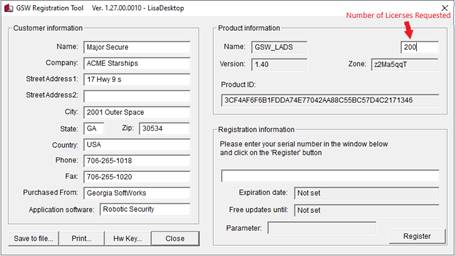
Figure 222: Registration Tool with completed information
Save the file using the “Save to file…” button.
You may close the Registration program at this time.
The registration information must be provided to Georgia SoftWorks to obtain the Serial Number. Several methods are available for your convenience.
Please use option “a” if possible.
a. Go to https://www.georgiasoftworks.net/support_gsw/open.php to submit a support ticket for Registration. Complete necessary fields and attach the file you saved in the previous step.
This is the preferred method – Fastest
Response time.
OR
b. Email the file to registration@georgiasoftworks.com. A support ticket will be opened and you will receive instructions how to proceed with the registration.
c. Print the information and Fax it to Georgia SoftWorks – 706.265.1020
3. Once Georgia SoftWorks receives the information, a Serial Number will be generated and sent back to you.
Open the registration program again.
Please copy the Serial Number and paste it into the Registration information field in the Registration tool.
The easiest method to copy the serial number is to highlight the returned Serial number and
copy (ctrl-c) it. Then position the mouse in the Serial Number Field in the Registration Information box and paste (ctrl-v).
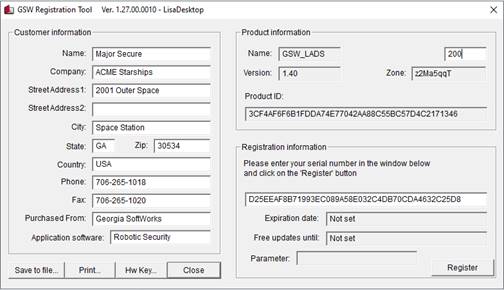
Figure 223: Registration Tool - Serial Number Entered
Click Register.
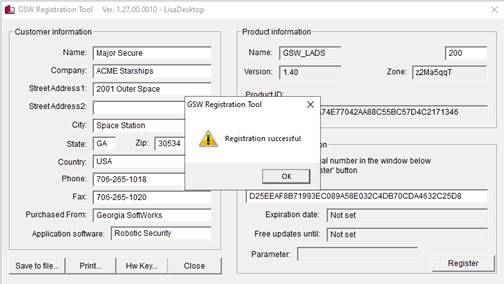
Figure 224: Registration Successful
After a successful GSW LADS registration, restart the Georgia SoftWorks gswlads service in Microsoft Services. GSW LADS will now distribute licenses for GSW ConnectBot software, up to the number of purchased activations.
After installation, GSW LADS will run as a Microsoft Windows Service.
GSW ConnectBot will automatically discover LADS on the network. Two other options are available for specifying the IP address of GSW LADS:
1. Enter the IP address of the GSW LADS server on the device. (See page 25)
2. Modify and transfer the xml configuration file to the device running GSW ConnectBot.
At times the system administrator may want to define configuration information for the device to ensure specific parameters are used by GSW ConnectBot. This is accomplished using the config.xml file. See below.
The GSW LADS XML configuration file (name: config.xml). A template of the xml file is located in LADS directory default path:
C:\Program
Files (x86)\Georgia SoftWorks\Georgia SoftWorks Licensing and Deployment
Server\files\com.gsw.connectbot\files\config.xml
This xml file allows specification of information that GSW ConnectBot will use instead of discovery or requiring manual entry at the device.
· IP Address of the GSW LADS server
· Port number on the GSW LADS server
· Name of specific configuration file to use
· Auto Erase
The format of the XML files is as follows and should be placed on the device in the following location:
{root[13]}/Android/data/com.gsw.connectbot/files
<?xml
version="1.0" encoding="UTF-8"?>
<!DOCTYPE
properties SYSTEM "http://java.sun.com/dtd/properties.dtd">
<!--
This file
should be placed in /{root}/Android/data/com.gsw.connectbot/files
-->
<properties>
<entry
key="lads_ip">lads_ip_address</entry>
<entry
key="lads_port">12574</entry>
<entry key="lads_config">Name
of configuration to download</entry>
<entry key="auto_erase">false</entry>
</properties>
LADS IP ADDRESS: <entry
key="lads_ip">lads_ip_address</entry>
Example: <entry
key="lads_ip">192.168.77.1</entry>
LADS PORT: <entry key="lads_port">lads_port_number</entry>
Example: <entry key="lads_port">12574</entry>
LADS Config file: <entry key="lads_config">Name
of configuration to download</entry>
Example: <entry key="lads_config">trunkmount-charlie</entry>
LADS IP ADDRESS: <entry key="auto_erase">[true|false]</entry>
Example: <entry key="auto_erase">true</entry>
This is provided for
completeness. You may want to return to discovery of LADS instead of using the
config.xml file. You set this to “true” if you want the config.xml file
automatically be deleted after being used.
If GSW LADS is unable to be found during auto discovery of initial launch of GSW ConnectBot, after several failed attempts, “GSW LADS not found during Discovery” will appear. Several options are available to choose from and are described below.
·
Retry Discovery – Will scan network again
to automatically locate GSW LADS. See Figure
225
·
Enter GSW LADS IP Address manually – Will
allow manual entry of IP address of system GSW LADS has been installed. See Figure 227
·
I am not using GSW LADS, Disable GSW LADS – Automatic
Provisioning disabled in “Global Settings” Can be re-enabled at any time by
changing setting. See Figure 229
·
Go to Hosts List screen to configure
connection – “Hosts List” Screen launched. See Figure 231
PORTS use by GSW
LADS server:
Firewall rules added by installation for ports 10010, and 12574
Firewall rules are not needed for ports 12575 and 12576 as they run on internal
loopback 127.0.0.1
|
Port |
Description |
|
10011 |
Used for multicast discovery, Hardware dependent |
|
10010 |
UDP data gram for auto discover/zero touch |
|
12574 |
TCP SSH Tunnel |
|
12575 |
Licensing, Configuration upload and download, screenshots, and configuration data |
|
12576 |
Strictly for business intelligence |
|
Figure 225: Retry Discovery |
Figure 226: Searching network for GSW LADS |
|
Figure 227: Enter GSW LADS IP Address manually |
Figure 228: Enter IP where GSW LADS is located |
|
Figure 229: I am not using GSW LADS, Disable GSW LADS |
Figure 230: Automatic Provisioning disabled in Global Settings |
|
Figure 231: Go to Hosts List screen to configure connection |
Figure 232: Taken to Hosts List screen not changes made |
GSW LADS makes the licensing of GSW ConnectBot on devices automatic and virtually effortless. Instead of having to manually license each individual GSW ConnectBot, the launch of each instance of GSW ConnectBot will automatically request a license from GSW LADS. If a license is available, it is provided to GSW ConnectBot. If a license is not available the user is alerted to this condition and should contact the system administrator.
The GSW License Manager displays the total number of GSW ConnectBot licenses registered as well as the number that have not been assigned.
Navigate to the GSW LADS License Manager
Start | GSW License and Deployment Server | License Manager
Below is the GSW License Manager dialog.
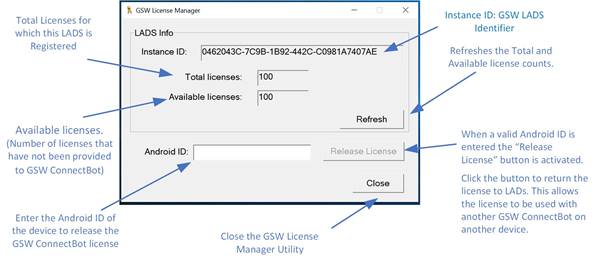
Figure 233: GSW License Manager tool
The GSW License manager provides a quick method for the administrator to:
· View how many GSW ConnectBot licenses are registered with GSW LADS - Total licenses
· View how many GSW ConnectBot licenses are available for assignment – Available licenses
· Manually release a GSW ConnectBot license from GSW LADS
If a device is being retired or replaced, the best practice is to return the license from GSW ConnectBot ( as described on page 26). The released license will be available to assign to a new device.
GSW LADS manages a GSW ConnectBot License Lease for each GSW ConnectBot assigned a license. When the GSW ConnectBot License Lease expires, a new lease is acquired. This automatically recovers the licenses from inactive devices, making them available to be assigned to GSW ConnectBots in use.
If a device is lost, or destroyed and the GSW ConnectBot license has not been released, GSW LADS will make the license available to other devices after the license lease expires. The default is 3 days.
The value can be changed if needed for your particular environment.
The registry contains the License Lease value which is the number of days for the License Lease.
Computer\HKEY_LOCAL_MACHINE\SOFTWARE\WOW6432Node\Georgia
SoftWorks\gswlads\Parameters\dwLicenseLeaseDuration
Default: 3 days
If you do not want to have Leased Licensing then set the value to 0.
If the license is needed before that time, the administrator can use the GSW LADS License Manager utility to release the license so it can be assigned to other devices. To open the GSW LADS License Manager:
Start Button|Georgia
SoftWorks Licensing and Deployment Server|License Manager
|
Figure 234: Release License - Notice Available License Count |
Figure 235: Enter Android ID, Click Release License |
|
Figure 236: License Released Confirmation |
Figure 237: Release License - Notice Available License Count Incremented |
Enter the Android ID of the GSW ConnectBot to release from the missing or destroyed device.
Click “Release License”. The available license count is incremented to reflect the license returned as shown in Figure 237.
To use the Release License feature of the License Manager, the Android ID must be known. Often system administrators have the devices inventoried, so the Android ID may already be known. If not, then GSW LADS utility LADSTbl.exe can help the system administrator identify the Android ID of the GSW ConnectBot on the missing/destroyed etc. device. To utilize this tool the “Collect Business Intelligence” setting must be enabled on the GSW ConnectBot. See page 62.
The tool is located in the GSW LADS installation folder.
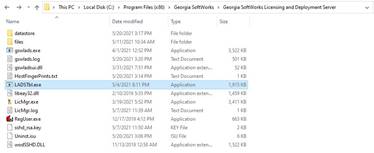
Figure 238: LADSTble.exe folder
Open a command shell (as Administrator), navigate to the folder above and type:
LADSTbl.exe
A table will be created that shows the
Android ID, the IP address and the last times GSW LADS recognized the GSW
ConnectBot as active. An example is shown in Figure
239. Usually, that will be
enough information to identify the Android ID of the GSW ConnectBot to release.
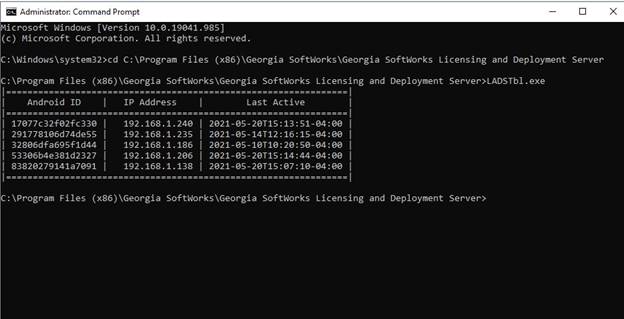
Figure 239: Output of LADSTbl.exe utility
Beginning with LADS version 1.41.0001, LADSTbl.exe is disabled by default. It can be enabled with a Windows Registry edit. Computer\HKEY_LOCAL_MACHINE\SOFTWARE\WOW6432Node\Georgia SoftWorks\gswlads\Parameters\ bBIUseEventsFile Change the value to "1" and restart the LADS service to enable.
Manage Software Updates to GSW ConnectBot
GSW ConnectBot may be updated from GSW LADS on your intranet by placing the updated software in a specific GSW LADS folder and then follow the standard updating instructions (page 37).
Figure 240: GSW LADS - Software Updates
Copy the GSW
ConnectBot installation files to the folder %gsw_lads_root%\files.
Specifically, the following files:
·
output.json
·
gsw-connectbot-z.zz.zzz.apk
(where the
“z’s” refer to
the version number)
Example: gsw-connectbot-2.8.010.apk
You can obtain the files from the Georgia SoftWorks ConnectBot webpage by downloading the GSW ConnectBot Software .zip file and place both the .apk and .json file with corresponding versions into the GSW LADS “files” folder as shown in Figure 241.
Then on
the GSW ConnectBot client follow instructions on Updating Software by Licensing
and Deployment Server (LADS) on page 37.
Figure
241: Apk and .json located in the GSW LADS
files folder
This is a very important feature,
as it saves time and reduces errors by allowing configuration and testing of a
single device before deployment to all devices.
GSW LADS allows for upload and
download of host configurations once host(s) has/have been configured and
tested on the GSW ConnectBot. Typically, the administrator will create host(s)
on one device and upload to the GSW LADS. Once uploaded the configuration is
moved from the “Upload” to the “Download” folder[14]. Next, simply download the configuration to
other GSW ConnectBot devices.

Figure 242: GSW LADS Config Upload/Download folders
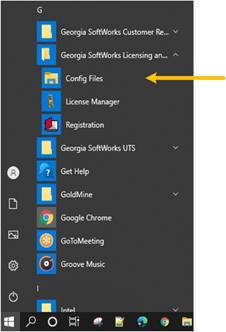
Figure 243: Easy access to the Config Files via Windows Start Menu
Zero touch means the administrator does not have to touch any of the multitude of devices to deploy configurations. Only a single device has to be configured and saved to GSW LADS. On all the other devices, when GSW ConnectBot is launched for the first time, they will automatically obtain the configuration from GSW LADS. This immensely simplifies configuration and deployment.
Zero Touch configuration allows automatic deployment of a designated default GSW ConnectBot configuration. A GSW ConnectBot can be configured and tested fully on a single device. Once the device has been successfully tested, the configuration can be uploaded and mass deployed to any number of GSW ConnectBot’s, as soon as the application is launched on a device.
Once configuration and testing are completed
1. In the Hosts List overflow menu select “Upload Configuration”
2. Change Tag: to “Default”
3. Tap “Upload Configuration, Upload in Progress will show on screen
4. Then a message will appear once upload is successful, Tap OK
|
Figure 244: Hosts List - Select Upload Configuration |
Figure 245: Set Tag field to "Default" |
Figure 246: Tap Upload Configuration |
Figure 247: Upload Progress bar |
Figure 248: Uploaded
Successfully |
5. Move the uploaded “Default” Folder to the “Download” folder as described in Upload / Download GSW ConnectBot Configuration on page 161
6. Now launch GSW ConnectBot on other devices, if on the same network it will automatically find GSW LADS, retrieve available license, and “Default” configuration will be downloaded
7. Start using GSW ConnectBot!
The 2-Tap screen shot as described on the Host Connection Operation section on page 54, can automatically send the screen shot to GSW LADS so they can easily be reviewed later[15]. Images are time stamped and associated with the device that took the screen shots.
A folder will be created and labeled
as the devices Android ID, and each screenshot is date/time stamped making it
extremely easy for administrator to identify.

Figure 249: GSW LADS Screen Shot
storage location Android ID
GSW ConnectBot version 2.9.115 labeled folder as MAC Address

Figure 250: GSW LADS Screen Shot storage location MAC Address
Figure 251: Examples of stored Screen shots
With GSW ConnectBot, the Public/Private SSH keys can be imported and exported using GSW LADS. When a configuration is uploaded from GSW ConnectBot, Public keys, for server configuration, are saved as pubkeys.xml file on GSW LADS. Private keys, for client configuration, are saved in the GSW ConnectBot configuration database. When a Host configuration is download from LADS, the private key will automatically be installed. To generate a public/private key on the GSW ConnectBot see page 73.
Once a key has been generated, upload the configuration as explained in Managing Host Configuration with the GSW LADS on page 90.
You can then find the public key generated in the configuration file that was uploaded at the following location:
C:\Program Files
(x86)\Georgia SoftWorks\Georgia SoftWorks Licensing and Deployment
Server\files\configs\(config folder tag name)\pubkeys.xml
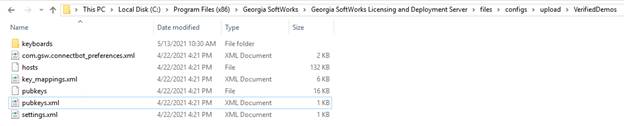
Figure 252: pubkey.xml located on GSW LADS
After key has been mapped as shown on page 72, and configuration folder has been moved from the “upload” to the “download” folder on GSW LADS. When a configuration is downloaded to another device, the private key will be automatically installed.
GSW LADS can collect information (Android ID, IP Address, MAC Address[16], other…) that is sent from GSW ConnectBot clients and produced by GSW LADS. The collected information can be gathered, processed and used to guide management on the use and overall operational efficiency.
Below you will see examples of how Business
Intelligence can be used when collected. BI Data is continuously output to a
text file (csv format) or fed to a PowerShell script if provided, and can be
used to visually show live data.
There is a clear separation of the data
collection and the presentation, which provide the user with ability to use the
data in any way needed. This is in contrast to fixed/canned reports available
to customers using other vendors’ products. As an example, with the use of PowerShell
scripts, the BI data can be easily fed to websites and databases. Users can
also use Dashalytics by GSW![]() for a pre-built solution learn more at https://dashalytics.app/overview.
for a pre-built solution learn more at https://dashalytics.app/overview.
·
Watch live picks happen, keep track of battery life of devices
· License usage, Items Picked
· Productivity of workers, etc.
|
Figure 253: BI example charts |
Figure 254: More BI example
charts |
|
Figure 255: Dashalytics – Wi-Fi Drop Log |
Figure 256: Dashalytics - Productivity Dashboard |
Business Intelligence data provides a wealth of structured real-time data that can be organized in various ways to illuminate important events in the GSW ConnectBot ecosystem that can be used to identify operational strengths to preserve and weaknesses to strengthen. Some common questions are:
· Where does Business Intelligence data originate?
· Where does it end up?
· How does it get there?
The figure below should help gain an understanding of the flow of data for GSW Business Intelligence.
Figure 257: Business Intelligence Data Flow
The high-level answers are:
· Business Intelligence originates from GSW ConnectBot and GSW LADS when configured.
· It ends up either in the events.txt file, or where ever your Power Shell script sends it, such as live views, a database, etc.
· It gets there (events.txt file) by GSW LADS or the destination of the custom Power Shell script.
To enable GSW Business Intelligence Data Collection on GSW ConnectBot simply enable “Send Business Intelligence data to GSW LADS” in the Global Config as shown on page 62 . This is a basic requirement for gathering all Business Intelligence data. In a few cases other configuration may be required, and that will be specified as needed in the following descriptions.
Each time
an “Event” occurs, the data associated with the event is made available that
can be accessed by one of two methods. One is by using a events.txt file to collect the events. The other is by
using a PowerShell program to process the events. The exact same data is
available to both methods.
Note: Only
one method can be used at a time.
·
Events.txt file method. This method is that with every event, GSW
LADS puts time stamped event data into the events.txt file in csv format.
This file
is located in the (GSW LADS installation folder)-> datastore.
The
default installation folder is usually:
C:\Program Files
(x86)\Georgia SoftWorks\Georgia SoftWorks Licensing and Deployment Server\datastore
The events.txt is a standard ascii text file in csv[17] format. It can be easily imported into
spreadsheets, database’s, reporting software etc.
Additionally,
a programmer can use any programming or scripting language that has the
capability to read files to customize processing to satisfy the requirements of
the business.
Note: If the eventHandler.ps1 PowerShell script exists, then the
EventHandler method is used. If it does not exist then the Events.txt file
method is used.
·
EventHandler method – This method is that with every event, GSW
LADS invokes a PowerShell script with the name eventHandler.ps1. This is a very powerful mechanism for
real-time processing of business and operational data. PowerShell scripting
offers custom processing to fit the specific needs of the customer. A
PowerShell programmer can do everything from visually showing live data using
graphics, inserting the data into a database, to providing real-time alerts to
users.
To enable
the EventHandler method of processing events, simply place the PowerShell
script in the (GSW LADS installation folder)-> datastore.
It must
have the exact name: eventHandler.ps1
If this
file exists, then the GSW LADS will invoke it each time an event occurs. If it
does not exist then the events.txt method is used for event collection.
See page 192 for more details.
Each event is sent as a message to GSW LADS. With each event GSW LADS adds a row to the events.txt file. This row contains all the information that is associated with the event.
The information for each event includes data such as the type of event, the time it occurred, which GSW ConnectBot or GSW LADS is the source of the event, and other relevant data.
A few rows excerpted from an events.txt file can be viewed on page 170.
Each row has multiple components of information associated with the event. Each component is called a field, and each field is delimited with a defined character. As you can see in the excerpt of the events.txt file, the separator character between each field is the “|” (called the pipe or vertical bar) symbol, ASCII code 124.
The data in each row of the events.txt file has some variation that is dependent on the source of the event as well as the particular event. For example, if the source of the event is the GSW ConnectBot, then the data for that field will be the Android ID. If the source is GSW LADS, the data will be the computer name that GSW LADS is installed.
The format of the data in the events.txt file is as described below:
Message Version 100002 – GSW ConnectBot version 2.9.103 and above
· Message ID Code
· Version
· Create Time
· Send Time
· Latitude
· Longitude
· Horizontal Accuracy
· AndroidID
· IP Address
· Application Name
· Application Version
· Message
· Parameter 1
· Parameter 2
· Parameter 3
Message Version 100001 – GSW ConnectBot Version 2.9.070 and below
· Message ID code
· Message version
· Message creation time (ISO 8601 format)
· Message sent time (ISO 8601 format)
· Message Source: Android ID OR (All (16) zero’s if GSW LADS is installed)
· Client IP address: Client IP address OR (name of computer that GSW LADS is installed)
· Application name
· Application version
· Message
· Parameter 1
· Parameter 2
· Parameter 3
Notes:
Both Message Creation Time and Sent Timer are provided
in case there is a delay between the two.
The message source will be the Android ID if the
source of the event is the GSW ConnectBot client.
The message source will be the all Zeros, if the
source of the event is GSW LADS.
If the source is the GSW ConnectBot then Client IP
will contain the IP address.
If the source is GSW LADS then the Client IP address
filed will contain the compute name that GSW LADS is installed.
The application name will contain com.gsw.connectbot
if the source is the GSW ConnectBot.
The application name will contain com.gsw.lads if the
source is GSW LADS.
An example entry in the events.txt file is shown below.
Message Version 100002

Message ID Code: 2001
Message version: 100002
Message Creation Time: 2022-07-21T16:53:31-04:00
Message Sent Time: 2022-07-21T16:53:31-04:00
Latitude: 34.420833
Longitude: -84.118368
Horizontal Accuracy: 13.20[18]
Android ID: a219bc851148d444
Client IP Address: 192.168.1.168
Application Name: com.gsw.connectbot
Application version: 28010
Message: 4
Parameter 1: true
Parameter 2: c8:9e:43:89:58:94
Parameter 3:
Message Version 100001

Message ID Code: 1000
Message version: 100001
Message Creation Time: 2021-07-13T16:43:19-04:00
Message Sent Time: 2021-07-13T16:43:20-04:00
Message Source: a219bc851148d444
Client IP Address: 192.168.1.168
Application Name: com.gsw.connectbot
Application version: 28010
Message: 113
Parameter 1:
Parameter 2:
Parameter 3:
Message Version 100002
3003|100002|2022-07-18T16:26:17-04:00|2022-07-18T16:26:17-04:00||||ada4fab12010cff7|192.168.1.124|com.gsw.connectbot|29103|WebActivity|||
3003|100002|2022-07-18T16:26:17-04:00|2022-07-18T16:26:17-04:00||||ada4fab12010cff7|192.168.1.124|com.gsw.connectbot|29103|GSWHostListActivity|||
2000|100002|2022-07-18T13:28:57-04:00|2022-07-18T16:26:18-04:00||||ada4fab12010cff7|192.168.1.124|com.gsw.connectbot|29103|15|false||
2000|100002|2022-07-18T13:31:28-04:00|2022-07-18T16:26:23-04:00||||ada4fab12010cff7|192.168.1.124|com.gsw.connectbot|29103|14|false||
2100|100002|2022-07-19T04:26:23+08:00|2022-07-19T04:26:23+08:00||||176f0009acf6a13b|192.168.1.154|com.gsw.connectbot|29103|4|true|6c:cd:d6:50:9e:db|
3002|100002|2022-07-18T16:26:24-04:00|2022-07-18T16:26:24-04:00||||ada4fab12010cff7|192.168.1.124|com.gsw.connectbot|29103|ConsoleActivity|||
1100|100002|2022-07-18T16:26:24-04:00|2022-07-18T16:26:24-04:00||||ada4fab12010cff7|192.168.1.124|com.gsw.connectbot|29103|qwerty_portrait.xml|||
1200|100002|2022-07-18T16:26:24-04:00|2022-07-18T16:26:24-04:00||||ada4fab12010cff7|192.168.1.124|com.gsw.connectbot|29103|192.168.1.39|||
2100|100002|2022-07-19T04:26:53+08:00|2022-07-19T04:26:53+08:00||||176f0009acf6a13b|192.168.1.154|com.gsw.connectbot|29103|3|true|6c:cd:d6:50:9e:db|
2100|100002|2022-07-19T04:26:58+08:00|2022-07-19T04:26:58+08:00||||176f0009acf6a13b|192.168.1.154|com.gsw.connectbot|29103|4|true|6c:cd:d6:50:9e:db|
Message Version 100001
100000|100001|2021-03-08T21:12:00Z|2021-03-08T21:12:00Z|0000000000000000|CONFERENCE|com.gsw.lads|139045|89|99||
100000|100001|2021-03-14T09:07:35Z|2021-03-14T09:07:35Z|0000000000000000|CONFERENCE|com.gsw.lads|139045|89|99||
100001|100001|2021-03-18T13:54:15Z|2021-03-18T13:54:15Z|0000000000000000|CONFERENCE|com.gsw.lads|139045|88|99|a59e424fe6034873|
3000|100001|2021-03-18T09:53:39-04:00|2021-03-18T09:53:40-04:00|a59e424fe6034873|192.168.1.140|com.gsw.connectbot|28001|com.gsw.connectbot|||
3002|100001|2021-03-18T09:53:39-04:00|2021-03-18T09:53:40-04:00|a59e424fe6034873|192.168.1.140|com.gsw.connectbot|28001|GSWHostListActivity|||
2000|100001|2021-03-18T09:53:39-04:00|2021-03-18T09:53:40-04:00|a59e424fe6034873|192.168.1.140|com.gsw.connectbot|28001|97|||
3002|100001|2021-03-18T09:53:40-04:00|2021-03-18T09:53:41-04:00|a59e424fe6034873|192.168.1.140|com.gsw.connectbot|28001|LicenseFromGSWServerActivity|||
100001|100001|2021-03-18T13:54:19Z|2021-03-18T13:54:19Z|0000000000000000|CONFERENCE|com.gsw.lads|139045|87|99|a59e424fe6034873
GSW ConnectBot provides a very powerful way to collect and process event information by launching a PowerShell script each time an event occurs.
To enable
the EventHandler method of processing events, simply place the PowerShell
script in the (GSW LADS installation folder)-> datastore.
It must
have the exact name: eventHandler.ps1
Similar to the Events.txt format, eventHandler.ps1 is passed the parameters below for each event.
|
param( |
|
Table 20: eventHandler.ps1 function parameters
Examples of
PowerShell Scripts are shown in Appendix A.
· Take Event and insert into database
Create BI for
· Battery
· Connections
· License Usage
Message ID codes are the Event Identifiers that indicate the type (or category) of event that occurred.
Events generated by the GSW ConnectBot have the Message ID codes shown in Table 21
|
Message ID Code |
Description |
GSW ConnectBot Version |
|
1000 |
Key code – Key code sent to GSW ConnectBot when key is pressed. |
2.8.010 |
|
1001 |
Key output text – Text sent to server when key is pressed |
2.8.010 |
|
1100 |
Keyboard Set – GSW Keyboard file name when keyboard is selected. |
2.8.010 |
|
1200 |
Host Launched, nickname is included as an event’s parameter (this event is supported for all hosts) |
2.9.021 |
|
1201 |
Connected to a TE host, host’s URL and nickname are included as parameters |
2.9.021 |
|
1202 |
Disconnected to a TE host, host’s URL and nickname are included as parameters |
2.9.186 |
|
1300 |
Web page loaded, host’s nickname and base64-encoded URL are included as parameters |
2.9.021 |
|
1301 |
Web request not allowed, host’s nickname and base64-encoded URL of the request are included as parameters |
2.9.021 |
|
1302 |
Top level URL not allowed, host’s nickname and base64-encoded URL are included as parameters |
2.9.021 |
|
1400 |
Key Event from Telnet or SSH Connections |
2.9.112 |
|
1401 |
Scan Event from Telnet or SSH Connects from supported device manufacturers |
2.9.112 |
|
1402 |
Key Event from web connections |
2.9.112 |
|
1410 |
TE Scan tracking is enabled or disabled for connection / TE session activity (ConsoleActivity or ConsoleWorkActivity) is created |
2.9.127 |
|
1411 |
Web Scan tracking is enabled or disabled for connection to web session |
2.9.127 |
|
1500 |
Screen Recognition - A configured screen is recognized. |
2.8.010 |
|
1600 |
When a user replies to a chat message |
2.9.139 |
|
2000 |
Battery Level – Battery level changes |
2.8.010 |
|
2100 |
WIFI level changed |
2.8.085 |
|
3000 |
App Started |
2.8.010 |
|
3001 |
App Stopped |
2.8.010 |
|
3002 |
Activity Resumed |
2.8.010 |
|
3003 |
Activity Destroyed |
2.9.103 |
|
4000 |
Duplicate License Removed |
2.8.010 |
|
5000 |
GSW unified scanner interface receives scanned data from web
session, base64-encoded URL of the request are included as parameters |
2.9.070 |
|
100000 |
License Count Information |
2.8.010 |
|
100001 |
License Obtained |
2.8.010 |
|
100002 |
License Released |
2.8.010 |
|
100100 |
Device Telemetry Data variables change |
2.9.069 |
|
100101 |
LADS instance ID |
2.9.103 |
Table 21: GSW ConnectBot Events / Message ID Codes
GSW Keyboard events can be configured to provide data when keys are pressed or GSW keyboards are selected. The Key code and Key text must be enabled for each key that an event is desired.
GSW Keyboards must be enabled for GSW Keyboard events to be generated. (page 62 )
|
Message ID Code |
Description |
|
1000 |
Key code – Key code sent to GSW ConnectBot when key is pressed. |
|
1001 |
Key output text – Text sent to server when key is pressed |
|
1100 |
Keyboard Set – Keyboard name is provided when a GSW keyboard is selected for a session. For example, when new session, left/right keyboard navigation, screen recognition etc. |
Table 22: GSW Keyboard Events
Description: This event provides the Key code when a configured GSW keyboard key is pressed.
This is useful when specific keys have particularly useful meanings. Often function keys have business actions associated with them such as Help Requested, Picking complete, On Break, etc. Any key that can provide information that can be used to identify productivity data points can be configured to provide BI data.
Data: Message is the key code.
How to Enable:
Automatically enabled when GSW
ConnectBot Global settings Business Intelligence is set.
and
On each GSW keyboard definition file (.xml) where the desired event is needed.
Applies to: One or more Key definitions with the gsw:codes field
Add the text to enable:
Syntax: gsw:logUsage=”true”
Action: When the configured key on the keyboard is pressed, the key code event is generated.
When the “r” key is pressed, generate a BI Event.
In the qwerty_portriat.xml keyboard definition file.
<Key
gsw:codes="114" gsw:keyLabel="r"
gsw:logUsage="true"/>
Events.txt
1000|100001|2021-07-08T09:13:10-04:00|2021-07- 08T09:13:10-04:00|a219bc851148d444|192.168.1.168|com.gsw.connectbot|28010|114|||
In the first field of the events.txt file the message id of 1000, in
the message field (in red) is the key code (114).
Note: Do not enable on all keys as the amount of processing required on the device, the network and GSW LADS would be excessive. Purpose to only use keys that provide useful data and all should be fine.
eventHandler.ps1
Description: This event provides the text sent to the server when a configured GSW keyboard key is pressed.
This is useful when the text output provides useful information. Any key that can provide information that can be used to identify productivity data points can be configured to provide BI data.
Data: Message is the key text sent to the server. It may be multiple characters if defined.
How to Enable:
Automatically enabled when GSW
ConnectBot Global settings Business Intelligence is set.
and
On each GSW keyboard definition file (.xml) where the desired event is needed.
Applies to: One or more Key definitions with the gsw:keyOutputText field
Add the text to enable:
Syntax: gsw:logUsage=”true”
Action: When the configured key on the keyboard is pressed, the key output text event is generated.
When the key with the label “ABC” is pressed, generate a BI Event.
In the qwerty_portriat.xml keyboard definition file.
<Key gsw:keyLabel=”ABC” gsw:keyOutputText=”Zorro”
gsw:logUsage=”true”/>
Events.txt
1001|100001|2021-07-13T16:41:29-04:00|2021-07-13T16:41:29-04:00|a219bc851148d444|192.168.1.168|com.gsw.connectbot|28010|Zorro|||
In the first field of the events.txt file the message id of 1001, in the message field (in red) is the key output (Zorro).
Note: Do not enable on all keys as the amount of processing required on the device, the network and GSW LADS would be excessive. Purpose to only use keys that provide useful data and all should be fine.
Description: This event provides the name of the GSW keyboard selected.
Keyboards are selected when a new session is established, or when using the left/right arrow and keyboard navigation keys, swiping and re-orienting the device if a keyboard change occurs.
This can be useful to identify which keyboards are being used for what tasks, as well as frequency, orientation etc. Gain insight as to better keyboard key layouts as well as identifying inefficiencies and errors caused by using less than optimal keyboard to the task.
Data: GSW Keyboards
How to Enable:
Automatically enabled when GSW
ConnectBot Global settings Business Intelligence is set.
Action: When a keyboard is selected the event is generated.
When the device orientation is changed generate a BI Event.
Using the qwerty_portriat.xml keyboard, change device orientation to landscape.
The event will be generated and is shown in the events.txt file.
Events.txt
1100|100001|2021-07-13T16:42:36-04:00|2021-07-13T16:42:36-04:00|a219bc851148d444|192.168.1.168|com.gsw.connectbot|28010|qwerty_landscape.xml|||
In the first field of the events.txt file the message id of 1100, in the message field (in red) is the keyboard name qwerty_landscape.xml is shown.
GSW Host events provide data on the type of connection, host’s nickname and URL. This data can be used to verify correct connections to host whether it be for troubleshooting or to see that user is on task.
|
Message ID Code |
Description |
|
1200 |
Host Launched, nickname is included as an event’s parameter (this event is supported for all hosts) |
|
1201 |
Connected to a TE host, host’s URL and nickname are included as parameters |
|
1202 |
Disconnected from a TE host, host’s URL and nickname are included as parameters |
|
1300 |
Web page loaded, host’s nickname and base64-encoded URL are included as parameters |
|
1301 |
Web request not allowed, host’s nickname and base64-encoded URL of the request are included as parameters |
|
1302 |
Top level URL not allowed, host’s nickname and base64-encoded URL are included as parameters |
|
1410 |
TE Scan tracking Enabled or Disabled |
|
1600 |
Message sent by Dashalytics. Provides a unique code to allow Dashalytics to correlate the response with the original message. base64-encoded URL of the request are included as parameters |
|
5000 |
GSW unified scanner interface receives scanned data from web session, base64-encoded URL of the request are included as parameters |
Table 23: Host Events Message ID Codes
Description:
This event indicates the host connection has been launched.
Data: Host
connection launched provides Nickname and Host URL.
How to Enable: Automatically enabled when GSW ConnectBot Global
settings Business Intelligence is set.
Action: Any time a host connection is launched.
Events.txt
1200|100001|2021-10-27T10:13:05-04:00|2021-10-27T10:13:05-04:00|17077c32f02fc330|192.168.1.174|com.gsw.connectbot|29012|GSW
Whitelisting|||
Description: Connected to a TE host, host’s URL and nickname are included as parameters
Data: Provide information on TE host connection.
How to Enable: Automatically enabled
when GSW ConnectBot Global settings Business Intelligence is set.
Action: TE host connection is
connected.
Example: When a host connection is configured for SSH or Telnet and connected
Events.txt
1201|100001|20211027T11:17:3404:00|20211027T11:17:3404:00|17077c32f02fc330|192.168.1.174|com.gsw.connectbot|29012|Truck Mount|rfuser@192.168.1.211||
In the field that appears green is the
Host Nickname. In the field that appears red is the host’s URL.
Description: Disconnected from a TE host, host’s URL and nickname are included as parameters
Data: Provide information on TE host disconnection.
How to Enable: Automatically enabled
when GSW ConnectBot Global settings Business Intelligence is set.
Action: TE host connection is
disconnected.
Example: When a host connection is configured for SSH or Telnet and it is disconnected
Events.txt
1202|100001|20211027T11:17:3404:00|20211027T11:17:3404:00|17077c32f02fc330|192.168.1.174|com.gsw.connectbot|29012|Truck
Mount|rfuser@192.168.1.211||
In the field that appears green is the
Host Nickname. In the field that appears red is the host’s URL.
Description: web page loaded, host’s nickname and base64-encoded URL are included as parameters
Data: Will show information for web host connection
How to Enable: Automatically enabled
when GSW ConnectBot Global settings Business Intelligence is set.
Action: Web Host Connection is
connected
Example: When a host connection configured for http or https has made connection
Events.txt
1300|100001|2021-10-27T10:13:15-04:00|2021-10-27T10:13:15-04:00|17077c32f02fc330|192.168.1.174|com.gsw.connectbot|29012|GSW Whitelisting|aHR0cHM6Ly93d3cuZ2VvcmdpYXNvZnR3b3Jrcy5jb20vcGFydG5lcnM=||
In the field that appears green is the
Host Nickname. In the field that appears red is the website, which is
Base64-encoded. There are websites that allow strings to be decoded such as https://www.base64decode.org/.
Description: web request not allowed, host’s nickname and base64-encoded url of the request are included as parameters
Data: Will show information for web host connection
How to Enable: Automatically enabled
when GSW ConnectBot Global settings Business Intelligence is set.
Action: Web Host Connection is not
allowed
Events.txt
1301|100001|2021-10-27T11:35:26-04:00|2021-10-27T11:35:26-04:00|17077c32f02fc330|192.168.1.174|com.gsw.connectbot|29012|GSW Whitelisting|aHR0cHM6Ly9jZG4uYW1wcHJvamVjdC5vcmcvdjAvYW1wLWFjY29yZGlvbi0wLjEuanM=||
In the field that appears green is the
Host Nickname. In the field that appears red is the website is Base64-encoded.
There are websites that allow strings to be decoded such as https://www.base64decode.org/.
Description: top level URL not allowed, host’s nickname and base64-encoded url are included as parameters
Data: Will show information for web host connection
How to Enable: Automatically enabled
when GSW ConnectBot Global settings Business Intelligence is set.
Action: Top Level URL is not allowed.
Events.txt
1302|100001|2021-10-27T10:13:16-04:00|2021-10-27T10:13:16-04:00|17077c32f02fc330|192.168.1.174|com.gsw.connectbot|29012|GSW Whitelisting|aHR0cHM6Ly93d3cuemVicmEuY29tL3VzL2VuLmh0bWw=||
In the field that appears green is the
Host Nickname. In the field that appears red is the website is Base64-encoded.
There are websites that allow strings to be decoded such as https://www.base64decode.org/.
Description: Key events form Telnet or SSH connections are sent base64 encoded.
Data: Will show which physical or virtual keys are pressed within GSW ConnectBot
How to Enable: Enable “Log all keys”
in the host list settings menu
Action: Pressing any keys in GSW ConnectBot
Events.txt
1400|100002|2022-08-29T12:10:46-04:00|2022-08-29T12:10:46-04:00|34.420863|-84.118439|21.05|46197cb7cbc6d8ee|192.168.1.134|com.gsw.connectbot|29112|eyJrZXlDb2RlIjozNCwiYWN0aW9uIjoxLCJkZXZpY2VJZCI6LTEsImRpc3BsYXlMYWJlbCI6NzAsImZsYWdzIjo2LCJwcmludGluZ0tleSI6dHJ1ZSwibWV0YVN0YXRlIjowLCJudW1iZXIiOjAsInNjYW5Db2RlIjowLCJ1bmljb2RlQ2hhciI6MTAyLCJzb3VyY2UiOjI1Nywia2V5Q29kZVRvU3RyaW5nIjoiS0VZQ09ERV9GIiwibW9kaWZpZXJzIjowfQ==|bG9jYWwgc2Nhbm5pbmc=||
https://www.base64decode.org/.
Description: scan events form Telnet and SSH connections are sent base64 encoded.
Data: Will show scan data when scanner is initiated from physical keys or virtual keys.
How to Enable: Enable “Log all keys”
in the host list settings menu (Must be from a supported device manufacturer
for the data to be collected)
Action: Scanning barcodes in GSW ConnectBot
Events.txt
1401|100002|2022-08-29T12:09:46-04:00|2022-08-29T12:09:46-04:00|34.420860|-84.118415|18.94|46197cb7cbc6d8ee|192.168.1.134|com.gsw.connectbot|29112|eyJrZXlDb2RlIjowLCJhY3Rpb24iOjIsImNoYXJhY3RlcnMiOiIwNzA4NDcwMTI0NyIsImRldmljZUlkIjotMSwiZGlzcGxheUxhYmVsIjowLCJmbGFncyI6MCwicHJpbnRpbmdLZXkiOmZhbHNlLCJtZXRhU3RhdGUiOjAsIm51bWJlciI6MCwic2NhbkNvZGUiOjAsInVuaWNvZGVDaGFyIjowLCJzb3VyY2UiOjI1Nywia2V5Q29kZVRvU3RyaW5nIjoiS0VZQ09ERV9VTktOT1dOIiwibW9kaWZpZXJzIjowfQ==|bG9jYWwgc2Nhbm5pbmc=||
https://www.base64decode.org/.
Description: Key events form web connections are sent base64 encoded.
Data: Will show which physical or virtual keys are pressed within GSW ConnectBot
How to Enable: Enable “Log all keys”
in the host list settings menu
Action: Pressing any keys in GSW ConnectBot
Events.txt
1402|100002|2022-08-29T12:12:08-04:00|2022-08-29T12:12:08-04:00|34.420864|-84.118428|19.36|46197cb7cbc6d8ee|192.168.1.134|com.gsw.connectbot|29112|eyJrZXlDb2RlIjozNSwiYWN0aW9uIjoxLCJkZXZpY2VJZCI6LTEsImRpc3BsYXlMYWJlbCI6NzEsImZsYWdzIjo2LCJwcmludGluZ0tleSI6dHJ1ZSwibWV0YVN0YXRlIjowLCJudW1iZXIiOjAsInNjYW5Db2RlIjowLCJ1bmljb2RlQ2hhciI6MTAzLCJzb3VyY2UiOjI1Nywia2V5Q29kZVRvU3RyaW5nIjoiS0VZQ09ERV9HIiwibW9kaWZpZXJzIjowfQ==|U2hpcHBpbmctV2Vi||
https://www.base64decode.org/.
Description: Event 1410 is generated when TE/SSH Host is launched
Data: Will report if host connection is tracking TE/SSH scans
How to Enable: Enable Track TE Scans in global settings menu
Events.txt
1410|100002|2023-02-27T14:14:38-05:00|2023-02-27T14:14:38-05:00||||
9aa292d9bb346147|192.168.1.174 |com.gsw.connectbot |29139 |false |||
1410|100002|2023-02-27T14:14:38-05:05|2023-02-27T14:14:38-05:00||||
9aa292d9bb346147|192.168.1.174 |com.gsw.connectbot |29139 |true |||
In the field that appears red will
show true being TE tracking is enabled, false being TE tracking is disabled
Description: Event 1410 is generated when Web Host is launched
Data: Will report if host connection is tracking web scans
How to Enable: Enable Track Web Scans in global settings menu
Events.txt
1411|100002|2023-03-10T15:35:05-05:00|2023-03-10T15:35:06-05:00||||829279e9f338d7c6|192.168.1.160
|com.gsw.connectbot| 29139 |true|||
1411|100002|2023-03-10T15:37:33-05:00|2023-03-10T15:37:34-05:00||||829279e9f338d7c6|192.168.1.160|com.gsw.connectbot|29139
|false|||
In the field that appears red will
show true being web scan tracking is enabled, false being web scan tracking is
disabled
Description: Event 5000 is generated in web sessions when GSW unified scanner interface receives scanned data. The ‘message’ parameter is set to base64 encoded scan result.
Data: Will show information for GSW unified scanner, scanned data.
How to Enable: Automatically enabled
when GSW ConnectBot Global settings Business Intelligence is set.
Action: Data is scanned with GSW
unified scanner
Example: When using GSW Unified scanner in web session, scanned data will be reported
Events.txt
5000|100002|2022-08-29T12:08:52-04:00|2022-08-29T12:08:52-04:00|34.420869|-84.118430|20.99|46197cb7cbc6d8ee|192.168.1.134|com.gsw.connectbot|29112|eyJrZXlDb2RlIjowLCJhY3Rpb24iOjIsImNoYXJhY3RlcnMiOiIwNzA4NDcwMTI0NyIsImRldmljZUlkIjotMSwiZGlzcGxheUxhYmVsIjowLCJmbGFncyI6MCwicHJpbnRpbmdLZXkiOmZhbHNlLCJtZXRhU3RhdGUiOjAsIm51bWJlciI6MCwic2NhbkNvZGUiOjAsInVuaWNvZGVDaGFyIjowLCJzb3VyY2UiOjI1Nywia2V5Q29kZVRvU3RyaW5nIjoiS0VZQ09ERV9VTktOT1dOIiwibW9kaWZpZXJzIjowfQ==|aHR0cHM6Ly9nZW9yZ2lhc29mdHdvcmtzLmluZm8=||
In the field that appears red is the data
from the scan; it is Base64-encoded. There are websites that allow strings to
be decoded such as https://www.base64decode.org/.
GSW ConnectBot screen recognition events occur when a screen is recognized as per the screen recognition configuration. At this time Screen Recognition Events only occur with Telnet/SSH protocol.
|
Message ID Code |
Description |
|
1500 |
Screen Recognition- An event is generated when a configured screen is recognized |
|
|
|
Table 24: Screen Recognition Events
Please see the screen recognition documentation to gain understanding on configuring this feature.
Description: This event provides the screen recognized
Understanding the screen processing can provide the best insight on operation efficiency.
Data: Parameter 1 is the name of the Screen Recognized.
How to Enable:
Automatically enabled when GSW
ConnectBot Global settings Business Intelligence is set.
Event happens when a screen defined in
GSW ConnectBot’s database is recognized.
For example, if a screen has a
customized keyboard and defined in the GSW ConnectBot’s database to be
displayed on recognized screen and that screen was displayed on the ConnectBot
you would see the following located in the events.txt
Example Screen Recgonition Event
A custom keyboard has been defined to display on a particular screen in the GSW ConnectBot database, when screen is launched event 1500 is generated.
Action: Launch screen that custom keyboard has been defined.
Events.txt
1500|100001|20211026T13:18:5104:00|20211026T13:18:5104:00|17077c32f02fc330|192.168.1.174|com.gsw.connectbot|29012|MFAChoice|||
The field in red “MFAChoice” is the name of the screen assigned in the screens table in the hosts.db on GSW LADS.
GSW ConnectBot general events can be useful for a wide range of purposes.
|
Message ID Code |
Description |
|
2000 |
Battery Level has changed |
|
2100 |
WI-FI Level has changed |
|
3000 |
App Started |
|
3001 |
App Stopped |
|
3002 |
Activity Resumed |
|
3003 |
Activity Destroyed |
|
4000 |
Duplicate License Removed |
Table 25: General Events
Description: This event provides the Battery charge level each time the level changes and also provides data if the battery is being charged. The range is from 1-100, where 100 is 100% charged.
Keep up with the battery levels of everyone. Observe when the battery is too low to complete the shift. How often does this happen, who does it happen? Notify people before it’s too late.
Data: Battery charge level.
How to Enable:
Automatically enabled when GSW
ConnectBot Global settings Business Intelligence is set.
Action: Any time the battery charge
level changes.
Events.txt
2000|100001|2021-07-19T13:23:17-04:00|2021-07-19T14:11:12-04:00|1c68ed2d6ed968d0|192.168.1.131|com.gsw.connectbot|28034|73|true||
2000|100001|2021-07-19T13:23:17-04:00|2021-07-19T14:11:12-04:00|1c68ed2d6ed968d0|192.168.1.131|com.gsw.connectbot|28034|70|false||
In the first field of the events.txt
file the message id of 2000, in the Message field (in red) is the battery
charge level 73 and 70. In the Message
field (in green) true means device is being charged and false means
the battery is discharging
Description: This event provides the Wi-Fi level each time the level changes. The range is from 1-4, where 4 is 4 bars available.
Keep up with the Wi-Fi levels of everyone. Observer when the levels are low in a certain area.
Data: WI-FI strength.
How to Enable:
Automatically enabled when GSW
ConnectBot Global settings Business Intelligence is set.
Action: Any time the WI-FI level
changes.
Events.txt
2100|100001|20211026T14:41:4904:00|20211026T14:41:4904:00|17077c32f02fc330|192.168.1.174|com.gsw.connectbot|29011|4|true||
In the first field of the events.txt
file the message id of 2100, in the Message field (in red) is the Wi-Fi level
of 4. The “true” states active Wi-Fi connectivity.
Description: This event occurs when a
duplicate license is removed from GSW ConnectBot. Occasionally, GSW LADS will
issue duplicate licenses to a device. The 4000 event signifies the duplication
was resolved.
Data: Android ID of the device that
had duplicate licenses.
How to Enable:
Automatically enabled when GSW
ConnectBot Global settings Business Intelligence is set.
Action: Any time a duplicate license
is removed.
Example: Duplicate License Removed
Events.txt
4000|100001|2022-01-27T10:43:53-05:00|2022-01-27T10:43:53-05:00|83820279141a7091|192.168.1.145|com.gsw.connectbot|29062|a219bc851148d444|||
In the first field of the events.txt
file the message id of 4000, in the Message field (in red) is the android ID of
the device that has the duplicate license.
As the user navigates through, out of and back into the app, events are generated that provide transitions information through different states in its lifecycle.
This information is useful for a variety of application usage data that may indicate the efficiency of application navigation to the operational efficiency of the user.
Understanding the Android Lifecycle Activity is helpful to know when the different events are generated and how they can provide useful information. For those interested in the technical details please visit Understand the Activity Lifecycle | Android Developers website.
Android Lifecycle Activity diagram

Figure 258: Android Lifecycle diagram[19]
Description: This event is generated
when the application activity enters the Started state.
When the activity becomes visible to
the user, as the GSW ConnectBot prepares for the activity to enter the
foreground and become interactive.
This state completes very quickly, and
transitions to the Resumed state; or the OnStop state if it becomes hidden.
Data: GSW ConnectBot Activity that started.
How to Enable:
Automatically enabled when GSW
ConnectBot Global settings Business Intelligence is set.
Action: When GSW ConnectBot application
activity is started.
Example: Events.txt Activity Started
3000|100001|2021-07-19T12:18:35-04:00|2021-07-19T12:18:35-04:00|32806dfa695f1d44|192.168.1.174|com.gsw.connectbot|28036|com.gsw.connectbot|||
In the first field of the events.txt file the message id of 3000, in the message field (in red) is the GSW ConnectBot Activity that Started.
Description: This event is generated
when the application activity enters the Resumed state.
When the activity comes to the
foreground and ready to start interacting with the user, the Resumed event is
generated.
The GSW ConnectBot will stay in this
state until something happens to take focus away from the app. Examples include
but not limited to the user navigating to another activity or the device screen
turns off.
Data: GSW
ConnectBot Activity that resumed.
Examples include items such as (but
not limited to):
· GSWHostListActivity
· DownloadConfigFromGSWServerActivity
· ConsoleActivity
· WebActivity
· UpdateFromGSWServerActivity
How to Enable:
Automatically enabled when GSW
ConnectBot Global settings Business Intelligence is set.
Action: When GSW ConnectBot has been
idle and user interacts you will receive activity resumed event.
Example – Events.txt - Activity Resumed
3002|100001|2021-07-19T12:28:56-04:00|2021-07-19T12:28:56-04:00|32806dfa695f1d44|192.168.1.174|com.gsw.connectbot|28036|ConsoleActivity|||
In the first field of the events.txt file the message id of 3002, in the message field (in red) is the GSW ConnectBot Activity that resumed.
Description: This event is generated
when the application activity enters the Destroyed state.
When the activity is closed by the
user, the Destroyed event is generated.
Data: GSW ConnectBot Activity that Destroyed.
How to Enable:
Automatically enabled when GSW
ConnectBot Global settings Business Intelligence is set.
Action: When GSW ConnectBot activity
is closed by the user.
Example – Events.txt - Activity Destroyed
3003|100002|2022-07-21T16:53:12-04:00|2022-07-21T16:53:12-04:00||||32806dfa695f1d44|192.168.1.217|com.gsw.connectbot|29103|LicenseFromGSWServerActivity|||
In the first field of the events.txt file the message id of 3003, in the message field (in red) is the GSW ConnectBot Activity that resumed.
Events generated by the GSW LADS have the Message ID codes:
|
Message ID Code |
Description |
|
100000 |
Message License Count info |
|
100001 |
Message license obtained |
|
100002 |
Message license released |
|
100100 |
Device Telemetry Data variables change |
|
100101 |
LADS instance ID (When GSW LADS Service is started or restarted) |
Table 26: GSW LADS Events/Message ID Codes
Description: This event provides updated license count information.
GSW LADS maintains GSW ConnectBot license count and reports license count information.
Data: License Count Information
How to Enable:
This event is generated by GSW LADS
and is always enabled.
Action: Will occur when a license is
retrieved or returned to GSW LADS via GSW ConnectBot or GSW License Manager
Tool.
Events.txt
100000|100001|2022-01-28T13:41:51Z|2022-01-28T13:41:51Z|0000000000000000|LISADESKTOP|com.gsw.lads|141003|7|10||
The example event above shows GSW LADS is licensed with 10 GSW ConnectBots (Green). And 7 GSW ConnectBot licenses are available (Red).
Description: This event shows when a license has been obtained from GSW LADS by GSW ConnectBot and provides android ID of device.
Data: Licenses obtained from GSW LADS and shows android ID of device that obtained license.
How to Enable:
This event is generated by GSW LADS
and is always enabled.
Action: Will occur when a license is obtained
from GSW LADS via GSW ConnectBot.
Events.txt
100001|100001|2022-01-31T15:10:58Z|2022-01-31T15:10:58Z|0000000000000000|LISADESKTOP|com.gsw.lads|141003|7|10|0bb5d1420f03d535|
The example event above shows GSW LADS has issued a license to device with android ID 0bb5d1420f03d535 (red).
Description: This event shows when a license has been returned to GSW LADS and released from GSW ConnectBot and provides android ID of device.
Data: License returned to GSW LADS and show android ID of device that returned license
How to Enable:
This event is generated by GSW LADS
and is always enabled.
Action: Will occur when a license is
returned to GSW LADS from GSW ConnectBot.
Events.txt
100002|100001|2022-01-24T15:47:06Z|2022-01-24T15:47:06Z|0000000000000000|LISADESKTOP|com.gsw.lads|141003|9|10|53306b4e381d2327|
The example event above shows GSW ConnectBot with android ID 53306b4e381d2327(red) has returned its license to GSW LADS
Description: When any Device Telemetry Data variables change, this event is generated.
Data: .xml file where telemetry data variable change occurred
How to Enable:
This event is generated by GSW LADS
and is always enabled.
Action: Will occur when any device
telemetry data is changed
Example: Device Telemetry Data variable change
Events.txt
100100|100001|2022-01-21T14:16:44Z|2022-01-21T14:16:44Z|0000000000000000|LISADESKTOP|com.gsw.lads|141003|829279e9f338d7c6.xml|||
The example event above shows GSW LADS reported .xml (red) file where telemetry data was changed.
Description: When GSW Licensing and Deployment Server is started.
Data: .xml file where telemetry data variable change occurred
How to Enable:
This event is generated by GSW LADS and is always enabled.
Action: When GSW Licensing and Deployment Server service is started.
Events.txt
100101|100001|2022-07-21T20:52:54Z|2022-07-21T20:52:54Z|0000000000000000|LADSSRV|com.gsw.lads|141011|16CA6696-188B-3D06-492D-7C2DE4B39ABB|||
The example event above shows GSW LADS reported that GSW LADS has been started.
GSW ConnectBot provides a very powerful way to collect and process event information. A PowerShell
To enable
the EventHandler method of processing events, simply place the PowerShell
script in the (GSW LADS installation folder)-> datastore.
It must
have the exact name: eventHandler.ps1
Similar to the Events.txt format, eventHandler.ps1 is passed the parameters below for each event.
|
param( |
|
Table 27: eventHandler.ps1 function parameters
Georgia SoftWorks ConnectBot supports discovery and printing with Zebra’s one-of-a-kind enterprise Link-OS printers. Setting up Zebra Link-OS printers is fast and easy.
The Zebra Link-OS printer must be discovered and selected for each Host connection.
To configure a Zebra Link-OS printer for Telent and SSH connections:
1. Tap on the 3-dot menu in the top right of the host list screen
2. Tap on “Link OS Printers” at the top of the menu. See Figure 259
3. Select the connection type supported by your printer to initiate discovery: BT (Bluetooth), BTLE (Bluetooth Low Energy), or TCP (Wi-Fi). This example uses BT (Blue Tooth) See Figure 260
After Discovery is
initiated[20], GSW ConnectBot will search for available
printers, tap on the discovered printer to select it. See Figure 261. If one is not found, then either the printer is not configured
for discovery(pairing) OR use the (+) icon in the bottom right to manually add
the printer. See section
4. Add Link-OS Printer
|
Figure 259: Select Link-OS Printers |
Figure 260: Select Printer Connection Technology. |
Figure 261: Printer found. Select Printer |
To use the discovered Zebra Link-OS printer set section “Use Link-OS Printer.” (Page 196 )
To add a Link-OS printer Select the (+) icon in the bottom right
|
|
Figure 262: Add a Blue Tooth Link-OS printer |
Figure 263: Add a Blue Tooth Low Energy (BTLE) Link-OS printer |
Figure 264: Add a TCP Link-OS Printer |
For Blue Tooth (BT) and Blue Tooth Low Energy (BTLE) enter a Nickname for the printer. Usually, it should be an easy name to identify the printer.
Enter the MAC address of the printer.
For TCP printer, enter a Nickname for the printer. Usually, it should be an easy name to identify the printer.
Also enter the TCP/IP of the printer.
1. Once a printer is connected(discovered), return to the host list screen.
2. At the host list menu, long press on the connection that requires Link-OS printing and tap “Edit Host”. See Figure 265
3. Scroll down and tap on “Use Passthrough Printer”
4. Select the desired printer from the displayed menu. See Figure 267
If the desired printer is not displayed – see section Discover Zebra Link-OS printer
|
Figure 265: Long Press Host to get to Edit settings |
Figure 266: Scroll down to "Use passthrough printer" |
Figure 267: Select Link-OS printer |
Cordova is an easy way to get Zebra Link-OS printing operational from a web application.
Visit the demo page (https://www.georgiasoftworks.info/cordova/demos/link-os.php) from GSW ConnectBot with Cordova Enabled in the host settings.
|
|
|
1. Select the connection type
2. Tap “Discover Printers”
3. Select the printer from the drop-down menu
4. Test print an image or ZPL
The JavaScript used to create the example is provided at the bottom of the demo page This code can be added into an existing web-application, or injected via GSW ConnectBot JavaScript Injection
GSW ConnectBot has the capability to recognize screens based on their unique screen content. This provides data that can be used for associating custom keyboards, optimized for particular screens[21]. Additionally, screen recognition can be used to gather information for use in our Business Intelligence (BI) feature (see page 164).
GSW ConnectBot uses an SQLite database that can be used to switch to a custom keyboard when a pattern of characters on the screen is recognized. Custom keyboards can present a specific keyboard that addresses the inputs of each individual screen.
The ability to present only the options that the user needs in a more user-friendly format increases usability and reduces input errors.
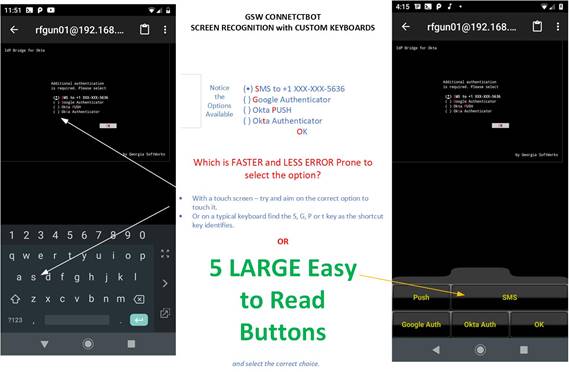
Figure 268: Screen Recognition/Custom Keyboards
Many ERP applications (warehouse, logistics, manufacturing, etc.), consist of a set of screens with strictly defined input of just a few options. GSW Screen Recognition has the ability to identify these screens. Custom Keyboards as well as Business Intelligence build on this capability.
A lightweight version of screen recognition is text recognition, which is used in GSW ConnectBot Auto Response fields as well. See page 48.
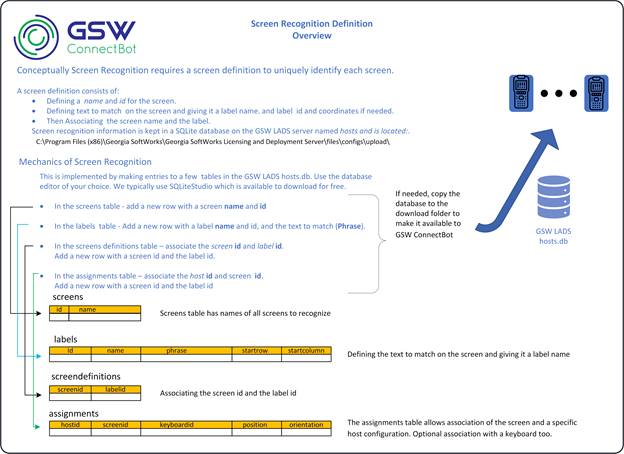
Figure 269: Screen Recognition Fundamentals
Soon the specification for the GSW LADS Database will be published. Until that time, please contact GSW Tech Support for assistance with screen recognition and keyboard association.
An incredible way to reduce errors and increase productivity is to have custom keyboards for the most common tasks. Custom keyboards can be designed with specific keys, rows, sizes, skins etc. All aspects of the keyboard can match the requirements of your environment. From hacker’s keyboards to keyboards specific to the manufacturing floor’s application, custom keyboards make input easier and increase accuracy.
For
example, if you often need just the number 0-9 Cancel and OK buttons, you can
have a custom keyboard built with just those keys. The keys can be larger than normal
accommodating large hands in difficult environments (like freezers) and making
it quicker to find the number you are looking for.
For
example, in the display below a numeric passcode is needed.
|
Figure 270: Numeric Only Keys -
Custom Keyboard |
Numeric Data entry is needed. |
|
Larger than normal Numeric keys and ONLY the
keys needed. 0-9, Cancel and OK. |
This is
another example where there are five choices in an option group selection.
Figure 271: Five Key Only -
Custom Keyboard |
The option from the option group to the left
can be selected much quicker by having only the keys necessary. |
|
Only 5 keys are needed to accommodate the
option group above. |
If you are
motivated regarding making your operations as efficient as possible, GSW can
help you create Keyboards that are optimized for the screen and automatically
associate it with the screen when displayed.
Please
contact GSW about creating custom keyboards for your environment. GSW and some
advanced resellers can create custom keyboards at an affordable fee basis, that
will allow your team to be more productive and make less errors.
Keyboards are a part of the configuration that GSW ConnectBot downloads from GSW LADS. In %gsw_lads_root%\files\configs\download , there is a keyboards directory in each of the configurations. By default, the keyboards directory contains GSW keyboards (*.xml files) in both portrait and landscape for qwerty, special keys and symbols. Each time GSW ConnectBot downloads a configuration from GSW LADS, keyboard xml files are transferred between GSW ConnectBot and GSW LADS.
The keyboards directory can also contain custom keyboards. Custom keyboards must follow the GSW Keyboard XML Properties specification, which closely follows the Android keyboard specification. Examples are the included default keyboards. Note: Do not modify the default keyboards! Make a copy of the existing keyboards, rename and edit. A custom keyboard should have both _portrait and _landscape versions. The file naming convention is: [description]_[landscape|portrait].xml . Example: qwerty_landscape.xml and qwerty_portrait.xml .
Georgia SoftWorks includes GSW Standard Keyboards that are preferred by many due to:
· Ease of viewing
· Handle to move keyboard
· Ability to anchor keyboard
· On/Off indicators
· Quick swapping keyboards and skins
· User controlled keyboard transparency
Below is some of the legend of special keys on the GSW Keyboards.
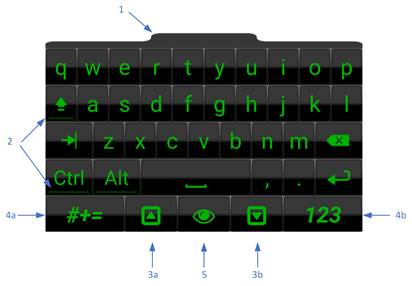
Figure 272: GSW Keyboard Special Key Definition
1. Keyboard handle. Press handle and move keyboard to desired location.
2. These are on/off indicators for sticky keys.
3. You can control the opacity/transparency of the keyboard. Often is it useful to be able to see the background of the screen through the keyboard as shown in Figure 275.
a. Keyboard opacity – up key (can also swipe up) – Increases GSW keyboard opacity. (Decreases keyboard transparency) Shown in Figure 273 and Figure 274.
b. Keyboard opacity – down key (can also swipe down) – Decreases GSW Keyboard opacity. (Increases keyboard transparency) Shown in Figure 274.
|
Figure 273: Opacity Control on default alpha keyboard |
Figure 274: Swipe up to increase opacity/Swipe down to decrease opacity |
Figure 275: Transparency increased to see background through keyboard |
4. a. Switches to the special character keyboard.
b. Switches to Special Key/Numeric keyboard.
Can also swipe on the keyboard to left and right to switch between keyboards.
5. Change the keyboards skin to the next one in the circular buffer of available skins
GSW ConnectBot comes with three default portrait keyboards and three landscape keyboards.
· QWERTY
· SYMBOLS
· SPECIAL KEYS / NUMERIC
They are shown below – first in portrait mode and following in landscape.
|
Keyboard |
Skin |
|
|
Figure 276: Qwerty keyboard – Black-Green skin |
Qwerty keyboard |
Black Green Skin |
|
Figure 277: Special Keys keyboard – Stone Skin |
Special Keys keyboard |
Stone Skin |
|
Figure 278: Numeric keyboard - Stone skin |
Numeric keyboard |
Stone Skin |
|
Figure 279: Telephone Keyboard – Black-Green (GSW
Browser Only) |
Telephone keyboard (GSW Web Browser Only) |
Black Green Skin |
The GSW ConnectBot Landscape Keyboards are placed to the right edge of the screen making it easier to see the rest of the screen.
Figure 280: Landscape Symbols/Numeric Keyboard Anchored to Right Edge
|
Landscape Keyboard Images |
Keyboard |
Skin |
||
|
Figure 281: Landscape – Alpha Numeric keyboard – Yellow – Black skin |
Alpha Numeric keyboard. Note: Name says Qwerty but is not a qwerty |
Yellow Black Skin |
||
|
Figure 282: Landscape Special Keys keyboard - Stone Skin |
Special Keys keyboard |
Stone Skin |
||
|
Figure 283: Landscape Numeric - Stone Skin |
Numeric keyboard |
Stone Skin |
||
Below is a variety of the GSW Keyboards and skins so you can get an idea of flexibility of keyboard looks available.
|
Keyboard Image |
Keyboard |
Skin |
|
Figure 284: QWERTY keyboard – Vista Sky Blue skin |
Qwerty keyboard |
Vista Sky Blue |
|
Figure 285: QWERTY keyboard – Black Green Skin |
Qwerty keyboard |
Vista Black Green |
|
|
|
|
|
Figure 286: QWERTY keyboard - Black White skin |
Qwerty keyboard |
Vista Black White |
|
Figure 287: QWERTY keyboard - Black
Yellow skin |
Qwerty keyboard |
Vista Black Yellow |
|
Figure 288: QWERTY keyboard – Vista Sangria skin |
Qwerty keyboard |
Vista Sangria |
|
Figure 289: Numeric keyboard – Stone White skin |
Numeric Keyboard |
Stone White |
|
Figure 290: QWERTY keyboard – Vista Amber skin |
Qwerty keyboard |
Vista Amber |
|
Figure 291: QWERTY keyboard – Vista
Green skin |
Qwerty keyboard |
Vista Green |
|
Figure 292: Numeric keyboard – Stone skin |
Numeric Keyboard |
Stone Skin |
|
Figure 293: QWERTY keyboard – Android Green skin |
Qwerty keyboard |
Android Green |
|
Figure 294: QWERTY keyboard – Plum Crazy skin |
Qwerty keyboard |
Plum Crazy |
|
Figure 295: Qwerty keyboard – White
Stone skin |
Qwerty keyboard |
White Stone |
When you have a question, please not
hesitate to contact GSW using the preferred support method – the GSW Support
Ticket system.
Georgia SoftWorks ticket system (http://www.georgiasoftworks.com/support_ost/index.php)
If you are unable to use our ticket
system, below is our telephone number.
Call +1 706.265.1018. EST, M-F 8:00
a.m. to 5:30 p.m. and have your Product ID ready.
[1] This is an implicit request either via registration or email.
[2] TIP – The suffix “c2g” stands for “Customer to Georgia SoftWorks”.
[3] TIP – The suffix “g2c” stands for “Georgia SoftWorks to Customer”
[4] The device must have internet access to update from external locations.
[5] Depending on Android version and particular device
[6] Android 11 and above will not report MAC address will show as 02-00-00-00-00-00
[7] Security Information setting only available in terminal emulation sessions, not available with web sessions
[8] The option “Default” is the default display format (Portrait / Landscape / Automatic) of the specific device.
[9] In step 4 of this example, we named the configuration “Truck Mount”, so select the folder.
[10] Config file shortcut was added with GSW LADS ver 1.40
[11] Preferred kiosk app can also be used to lock down GSW worker mode
[12] Variables are dependent upon device capabilities.
[13] Root refers to Media/Shared Storage Root
[14] This step is a safety measure to prevent accidental configuration placement of a configuration in the downloads folder.
[15] The configuration to enable / disable automatically sending the images to GSW LADS is described on page 57.
[16] Android 11+ does not allow reporting of MAC Address and will show as 02-00-00-00-00-00
[17] Comma Separated Values
[18] Latitude, Longitude, and Horizontal Accuracy will be empty if location services are disabled on device.
[19] This diagram is found on Android Developer webpage - Understand the Activity Lifecycle | Android Developers
[20] Discovery is very fast, a matter of seconds. If 15-20 seconds have elapsed, no printer was found.
[21] Current Screen Recognition events are only processed by Telnet/SSH.
[LT1]Updated